We’ve had customers who find that printing the exact right size print isn’t as simple as it seems. If you have ONYX as your RIP software, here’s how you can ensure you get the exact right width and length you want…

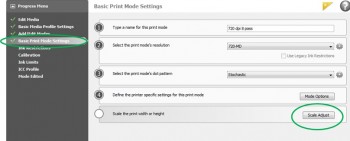
In ONYX, the Scale Adjust option is available in Media Manager when creating a new media profile or editing an existing one. This option is accessible during the Basic Mode Settings step.

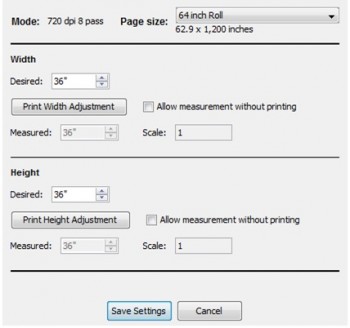
To scale the width of a print, set the desired width and click on the Print Width Adjustment button. This will send a scale target to the printer you can measure. Then, enter the actual width of the target in the Measured field. The scale will then be adjusted for you. You can repeat this procedure for the height option as well. This option is useful if all of your images are printing consistently at a certain scale off from the original size.

When you enter the measured value it should change the scale value listed from 1 to the new scale value. For example, entering 35.5″ for the measured value when the desired value is set to 36″ would change the scale value to 1.014.
Any new job you open and RIP will use the new value. The adjustment is made at the end of the RIPping process when the image is placed in the queue. For example, if you were to RIP an image that is 100″ in height, the image height would change to 101.4″ when placed in the queue.
Adjusting the scale value of a media’s print mode will not affect jobs RIPped before the adjustment was made. You will need to open and process a new file for the scale adjust setting to apply.
We hope that helps, and if you have any questions or need help with anything, give us a call at 800-453-9538.


