Let’s Go: HP Latex Print and Cut Academy with Timothy Mitchell

Join Timothy Mitchell, HP solutions architect and latex specialist, for an in-depth discussion on the benefits of the HP Latex Print and Cut Solution. Learn about latex applications and how to get the most out of your printer, cutter, and FlexiPRINT RIP.

Don’t miss this live session on Wed., May 20 at 2 p.m. ET.

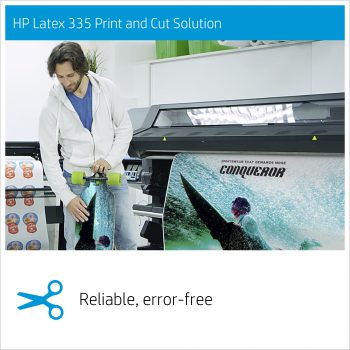
Whether creating decals or using the variable data function, discover new ways the Latex 335, Latex 315, or Latex 115 print and cut solutions can increase profitability.

Register today, space is limited. All attendees will receive an LOI for up to $3,000 savings on the purchase of an HP Latex printer or Print and Cut Solution.

Expand Your Printer Knowledge with March Webinars

We’ve got some exciting news about the HP Latex Webinar. Starting this month, when you tune into the HP webinar, Timothy Mitchell – HP’s Latex Applications Architect – will be discussing the benefits of latex printing. You may recognize Mitchell from several YouTube videos, where he discusses media, applications, and latex tips and tricks.

If you are interested in a Canon PRO-Series Printer, Pete Wright will take you through the features and applications of the PRO-Series family. Don’t forget, Canon is currently offering 0% financing on the purchase of a new printer.

Don’t wait to register for these free classes, space is limited.

Canon

  • What? Learn about the next generation Canon PRO-Series printers, software, and new contoured-cut bundles.
  • Who? Pete Wright, Canon’s technical specialist and award-winning photographer, discusses the benefits of the recently updated PRO Series printers.
  • When? Monday, Mar. 23, at 11 a.m. ET
  • Why? Attendees will receive an additional 5% off their PRO-Series printer purchase. SIGN UP NOW

HP

  • What? Join us for the free HP Latex printer technology webinar
  • Who? Timothy Mitchell, HP’s Latex Applications Architect, will discuss the applications and benefits of HP Latex technology.
  • When? Tuesday, Mar. 24, at 2 p.m. ET
  • Why? Attend and you will save $1,000 on an HP Latex 315 Print & Cut Bundle or HP Latex 335 Print & Cut Bundle, or save $3,000 on an HP Latex 560 or HP Latex 570. SIGN UP NOW

Sign up online or call one of our printer specialists at 800-453-9538 for additional information.

Best Practices for Printing an Overlaminate with Timothy Mitchell

HP Latex application specialist Timothy Mitchell explores uses and best practices for the versatile HP Gloss Polymeric Overlaminate. This product not only works as a typical overlaminate used to protect prints, it can also be printed and used as a clear media that works with the HP Latex Print & Cut Solution.

Mitchell suggests using the product for a project like a decorative border around the edges of a window. The clear media works well on windows and can be custom cut using the Print & Cut system.

For optimal results, Mitchell suggests raising the ink load to 200%. “If you were to build this at 110%, and you were to put it in a store window with strong lighting coming through it, it’s going to look washed out … because you have what is a translucent material in a window, and that light cuts the color back,” he says. “If you were to switch that same print to 200% and you put it in there, the colors are going to pop.”

He suggests building the ink signature the same way as a backlit. In the video above, he walks through the steps to do that, and shows how the printer color calibrates and then can create a customized or standard ICC profile, based on the type of Latex machine.

Mitchell also discusses other advantages of the product and how to get the best results. Watch the video above for all of his insider tips and tricks.

Four-Part Series: HP Latex Printer Accessories

Part Four – Caring for Your Latex Spindles

In the final edition of our latex tips and tricks series, HP Latex Specialist Timothy Mitchell offers some suggestions for spindle care as well as helpful hints for endcap placement that can resolve some common problems like paper recognition or “roll walking.”

Whether you have the 3-inch aluminum spindle for the Latex 365 or the smaller, adjustable core spindle for the Latex 115/315/335 family, Mitchell doesn’t recommend leaning the spindles against the printer when they are not in use. “It’s easy for the bottom to slip and it hits the ground and gets damaged,” he says. “Take care of them, I use beanbags on top of the printer to rest the spindles.”

Taking care of the endcaps and core adapters is also essential. There are locking mechanisms in place to keep the roll steady during printing that can loosen over time due to improper use. The tension is lost, rolls can slip or “walk.” If you have ever received a notification that the media was rejected or not recognized by the printer, it could be that the endcap is loose and the paper is not properly aligned in the printer.

“If you are doing long runs, using the take-up roll, the endcap needs to be secure and flush against the core,” Mitchell says. “If it gets loose, the media could slide with it. Making sure it’s stable is key.”

Mitchell also has some suggestions for the spindle with the adjustable core. “If you are completely committed to printing on 3-inch core product, you can permanently attach the core adapter with heavy-duty glue,” he says. You will want to ensure the glue doesn’t affect the latch if you choose to create a permanent 3-inch core.

Watch the video above to see Mitchell explain the best ways to keep your spindle and endcaps in working order, leading to a smooth latex workflow.

YOU MAY ALSO BE INTERESTED IN:

Four-Part Series: HP Latex Printer Accessories

Part Three – Custom Butterfly Edge Guards for HP Latex Printers

HP Latex Specialist Timothy Mitchell works with many different brands and types of media, providing him the unique opportunity to help printer operators find answers to some recurring issues – head strike or media curling, to name a few – that may occur.

Mitchell noticed that when he printed on high-intensity prismatic or reflective media and other heavy-duty products that retain curl, the edge guards weren’t properly holding the print in place as it was feeding through, causing it to raise up and contact with the carriage. When that happens, the image can be damaged, which means the graphic must be reprinted.

Reprints are a waste of media, ink and time. Mitchell found that creating a double – or butterfly – edge guard means the media stays closer to the platen, reducing the chance that the print will come in contact with the carriage.

“The reflective films tend to be expensive and when they go through the printer, I don’t want to waste anything,” he says. “They tend to curl a little. I need a little more strength to hold them down after they go through the original edge guards.”

In the video above, Mitchell explains how easy it is to make these guards: “You need to order an additional set, take them apart and put them back together.”

If you have any questions or would like to order an additional set of edge guards, please contact your LexJet printer specialist at 800-453-9538.

Four-Part Series: HP Latex Printer Accessories

Part Two – Using the Counterweights and Take-up Reel on Your HP Latex Printer

Printing panels for trade shows can keep a latex printer and a production manager busy, but there is one tip from HP Latex Specialist Timothy Mitchell that can help lighten the load a little: use the counterweights.

“There are a couple of key pieces to successfully panel printing with the 300 series latex printer,” Mitchell says of the counterweights. If you’ve never used them, they could still be on the dancer bar for the newer 300 series printers. For the older models (310, 330, 360), you may need to contact HP Support to order a set.

When panel printing, it is more efficient and accurate to reduce the tension on the media. The dancer bar adds tension and adjusting the counterweights on either end of the bar allows you to increase or decrease the tension, depending on the media thickness and material.

Another important tool to use properly is the take-up reel. Many people may not know that there is an option to wind the graphics inside or outside.

“If you go inside, there is a little less tension than if you go outside. I usually judge it by the media,” Mitchell says.

Much like adjusting the counterweights, winding media inside or outside depends on the media.

Watch the video above to see Mitchell discuss his tips and tricks for the counterweights and take-up reel. If you have an older 300 series printer, you can contact HP Latex Support.

If you have questions or are interested in learning more about printing with latex, contact a LexJet printer specialist at 800-453-9538 or visit LexJet.com.