It’s a common problem with files that come in from artists, photographers and agencies: Untagged images without an assigned color space. Printing untagged images will almost always produce an unusable print, wasting time, ink and material.
So, how do you find out which color space in which the file was originally captured? The first step, and the most reliable and obvious way to find out, is to go to the source of the image – the person who sent it – and find out the color space in which it was captured. Barring that, it’s actually pretty simple and this front-end step will eliminate the aforementioned printing headaches…
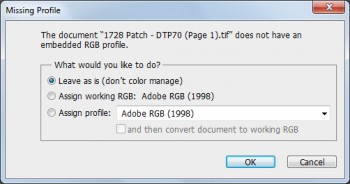
If a file comes in that is untagged when you initially bring it into Photoshop, you should receive a message from Photoshop that asks you what to do with the color space of the image. You should have a choice between Leave as is (don’t color manage), Assign working RGB and Assign profile:
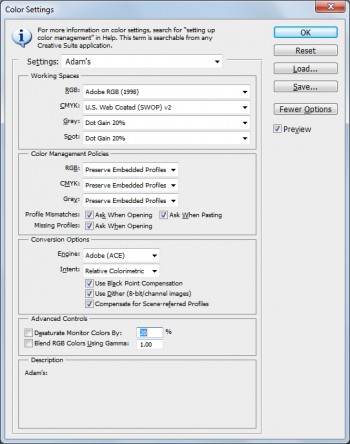
If this prompt does not show up when you originally open the untagged image you will have to edit your color settings/preferences by going to Edit > Color Settings.
You will want to check all of the boxes below your color management policies, labeled Ask When Opening. The screen should look like this:
Then, in Photoshop you will locate Assign Profile; in CS5 it’s under Edit > Assign Profile. When the Assign Profile window comes up you can choose between a number of different color spaces.
Given a properly profiled monitor, the profile to choose is the one that looks most accurate to you. Select that one and hit OK to assign the profile tag to the image, and there you have it.
If you have any difficulties with this, or you’re having a hard time finding where to go in your version of Photoshop, feel free to give us a call at 800-453-9538.
