Printing Industry Declares War on Germs

We all want to feel safe, right? That is especially true in 2020 as COVID-19 continues to be a huge presence around the world. You’ve, no doubt, seen the images of the grocery store, showing aisles of paper towels, toilet paper, and hand sanitizer completely sold out. Protecting yourself and customers from potentially harmful, and even deadly, viruses, diseases and bacteria has become more important than ever. Well, out of necessity comes innovation. Several companies in the print and packaging industry are capitalizing and unveiling antimicrobial products.

We’re talking about antimicrobial paper, antimicrobial wipes, antimicrobial ink, and even antimicrobial varnish.  It’s not exactly a new concept. You can find references online to antimicrobial products dating back as far as 2007. But, with health experts announcing new safety measures almost daily, our personal care has never been more important, and the demand has never been higher. Remember when it was considered “state of the art” that an Apple iPod could hold 50 songs? That’s almost laughable now. And I’m not talking about some of the songs you might have downloaded back then.

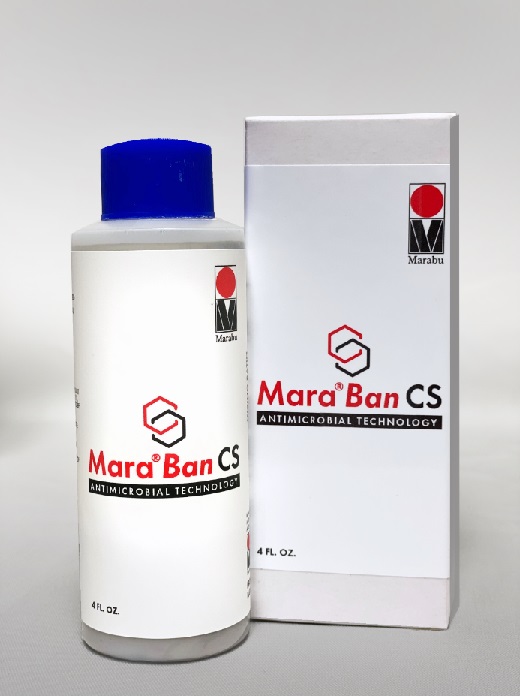
Quite simply, the technology is light years more advanced. That’s why companies within the print and packaging business keep trying to build a better mousetrap. Marabu is the latest company to develop an antimicrobial product. It’s an additive that’s put in its Clearshield Coating, designed to protect you from bacteria, viruses, and other disgusting microorganisms.  We’ve got more details about Mara Ban HERE.

There’s even more antimicrobial products in development across the industry and you’ll see some of them very soon. It will, no doubt, add tons of money to bottom lines everywhere. But will also do something even better; give customers the peace of mind that industry leaders care about their health and safety.

Marabu Mara®Ban CS Anti-Microbial Additive Now Available from LexJet

Marabu Mara®Ban CS Anti-Microbial Additive

Laminates have long protected graphics from the elements, but now there’s an urgent need for anti-microbial protection, as well. To help combat the growth of microbes on coated surfaces, Marabu created Marabu Mara®Ban CS Anti-Microbial Additive, formulated to be used in conjunction with ClearShield Liquid Coatings.

It’s a simple two-part additive system that works with all ClearShield formulas and provides ongoing anti-microbial protection. This new additive is perfect for signage, wall coverings, and protective shields found in healthcare facilities, schools, restaurants, etc.

While Mara Ban CS helps safeguard against microbes, Marabu’s ClearShield line has been protecting wide-format graphics against UV-rays for years, as well as offering chemical and abrasion resistance.

Suggested applications include:

  • Banners
  • Wallcoverings
  • Floor graphics
  • Banner stands
  • Decals

Watch the video above to learn how to properly mix Mara®Ban CS Anti-Microbial Additive and your ClearShield liquid of choice.

If you are looking for this or other products to help create social distancing graphics and to meet health and safety guidelines, please give us a call at 800-453-9538 or visit the LexJet Resource page.

Year in Review: The 11 Biggest Product Launches of 2017

As we look back on the year that 2017 was, there’s no denying that our customers are branching out into new areas and looking to offer their customers better performing, more cost-effective wide-format solutions. At LexJet, we strive to stay in-step with those demands. Our 2017 product launches brought to market everything from new outdoor banner materials and high-end fine-art paper options to all new technology portfolios and exciting, versatile media for multiple applications. Let’s take a look back at the changes 2017 brought in media products and equipment advances:

NEW MEDIA:

A Glossy, Opaque Banner: Many of our aqueous printer customers were requesting a glossy version of our ThriftyBanner, so we answered with LexJet Gloss Blockout ThriftyBanner. Not only does the gloss finish add extra pop to graphics and photos, it also eliminates the need to add a gloss laminate when requested, making it a one-step, cost-effective option. The 100% opaque blockout adds another unique feature for one of our most popular launches of 2017.

ClearShield SoftFeel Low Melt laminate applied to a menu.

Print Protection Portfolio: If you’re looking for any type of print protection, LexJet is the go-to source. We relaunched some products and added many new items to our Print Protection portfolio, which includes thermal laminates, water-based liquid coatings, UV liquid coatings and pressure sensitive laminates. This line includes nearly 70 options from the best brands in the industry: Marabu, ClearShield, Sunset, EnduraCoat, MaraShield and LexJet. If you need to protect a print in any application, our Print Protection page is the place to start.

How to Make Canvas Printing Work for You, Part 4: Coating Canvas

Dan Johnson Spray Booth
Dan Johnson’s DIY spray booth for canvas and fine-art prints.

As noted in the previous installments about printer selection for canvas printing, it’s recommended that you coat all aqueous-inkjet canvas output. Coating also helps ensure a crack-free, consistent stretch for gallery wrap applications, and it’s important to coat before stretching.

If it’s a short-term application – like a temporary decorative piece – or when using a solvent or latex printer, coating is not necessary unless the customer wants the look of a coated canvas.

Typically, coatings come in either gloss or satin (luster) finishes. Gloss coatings are often used to not only provide additional protection, but to bring out the density of blacks and the vibrancy of the colors in the print.

For a more subdued look and particularly to cut down the glare from high-powered lighting, a satin or luster coating may be preferred. Some will choose not to coat the canvas at all to retain the unique texture and characteristics of the material.

Coatings are available in both spray (aerosol or industrial sprayer) and liquid (can). Sprays from Hahnemuhle and Clearstar Corp., for instance, provide excellent results, though there are other brands available from other companies that specialize in fine-art and photo printing.

Stick with sprays and coatings that are specially formulated for this application, rather than those that are not tested specifically for inkjet prints (Krylon, for example), because the long-term effects of these off-the-shelf sprays on inkjet paper surfaces are unknown.

There are also liquid coating machines available in various widths from companies like Neschen and Marabu. While these machines automate the process and provide an excellent finished product, they require a controlled environment with consistent temperature and humidity, free from dust and dirt.

Coating Canvas
Click on the image to see a video on roller-coating canvas.

Liquid coatings that come in a can, such as Sunset Gloss and Sunset Satin Coatings, can be either rolled on or sprayed using an HVLP (high volume, low pressure) spray gun, which requires a well-ventilated dust-free area.

An HVLP spray gun wastes less coating in overspray than other types of sprayers. It also provides more control over the application process. Some print shops and studios simply don’t have space for spraying, or can’t justify buying specialized coating systems, which is why Sunset Coatings have been formulated to work equally well when applied with a spray gun, brush, or foam roller.

If you’re looking for way to spray on a budget and in limited space, click here to see how Dan Johnson built a space- and money-saving spray booth for his studio.

When rolling coatings on canvas, follow these basic steps:

1. Start with a high-density, white foam roller and a tray that is typically used for holding paints. You can buy these products in the paint department of any home-improvement store. The high-density foam will help reduce bubbles. Use a larger-width roller if you plan to coat larger canvases.

2. Pour the coating into the tray and dip the roller in the coating until it is thoroughly wet, but not too wet.

3. Lay your print on a clean, dust-free board that is bigger than your print. The extra space on the surface around the print can be used to roll off excess liquid if you happen to oversaturate the roller.

4. Consider using two or three thinner coats, instead of one thicker coat.

5. Don’t try to coat the whole print at once. Start with one or two passes at the edge of the print, and go over each pass enough times for the bubbles to dissipate, but not so many times that the coating becomes tacky or bumpy.

6. If large bubbles appear, try blowing on the coating.

7. Make overlapping passes so you can maintain a wet edge and avoid lines and streaks.

8. Find the rolling pattern that works best for you. Some users prefer rolling in one direction only. They go up the print in one pass, and down the print in the second pass (like mowing a lawn).

9. Don’t press down on the roller. Maintain a light, even pressure.

10. If you are applying a second coat, allow the first coat to dry before applying the second coat. A thin coat should take between 10 and 30 minutes to dry. But it will take longer if you’re working in an environment with high humidity.

11. Allow the coated print to dry thoroughly before you pack it for shipping. Don’t try to speed up the drying process with a fan; allow the print to dry on its own.

12. Clean the rollers immediately after each use. Run cool water of the rollers immediately after use, and squeeze them until they run clear. Allow 10 to 15 minutes.  If you keep the rollers clean, you can use them for about six months before you need to replace them.

A couple of important notes about coating canvas:

  • Make sure the ink is dry before applying any coatings. A good rule of thumb is 24 hours. To test whether a print is ready for coating, some printmakers suggest this technique: Lay each print on a flat surface, then cover the print with inexpensive butcher paper. The evaporating glycols will cause ripples to appear in the butcher paper. Periodically replace the wavy butcher paper with a fresh sheet of paper. If no waves appear in the fresh sheet of paper after a few hours, the print will be dry enough to coat.
  • Coat the print before stretching the canvas and wait at least six hours after applying the coating to stretch.
  • As more inks and media types are introduced, it is impossible to predict the compatibility of every combination of media, ink and clear coat. Therefore, it is strongly recommend that you test before use. A test will immediately show any incompatibilities, including water sensitivity, inkjet receptive layer mud cracks, and ink bleeds. Generally, let the tested material dry for at least 24 hours. Evaluate the adhesion, flexibility, and visual appearance. Be realistic in your expectations and simulate the conditions the material will be exposed to. Generally speaking, coatings formulated for wide format printing will work well with both aqueous and solvent prints.

Click here for a video demonstration of coating canvas with a roller.

For the rest of this series, click on the following links:

Part 1: Materials, Finishes and Textures

Part 2: Printer Technologies for Canvas

Part 3: Latex, Solvent and UV-Curable Printing

Part 5: Canvas Wrap Options