How to Create Tiles for Wall Murals in Photoshop

With the popularity of customized wall murals reaching an all-time high, setting up your print files properly is more important than ever. If you don’t have RIP software specific for creating tiles for large wall murals, not to worry! You can easily create your print files using Photoshop, as shown in the video above.

In this video, you’ll learn how to:

  • Crop a full size image to match the size of the wall
    • Tips for image resolution and cropping
  • Make tiles for printing using the Fixed Size Selection Tool in Photoshop
    • Easy copy-and-paste method to create tiles ready for your media width
  • Create panels to print with a half-inch overlap
    • Now you’re ready for printing!

Once you print your panels, you’re ready to install. Watch this Video: 3 Steps to Installing Large Tiled Wall Graphics to learn some vital tips to make the job a cinch.

Suggested self-adhesive products for easy install, positioning and removal of wall murals:

Windows, Walls and Doors Contest: And the First-Place Winner is…

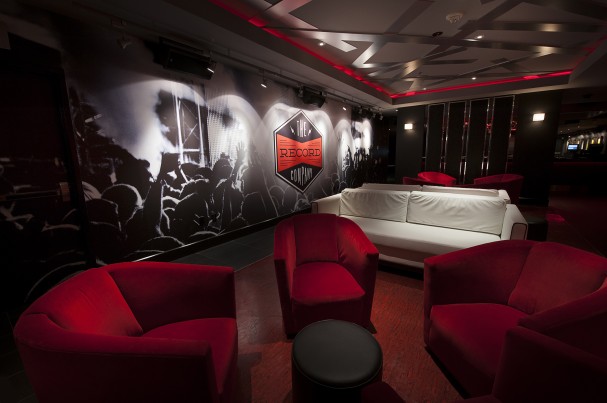
Casino Wall Mural by Illustrative Ink

Illustrative Ink took the top prize in LexJet’s Windows, Walls and Doors contest with this super-large wall mural for Hard Rock Casino in Biloxi, Miss.

The husband-and-wife team of Charles and Diana Punzo, aka Illustrative Ink, have an eye for décor and creating the perfect impression. In this case, it was time to update one of the casino’s nightclubs with appropriate graphics.

Illustrative Ink printed this wall mural on LexJet Simple WallCal (6 Mil) in nine panels with the HP Latex 260 Printer. Each panel was 54″ x 8′, except the ninth panel, which was printed at a narrower width for a total of 8′ x 38′ across the wall.

The panels were installed vertically top to bottom, overlapped and precisely seamed. Illustrative Ink used the tiling function in the ONYX RIP software to delineate the seams for a smooth and seamless application.

“It went up without a problem. We had three installers and were able to apply it in about two hours. The material is easy to position without having to stretch the image,” says Charles Punzo. “We installed it late this summer. It’s still up and everyone loves it.”

Congratulations again to Illustrative Ink for winning the top two spots in the Windows, Walls and Doors Contest. In case you haven’t seen the second- and third-place winners, here they are…

Second Place: Nursey Décor

Third Place: Beach Scenes in Colorado