How to Make Canvas Printing Work for You, Part 5: Canvas Wrap Options

Finishing and Stretching Canvas

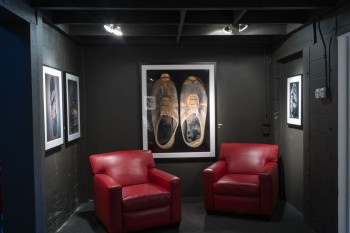
Before we get into the physical stretching and wrapping of canvas, this seems a good spot to discuss ways in which you can prepare the file before printing so that it’s ready to be rendered as a gallery or museum wrap. A gallery wrap, by the way, is where the image continues to bleed onto and over the edges. A museum wrap substitutes a solid border along the edges.

The trick is getting this right before you print. Fortunately, there are quite a few options…

Photoshop actions: Typically, the Clone tool is the primary tool used to create a mirrored border. You can do this manually in Photoshop and then record your actions.

Canon Layout Plug-In: If you have a Canon iPF inkjet printer, the Layout Plug-in software features a tool that automates the process.

OnOne Software, Perfect Resize 8: Formerly known as Genuine Fractals, with Perfect Resize you can create selective, mirror, museum-wrap and other types of wrap borders.

Qimage Ultimate: This imaging software tool offers a number of ways to work with print borders. Click here to see how it’s done.

Alien Skin Software: Alien Skin’s Blow Up software comes with a free Photoshop Gallery Wrap Panel to make a solid border, reflected edges or reflected edges with a fade.

Stretching Inkjet Canvas
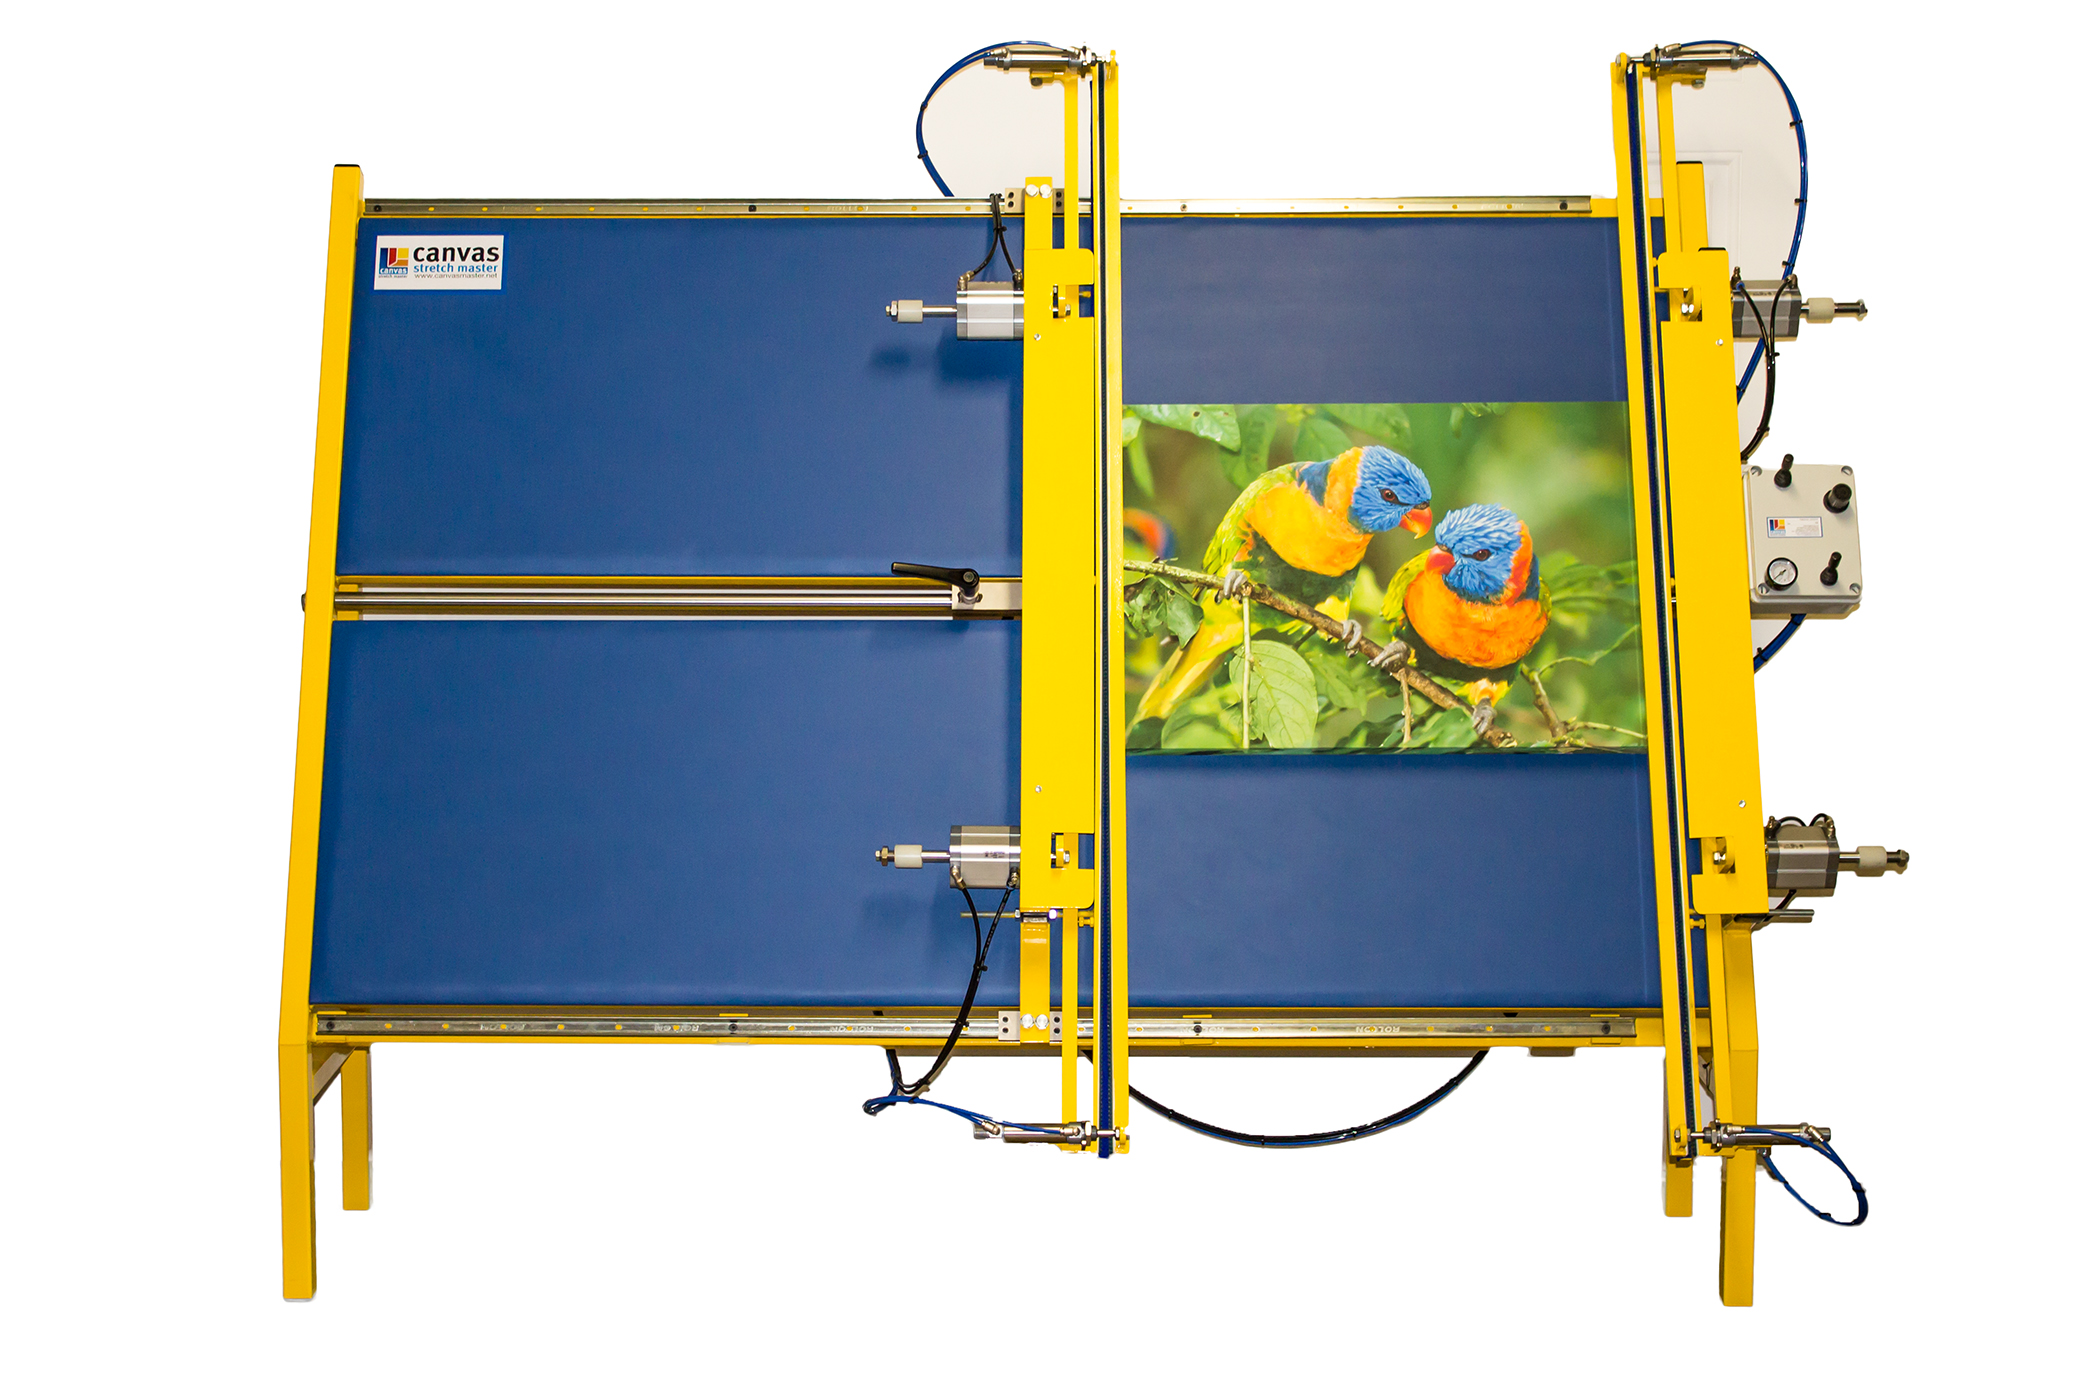
Typically, there are three ways a canvas print can be stretched: by hand, with stretcher bars and strainers; using canvas stretching machines that provide a range of automation, like the Tensador II and the more automated Canvas Master machines by GAPP Engineering; or using a do-it-yourself stretcher bar system.

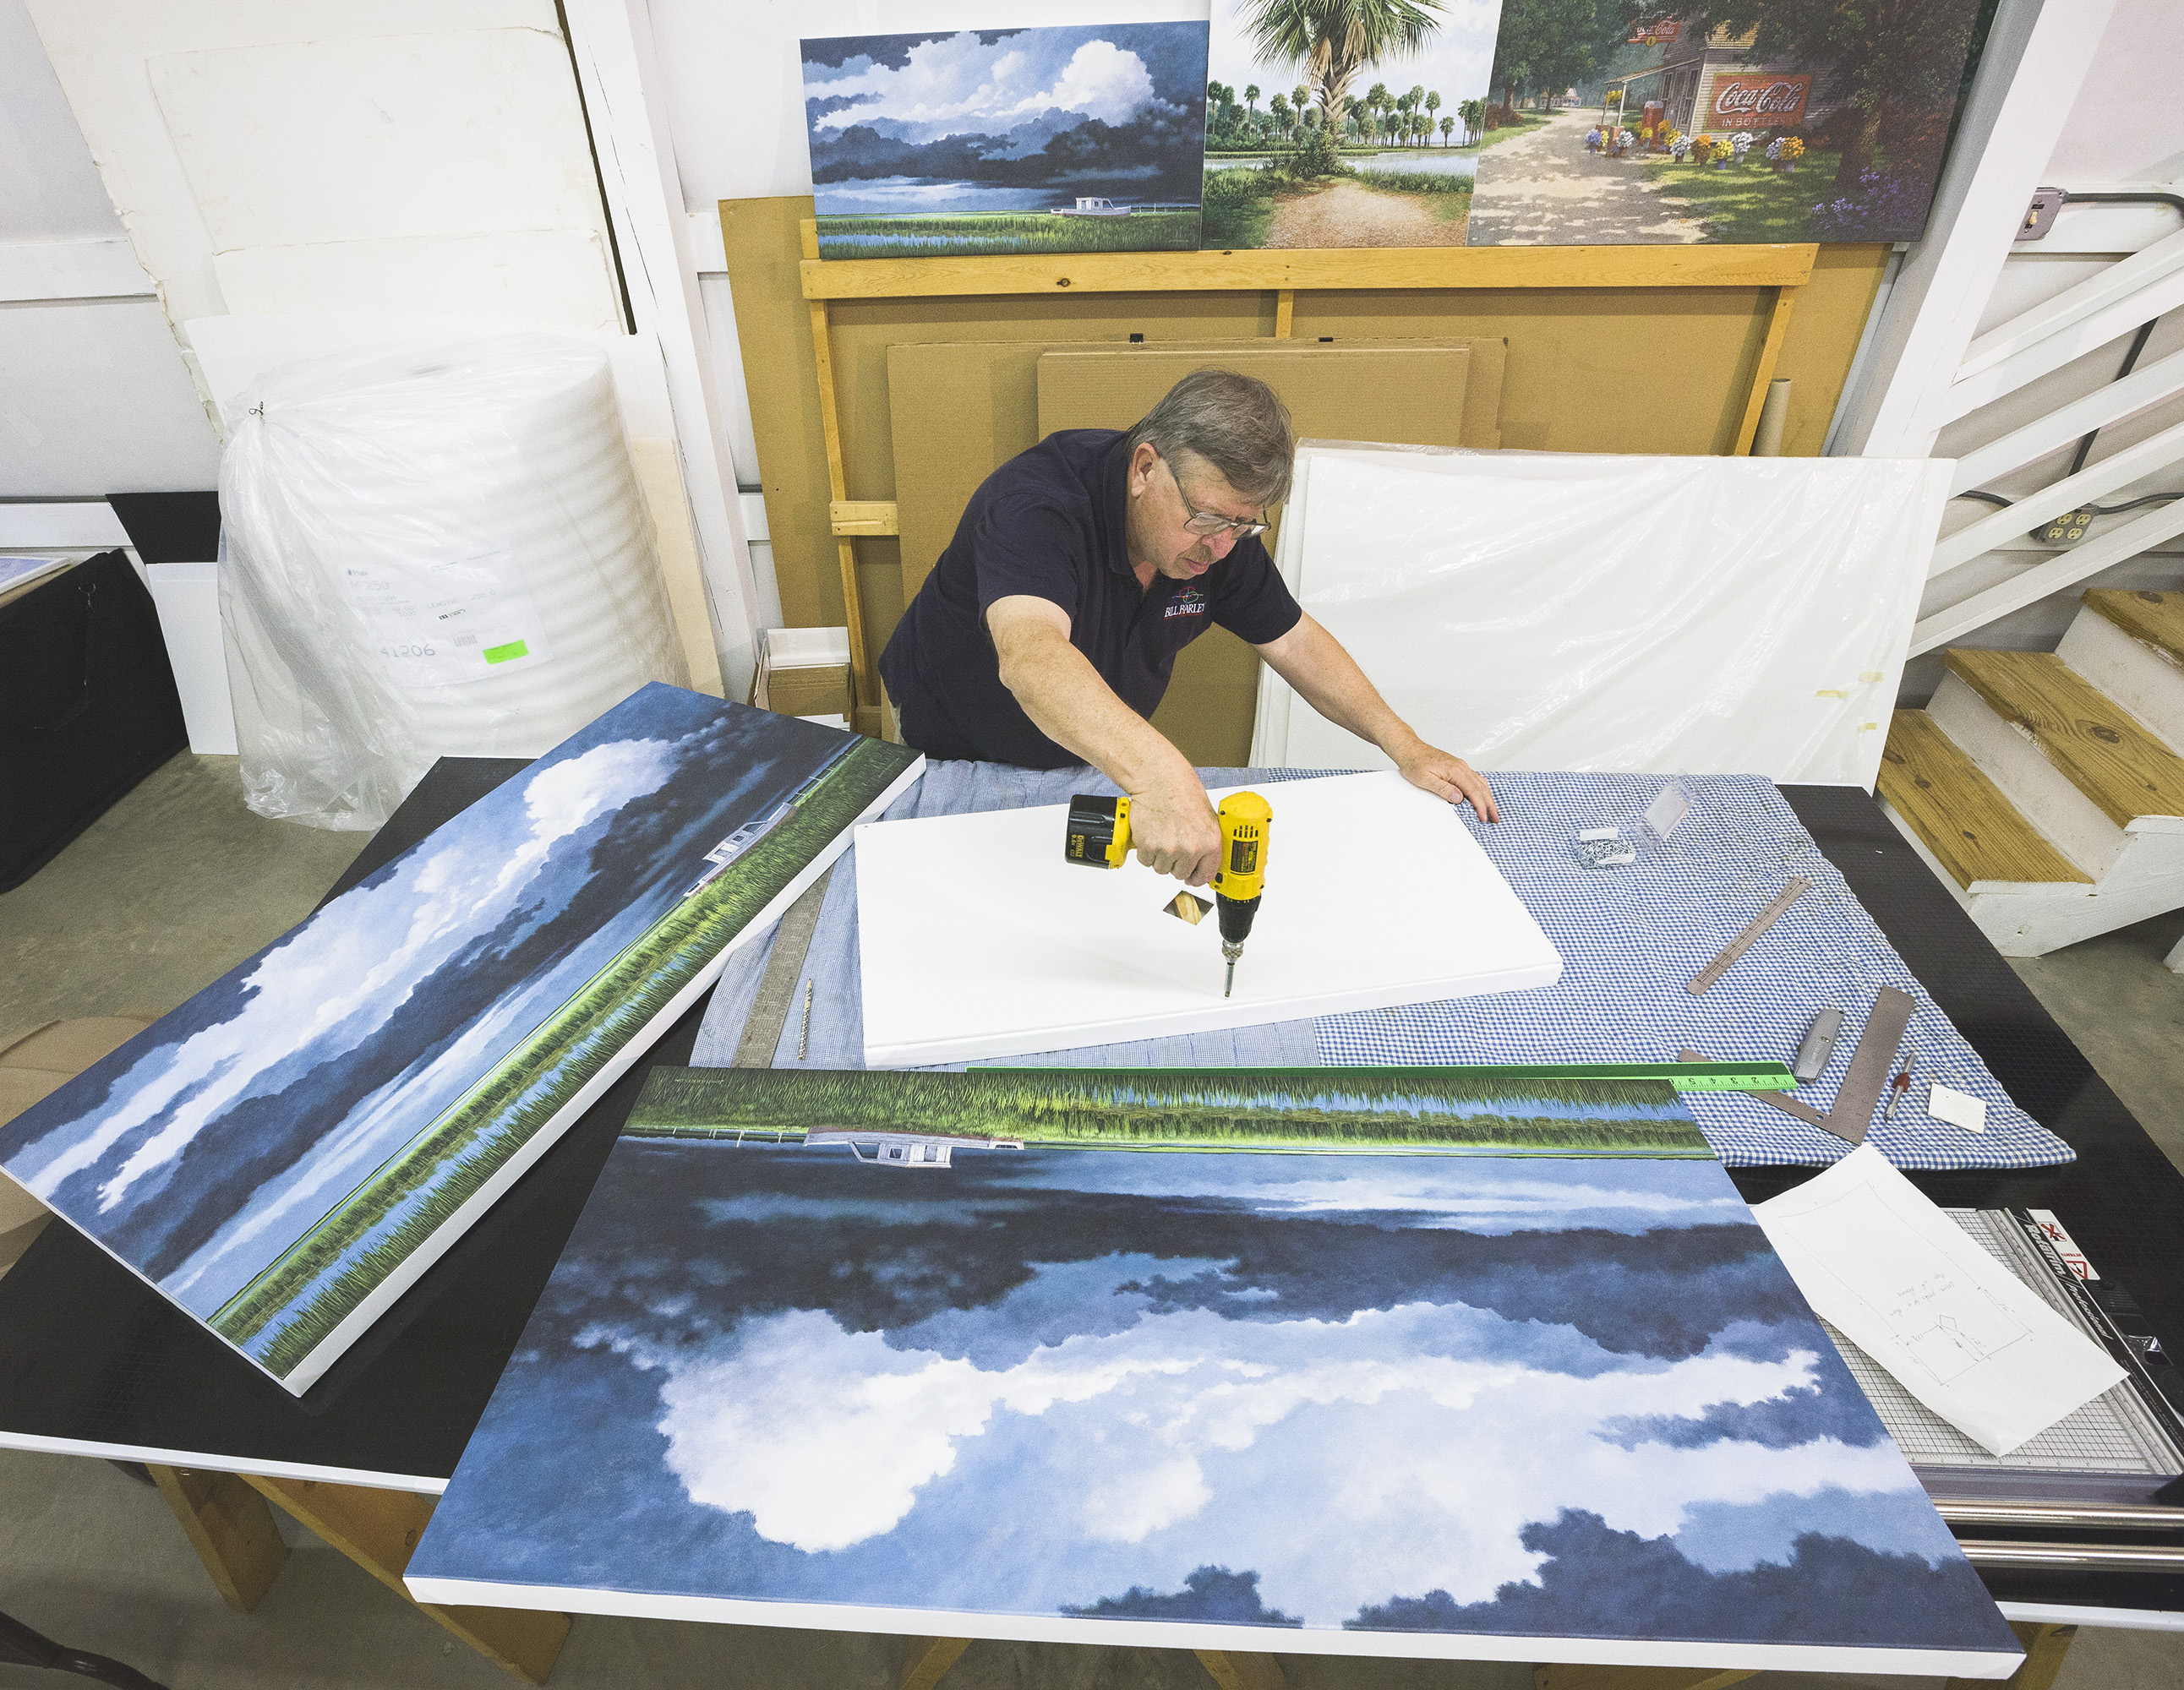
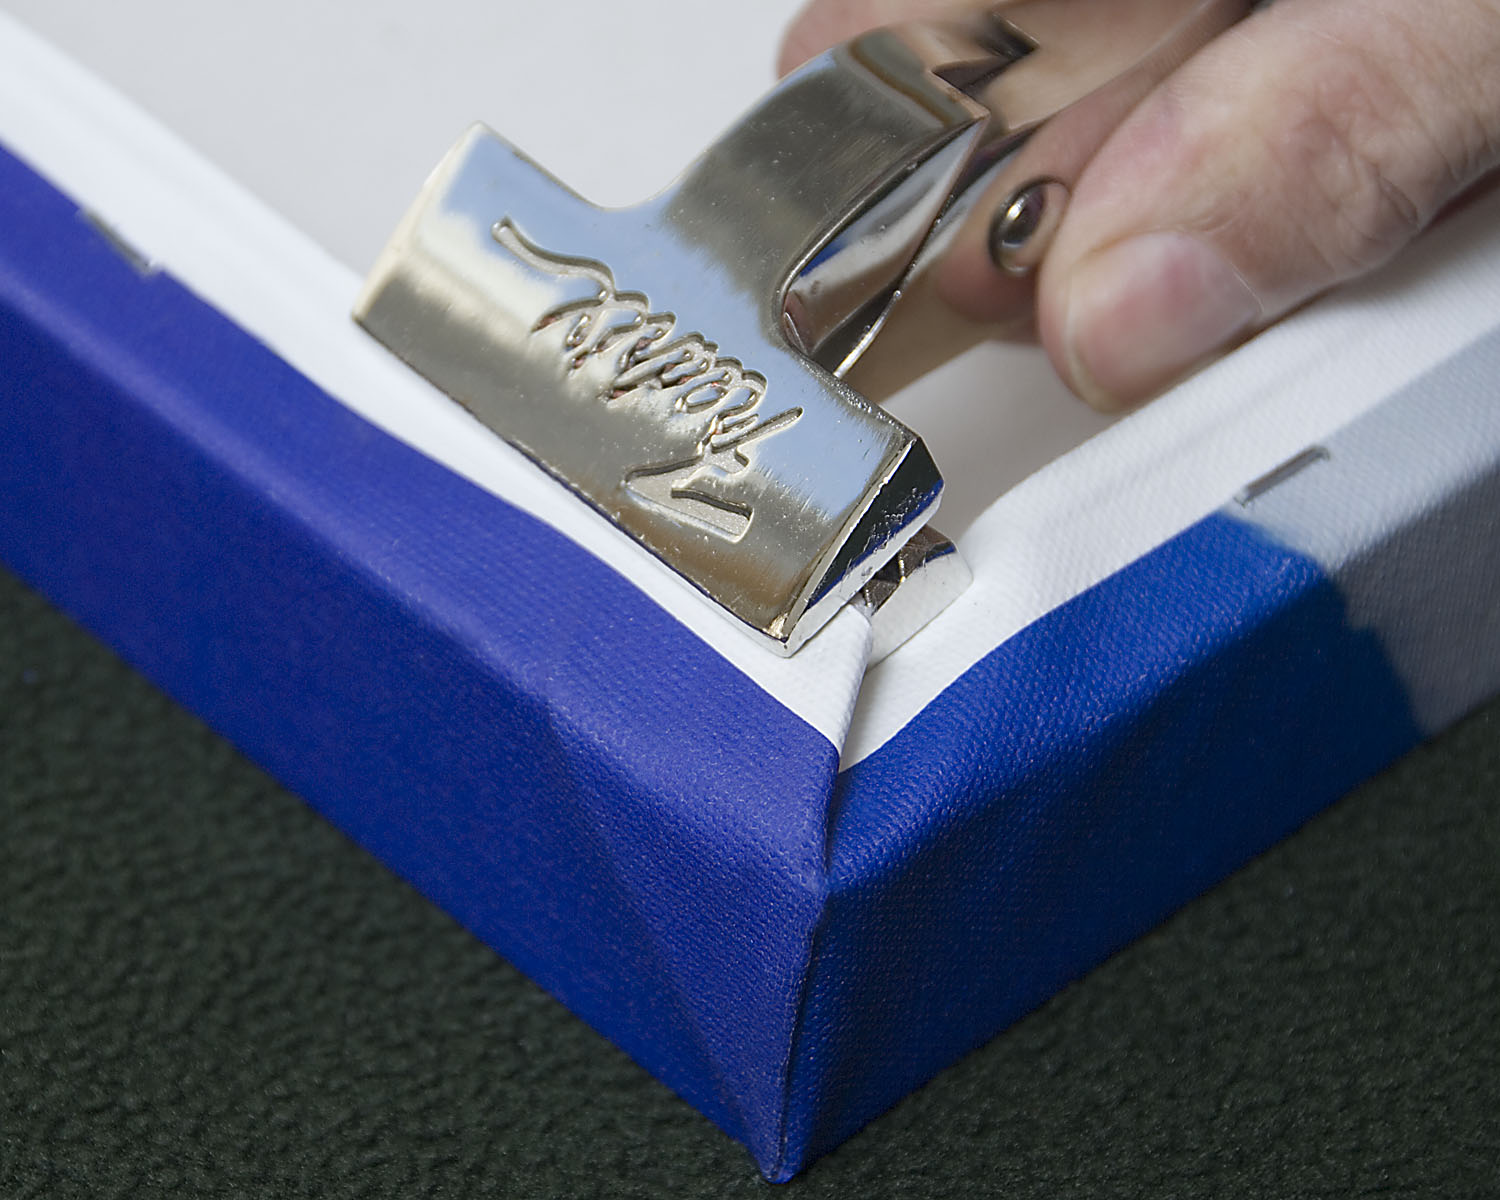
Stretching canvas by hand can be very involved and time-consuming, but the raw materials needed are less expensive. For detailed step-by-step instructions by master printer, photographer and craftsman Ralph Cooksey-Talbot on creating your own stretcher bars and canvas frames, including the tools and materials necessary, click here.

While much more efficient for production, acquiring equipment like the Tensador II or the Canvas Master requires an initial investment ranging from about $3,000 to $11,000. If your volume supports the equipment purchase, definitely investigate these machines.

Armando Garcia, director of operations for Soicher Marin, a high-volume fine art reproduction company is Sarasota, Fla., says, “We use the Tensador for just about everything up to 60 inches. When you compare it to doing it by hand, the machine always wins out. I can’t think of a situation where we wouldn’t use the machine, unless it was an original canvas.”

The Canvas Stretch Master from LexJet automates and speeds up the canvas wrap process for production printing and finishing.

Garcia adds that it usually takes one of their operators about a day and half to learn how to use the machine to its full potential and cuts the time needed to do a canvas wrap by anywhere from 30-50 percent.

The Canvas Stretch Master is more automated, thus it’s more expensive. However, it also produces about twice as many canvas wraps per hour than the Tensador II and the Canvas Studio Master, about 60 per hour on the high side, with less labor. To find out more about the setup and operation of the Studio Canvas Master and the Canvas Stretch Master, click to the videos below:

Studio Canvas Master Setup

Studio Canvas Master Demonstration

Canvas Stretch Master Setup

Canvas Stretch Master Demonstration

Corner Fold Options

Sunset Stretcher Bars for Canvas
DIY stretcher kits like Sunset Stretcher Bars are a quick and simple solution for canvas finishing.

The third option is the use of a pre-made DIY stretcher bar kit, which include kits by Hahnemuhle and LexJet Sunset. This is a happy medium between stretching by hand and automating the process. Tara Materials also offers easy-to-assemble tongue-and-groove stretcher bars so you don’t have to buy the raw materials and cut them down to size.

While overall material costs are a little more than if you made the frames by hand, each canvas wrap will be faster than doing it by hand, but will obviously take longer than using a machine. For videos of the process, click here.

And, for more videos about printing, coating and stretching canvas, click here.

For the rest of this series, click on the following links:

Part 1: Materials, Finishes and Textures

Part 2: Printer Technologies for Canvas

Part 3: Latex, Solvent and UV-Curable Printing

Part 4: Coating Canvas

How to Make Canvas Printing Work for You, Part 4: Coating Canvas

Dan Johnson Spray Booth
Dan Johnson’s DIY spray booth for canvas and fine-art prints.

As noted in the previous installments about printer selection for canvas printing, it’s recommended that you coat all aqueous-inkjet canvas output. Coating also helps ensure a crack-free, consistent stretch for gallery wrap applications, and it’s important to coat before stretching.

If it’s a short-term application – like a temporary decorative piece – or when using a solvent or latex printer, coating is not necessary unless the customer wants the look of a coated canvas.

Typically, coatings come in either gloss or satin (luster) finishes. Gloss coatings are often used to not only provide additional protection, but to bring out the density of blacks and the vibrancy of the colors in the print.

For a more subdued look and particularly to cut down the glare from high-powered lighting, a satin or luster coating may be preferred. Some will choose not to coat the canvas at all to retain the unique texture and characteristics of the material.

Coatings are available in both spray (aerosol or industrial sprayer) and liquid (can). Sprays from Hahnemuhle and Clearstar Corp., for instance, provide excellent results, though there are other brands available from other companies that specialize in fine-art and photo printing.

Stick with sprays and coatings that are specially formulated for this application, rather than those that are not tested specifically for inkjet prints (Krylon, for example), because the long-term effects of these off-the-shelf sprays on inkjet paper surfaces are unknown.

There are also liquid coating machines available in various widths from companies like Neschen and Marabu. While these machines automate the process and provide an excellent finished product, they require a controlled environment with consistent temperature and humidity, free from dust and dirt.

Coating Canvas
Click on the image to see a video on roller-coating canvas.

Liquid coatings that come in a can, such as Sunset Gloss and Sunset Satin Coatings, can be either rolled on or sprayed using an HVLP (high volume, low pressure) spray gun, which requires a well-ventilated dust-free area.

An HVLP spray gun wastes less coating in overspray than other types of sprayers. It also provides more control over the application process. Some print shops and studios simply don’t have space for spraying, or can’t justify buying specialized coating systems, which is why Sunset Coatings have been formulated to work equally well when applied with a spray gun, brush, or foam roller.

If you’re looking for way to spray on a budget and in limited space, click here to see how Dan Johnson built a space- and money-saving spray booth for his studio.

When rolling coatings on canvas, follow these basic steps:

1. Start with a high-density, white foam roller and a tray that is typically used for holding paints. You can buy these products in the paint department of any home-improvement store. The high-density foam will help reduce bubbles. Use a larger-width roller if you plan to coat larger canvases.

2. Pour the coating into the tray and dip the roller in the coating until it is thoroughly wet, but not too wet.

3. Lay your print on a clean, dust-free board that is bigger than your print. The extra space on the surface around the print can be used to roll off excess liquid if you happen to oversaturate the roller.

4. Consider using two or three thinner coats, instead of one thicker coat.

5. Don’t try to coat the whole print at once. Start with one or two passes at the edge of the print, and go over each pass enough times for the bubbles to dissipate, but not so many times that the coating becomes tacky or bumpy.

6. If large bubbles appear, try blowing on the coating.

7. Make overlapping passes so you can maintain a wet edge and avoid lines and streaks.

8. Find the rolling pattern that works best for you. Some users prefer rolling in one direction only. They go up the print in one pass, and down the print in the second pass (like mowing a lawn).

9. Don’t press down on the roller. Maintain a light, even pressure.

10. If you are applying a second coat, allow the first coat to dry before applying the second coat. A thin coat should take between 10 and 30 minutes to dry. But it will take longer if you’re working in an environment with high humidity.

11. Allow the coated print to dry thoroughly before you pack it for shipping. Don’t try to speed up the drying process with a fan; allow the print to dry on its own.

12. Clean the rollers immediately after each use. Run cool water of the rollers immediately after use, and squeeze them until they run clear. Allow 10 to 15 minutes.  If you keep the rollers clean, you can use them for about six months before you need to replace them.

A couple of important notes about coating canvas:

  • Make sure the ink is dry before applying any coatings. A good rule of thumb is 24 hours. To test whether a print is ready for coating, some printmakers suggest this technique: Lay each print on a flat surface, then cover the print with inexpensive butcher paper. The evaporating glycols will cause ripples to appear in the butcher paper. Periodically replace the wavy butcher paper with a fresh sheet of paper. If no waves appear in the fresh sheet of paper after a few hours, the print will be dry enough to coat.
  • Coat the print before stretching the canvas and wait at least six hours after applying the coating to stretch.
  • As more inks and media types are introduced, it is impossible to predict the compatibility of every combination of media, ink and clear coat. Therefore, it is strongly recommend that you test before use. A test will immediately show any incompatibilities, including water sensitivity, inkjet receptive layer mud cracks, and ink bleeds. Generally, let the tested material dry for at least 24 hours. Evaluate the adhesion, flexibility, and visual appearance. Be realistic in your expectations and simulate the conditions the material will be exposed to. Generally speaking, coatings formulated for wide format printing will work well with both aqueous and solvent prints.

Click here for a video demonstration of coating canvas with a roller.

For the rest of this series, click on the following links:

Part 1: Materials, Finishes and Textures

Part 2: Printer Technologies for Canvas

Part 3: Latex, Solvent and UV-Curable Printing

Part 5: Canvas Wrap Options

Transforming Trash into Art to Help Reduce Trash

No Es Basura Exhibition

For three months in the spring of 2012, from March 7 to June 6, Peter Gwillim Kreitler collected trash from 1,250 linear feet of Santa Monica Beach, California. This trash collection turned into a photography collection called No Es Basura, This is not Trash, now on display at the Bergamot Station Arts Center in Santa Monica.

No Es Basura ExhibitionIn the introduction to the collection, Kreitler explains: “Sixteen months later, John Reiff Williams, the gentleman who photographed our wedding in 1985, embraced the challenge and brought what was discarded, forgotten, or simply mundane into an object of art. The transformation is evident. And now our venture is intended to delight, inspire and motivate all of us to embrace our commitment to cleaner oceans and beaches.”

No Es Basura ExhibitionWilliams was an excellent choice, as his photography often blurs the lines, literally and figuratively, between the abstract and reality, perhaps best illustrated by his three signature photographic series – the La Jolla Beach Project, The Edge of Collapse Series from Mexico City and the Hollywood Boulevard Series – covered here at the LexJet Blog.

“Peter was going to do the project himself, and kept calling more for advice because he couldn’t get the results he wanted. He asked me to photograph the Arrowhead plastic water bottle, which was the first one in the series, and after that he said, ‘You have to photograph this whole show.’ He’s an old friend, so I couldn’t say no,” recalls Williams. “He had boxes and boxes of stuff, and finally brought the boxes over. After three or four boxes of that you scratch your head to remember what was in the first box, so I put the items in clear plastic. Even if I knew it was going to be a show I wasn’t thinking about continuity, but just the integrity of each object. These objects sat out for two or three days sometimes as I thought about them.”

Peter Gwillim KreitlerAs an example, the photo shown here of Kreitler standing next to the print of tangled fishing lures, hooks and bobbers at the exhibition was a matter of perspective. Williams imagined he was underwater, he was a fish, and this was his next meal.

“I tried to be honest with the photography, and asked myself: ‘Have I seen anything like this before,’ and, ‘Can I take this image any further?’ If you can’t amaze yourself, then you can’t amaze anyone else,” says Williams.

Williams estimates he took 5,000 photos of the debris and detritus that Kreitler collected at Santa Monica Beach and printed about 125 for the exhibition. Williams printed all the test prints, but was limited in scale by the size of his Epson 3880 inkjet printer. So, he called on master printer Roger Wong to print the gallery pieces, ranging from 16″ x 20″ to 40″ x 60″, on Hahnemuhle FineArt Baryta 325 g.

John Reiff Williams
The photographer, John Reiff Williams.

“Our profiles, printers, monitors and color-management systems were all matched, so Roger was basically able to print blind with just a few adjustments,” explains Williams. “Up until this point I had been printing on Hahnemuhle photo rag, so this was a big switch for me to go to a gloss paper, and the prints look great.”

To see the photographic collection, click here.

New Interactive Catalog and Your Chance for a $500 LexJet Gift Card

Digital Product Reference Guide

Go to www.lexjet.com/catalog for the latest LexJet Product Reference Guide, and click the Facebook Like or Share icons by Friday, May 2 for a chance to win a $500 LexJet Gift Card*.

LexJet’s new digital catalog is an excellent clickable source for everything you need for printing, with details on hundreds of products, including fine art materials, photo papers, fabrics, canvas, films, vinyl, banner materials, adhesive-backed materials, wallcoverings, specialty media, laminates, adhesives, printers, inks and more.

The new digital catalog provides interactive tools to make navigation and product sourcing simple:

  • When you go to www.lexjet.com/catalog, click on the catalog and it will open in your browser, starting at the cover page
  • Simply click on the right arrow to browse page by page, or use the tool at the bottom of the page (up arrow) for a thumbnail view
  • You can also click directly to the product page you’re interest in on the Table of Contents page, which you can access from anywhere within the catalog by clicking on the bullet-point icon located at the top of the page on the far right
  • The home icon at the top of the page on the far left takes you back to the cover

The comprehensive guide includes specifications, application ideas and pricing on the following:

  • LexJet, LexJet Sunset, Hahnemuhle and EPSON aqueous media
  • Sunset Stretcher Bars, Sunset Pro Photo Albums and Sunset and ClearStar coatings
  • Fredrix Print Canvas
  • LexJet, General Formulations and HP solvent, latex and UV-curable media
  • Specialty films and fabrics
  • LexJet laminates, adhesives and backers
  • Canon, EPSON and HP inks
  • Canon, EPSON and HP printers

If you have questions or need help with anything, contact a LexJet customer specialist at 800-453-9538.

*$500 Gift Card for products purchased through LexJet.

Prints that Win: All Systems Go!

All Systems Go by Kelly Schulze

If you’re familiar with DockDogs, you might be a dog lover, and particularly a lover of dog-oriented sporting events. DockDogs is a canine aquatics competition with a number of events including Big Air, Speed Retrieve, Extreme Vertical and Iron Dog.

This Sunset Print Award-winning image by Kelly Schulze, CPP, owner of Mountain Dog Photography in Monkton, Vt., exemplifies the essence of DockDogs. The subject, Madison, is retired from DockDogs, but still enjoys a leap off the docks into cold Vermont waters. Madison was adopted from a local animal shelter before her DockDogs career.

“The client knew she wanted a photo of the dog jumping off the dock because the dog used to compete in DockDogs. She also wanted the fall foliage in the background, so I scouted a few locations to find the best spot where the light would hit just right,” explains Schulze. “We did that shot at sunrise at a local pond. I knew as soon as the sun hit the dog and the leaves in the background that it would be bright and colorful. I was wading up to my hips in water to get just the right angle and to get closer. We did about 20 minutes of shooting so I knew I could get it just right with a good pose with the dog’s paws in the air.”

Schulze asked the client to throw a tennis ball straight off the dock to ensure the dog would be in the range Schulze set for sharp focus. Schulze measured the width of dock and found the f-stop that would encompass that range and set the shutter speed as fast as possible to catch not only the dog in mid-air, but the water droplets that flew off the dog as it jumped.

“In post processing I didn’t do a whole lot. I removed some interfering branches that were coming out of the dog’s head that I couldn’t account for when I was shooting. I darkened some of the trees because they’re bright white birches in that light, and I flipped the image horizontally. The dog was jumping to the right of the frame because that’s where the color and the light was. If I had gone the other way I would have been shooting against blue sky and wouldn’t have the same impact,” Schulze says.

Schulze knew she had a great image for competition and printed it on Hahnemuhle FineArt Baryta with her Epson Stylus Pro 3880. The image wowed the judges at the recent Vermont Professional Photographers Convention in late March with its combination of stop action and Vermont fall colors.

As the name of her studio implies, Mountain Dog Photography specializes in animal photography all over New England, including pets, show dogs, livestock and wildlife. “Sometimes the owners jump into the shot, but I photograph all different species and it’s pretty exciting.”

Prints that Win: Curves of Iris

Award Winning Print by The Portrait StudioMichael and Tina Timmons, owners of The Portrait Gallery, Vassar, Mich., have been featured here before for Prints that Win, but for their printing expertise. Sterling photographers in their own right, they also know how to print for competition, and print winners.

This time around, Tina is being honored for her capture of an Iris from her garden called Curves of Iris. Michael had quadruple bypass surgery (!) last year following a heart attack. We’re pleased to report that he’s recovering nicely, and the Timmons are back to their frenetic pace.

“Needless to say, we were home a lot more than we normally are, so I had more chances to enjoy my flowers. This year I didn’t get to see them at all,” says Tina. “I shot every day through the Iris season, and picked my favorite to enter in competition.”

The result was this beautiful rendition, which won a LexJet Sunset Award at the Professional Photographers of Michigan print competition. Tina says that her typical method for capturing flowers is to use a tripod and a macro lens, followed by some enhancement with Nik filters and some additional cleanup in Photoshop.

“Sometimes we’ll add a reflector fill outdoors, or we’ll do subtractive lighting if the flower is in open sun. We’ll use those tactics to control what lighting is available in nature,” Tina explains. “The Iris has a poetic motion about it with the leaves and the way everything blends together. When I work with any flower I’m very cautious about what’s in the background so there’s nothing distracting, including other flowers.”

The standard print medium for competition and the couple’s interior décor work is LexJet Sunset Photo eSatin, printed on an Epson Stylus Pro 9880 wide-format inkjet printer, which is then laminated. Though Curves of Iris was printed in the usual way, it was printed for this competition on a Hahnemuhle watercolor paper to provide a more fine-art look to the image.