One of the most common problems experienced in the fine art reproduction market is making the original artist happy with the reproductions you are able to create. Artists expend a lot of time, effort and talent creating an original piece of art, so it may be difficult to get them to accept a reproduction that doesn’t match their original exactly.
There are two things that you can do to make the artist more excepting and grateful of your version of their work: Set their expectations and use materials with a large color gamut.
Setting Expectations
Setting expectations is the most important thing that you can do for an artist. By properly setting expectations, they are more likely to accept a print that is not an exact match of their original. More importantly, you will prevent them from taking their business elsewhere.
Many times an artist will create his or her original piece using a large amount of different colors. Since your printer only has 7-11 colors (depending on the make and model), you will not be able to re-create their print exactly.
A good idea is to buy a 16-color and 64-color box of crayons and show them to the customer. Explain that they created the art with the 64-color box, but you only have the 16-color box available to re-create it. That usually hits home.
Now your customer should easily understand that your printer does not have an unlimited color gamut. The next step is to reassure them that no such printer exists. If you have a wide format inkjet printer from Canon, Epson or HP that has been manufactured in the last two or three years, then you can tell your customer with confidence that there are no other printers out there that can do a better job than the one your currently own. This will keep your customer from looking to your competition.
In order for you to be able to make this promise, however, you must update your printer if the newer technology offers a significant increase in color gamut.
Selecting Material with a Large Color Gamut

The paradox of fine art printing is this… Materials with matte finishes are usually preferred when doing fine art reproductions. Most of the time an artist will specify a matte canvas or matte water color paper. Due to the coatings of these materials and the physics of light, they traditionally have a smaller color gamut than all other papers. Therefore, you have artists who demand the largest color gamut possible requesting their work be reproduced on materials with the smallest color gamut.
The easiest way to increase the output color gamut is to change the material you are using to print. Luster and gloss materials have a larger color gamut because those surfaces are usually smoother than matte finish surfaces. This smoothness allows more light to bounce off of the print and directly back into the viewer’s eyes, creating richer colors, including blacks.
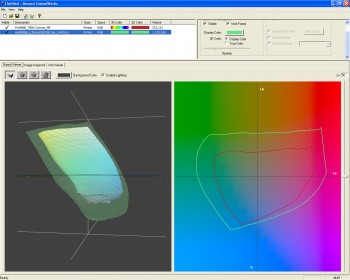
If your customer wants a print on canvas, then print it on a gloss canvas instead of a matte canvas. Your color gamut increases significantly with this simple switch (see Figure 1). If your customer absolutely has to have a matte finish canvas, then you can use a matte coating on the canvas, like those from ClearStar Corporation.

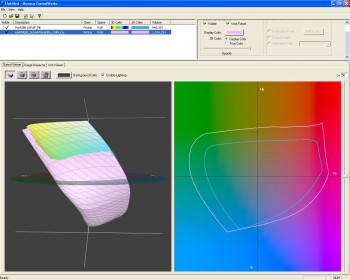
If your customer wants a print on fine art paper, then print it on the award-winning Sunset Fibre Papers, which come in various finishes: Sunset Fibre Satin, Sunset Fibre Gloss, Sunset Fibre Gloss Natural and Sunset Fibre Elite. They offer an elegant, high-end finish that emulates the fibre prints of the traditional darkroom. Compared to a watercolor paper, their color gamut is significantly larger (see Figure 2). There’s also Sunset Fibre Matte if your customer insists on using a matte fibre paper, but they’ll need to keep in mind that its color gamut is less than that of the other Sunset Fibre papers. Again, it’s about setting exectations.
With a larger color gamut, your printer or RIP’s color engine will have to re-map fewer colors. That means more of the artist’s original colors will be hit by the printer. Your customer may not like the finish of the gloss canvas or fibre papers unprinted; it’s quite subjective. However, they will most likely appreciate the fact that these materials produce a copy closer to their original art.
To be sure, print their image on matte and gloss canvas, Sunset Fibre Elite and fine art paper and let them make the decision. I am sure they will pick the paper with the larger color gamut almost every time.
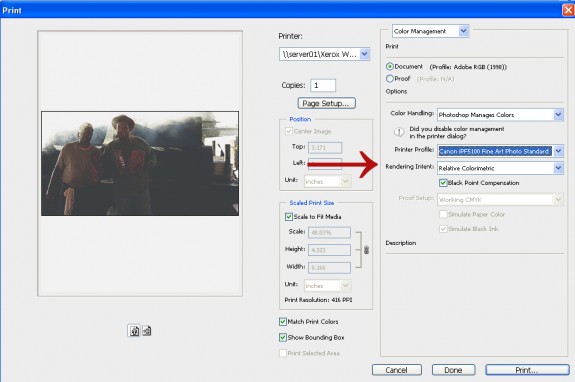
Also, try the relative colorimetric rendering intent when reproducing fine art, as it shifts fewer colors in the process. For more information about rendering intents and their effect on the final print, click here.
Special thanks to Tom Hauenstein for the expertise contained in this article.


