Canvas Printing without the Canvas

Sunset Photo Canvas Paper
Fine-art painting by Virginia Phillips (virginiaphillips.com) reproduced by Sharpeye Framing Company on Sunset Photo Canvas Paper 230g.

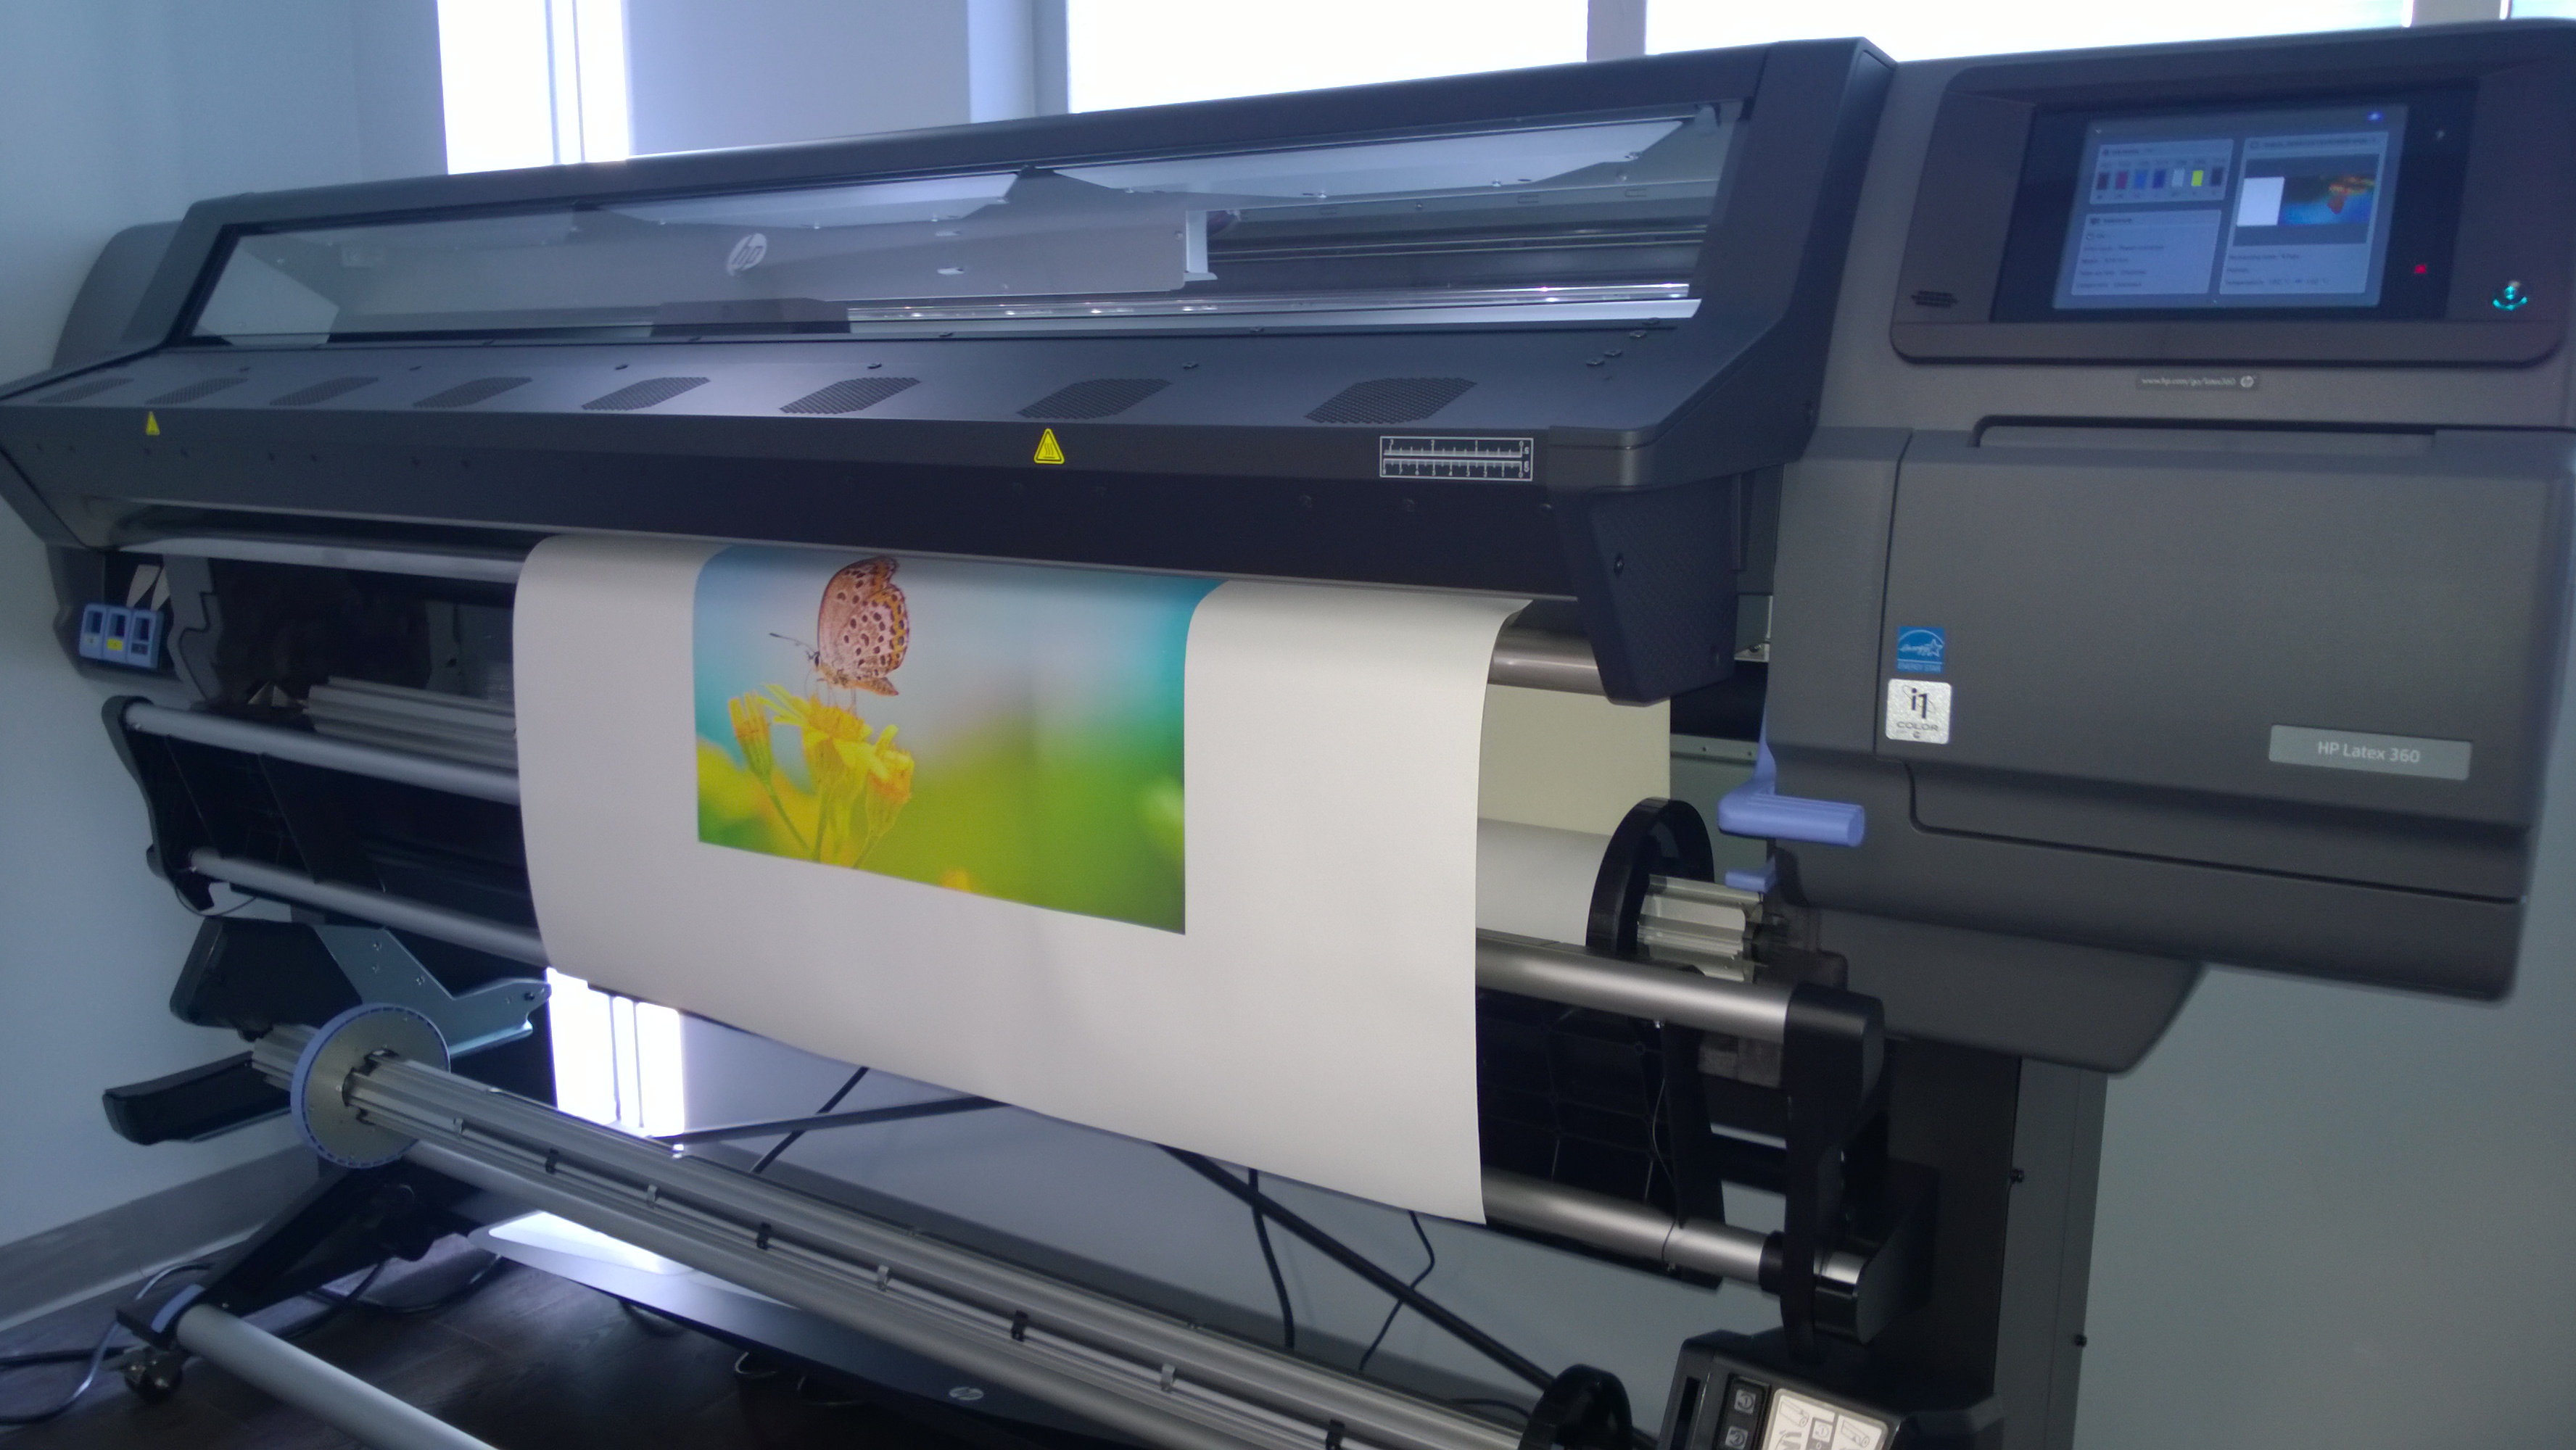
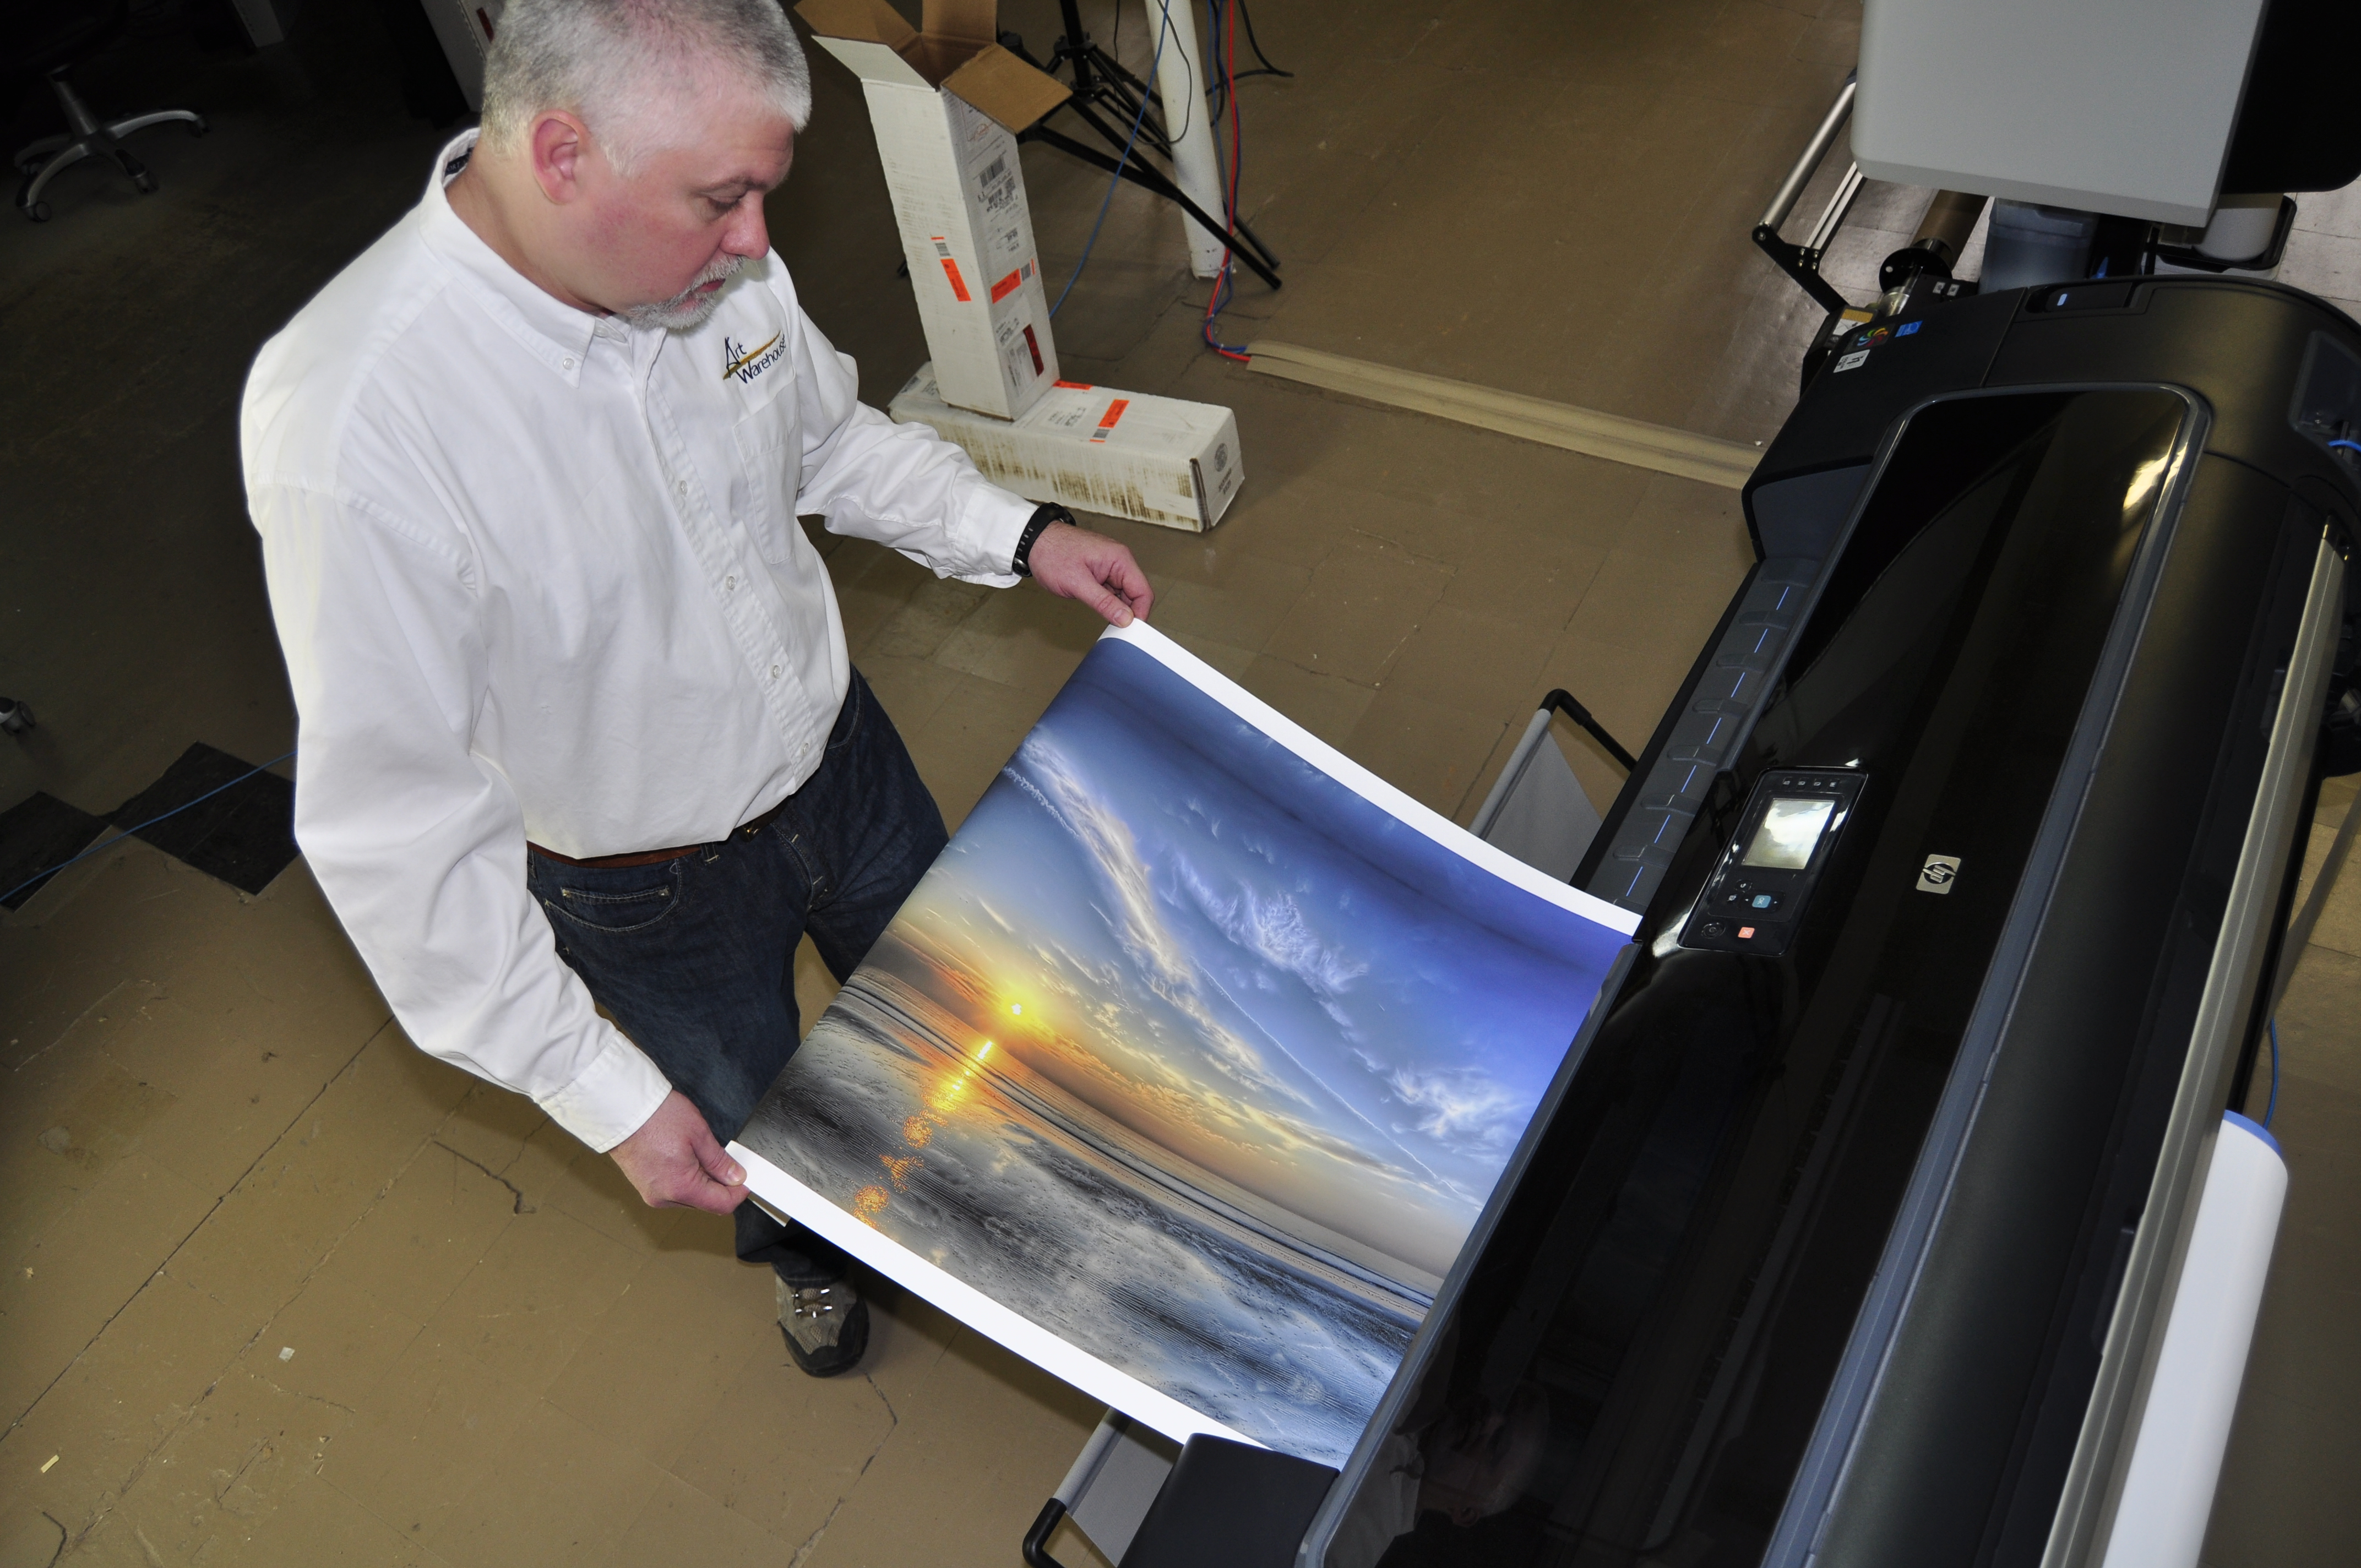
Print shops, fine-art reproduction companies, photographers and other print providers can now offer their customers canvas prints without the canvas: Sunset Photo Canvas Paper 230g from LexJet.

The new photo paper is LexJet’s popular Premium Archival Matte Paper embossed with a canvas texture, complete with all the benefits of Premium Archival Matte: an instant-dry coating for smudge-free printing and handling; a large color gamut for high-contrast, high-resolution printing; and an acid-free, pH-neutral thick and heavy base for trouble-free printing, mounting and framing.

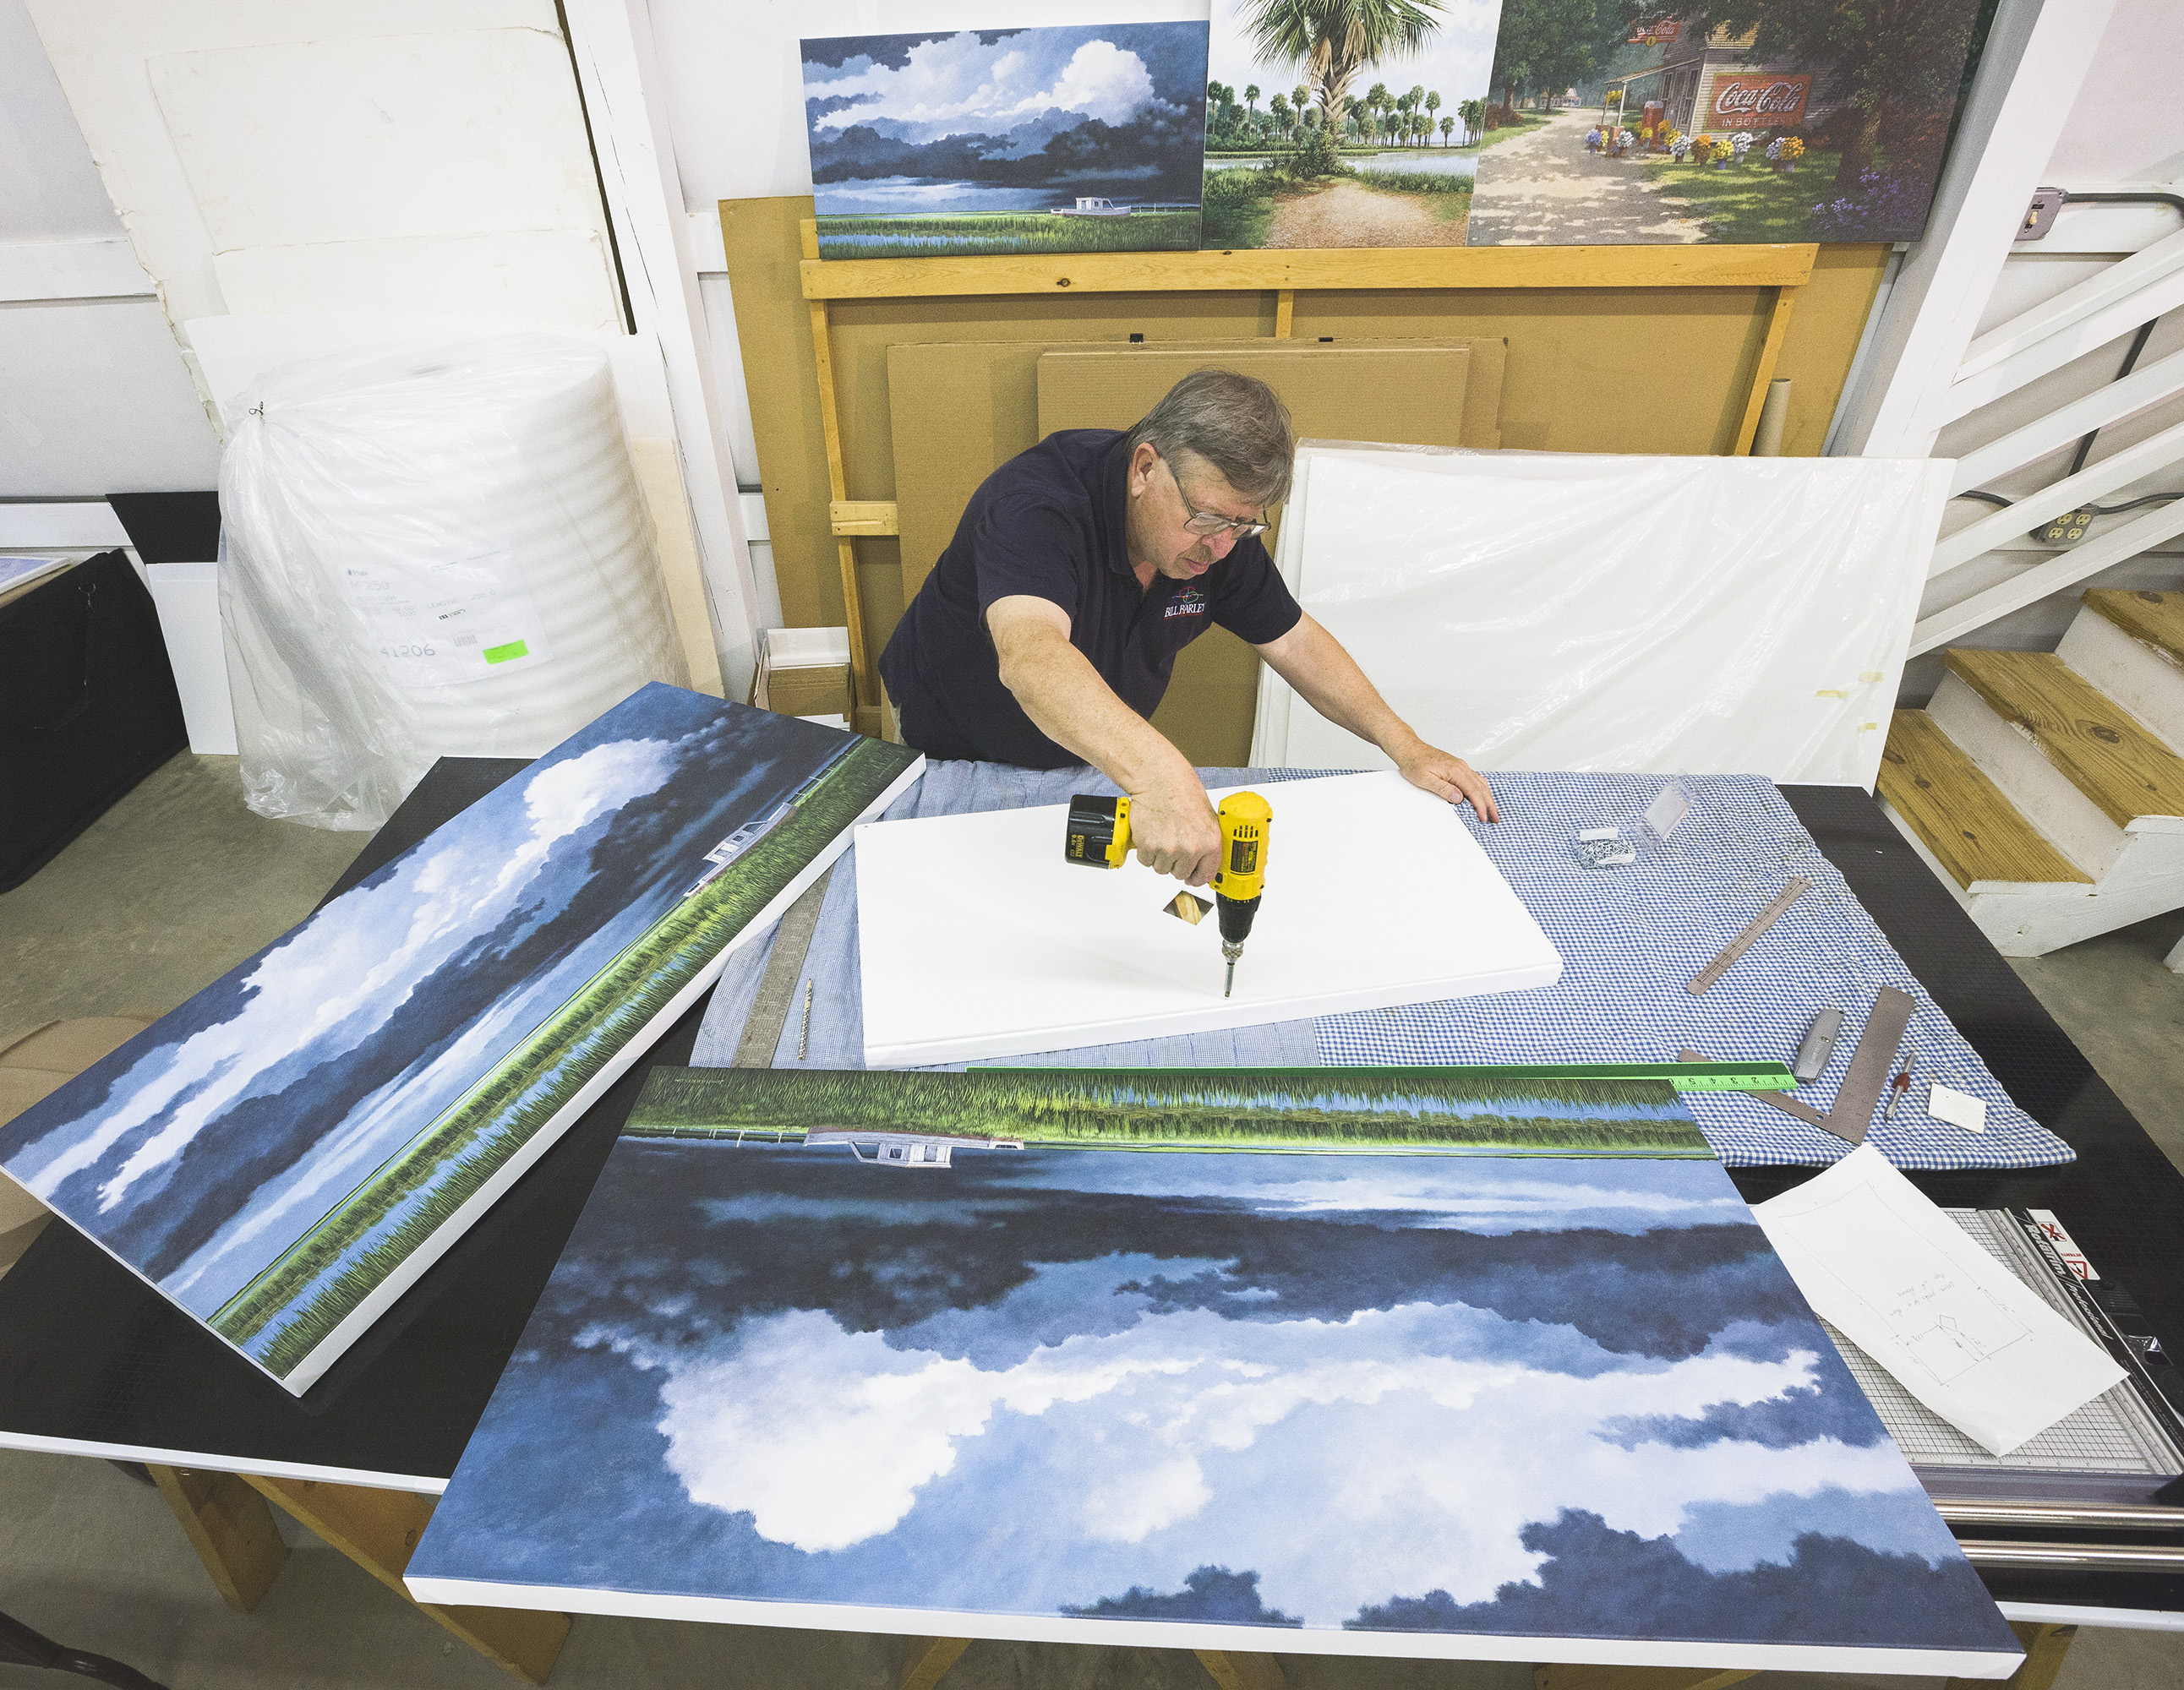
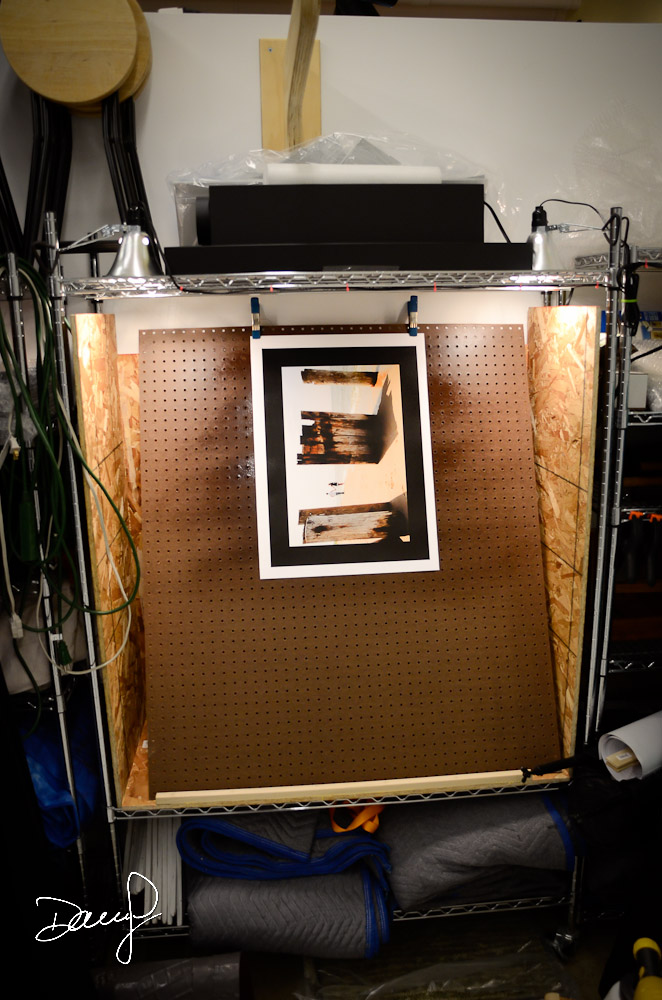
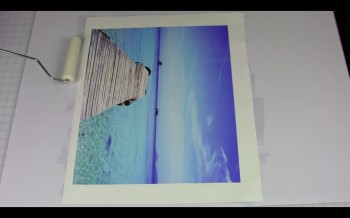
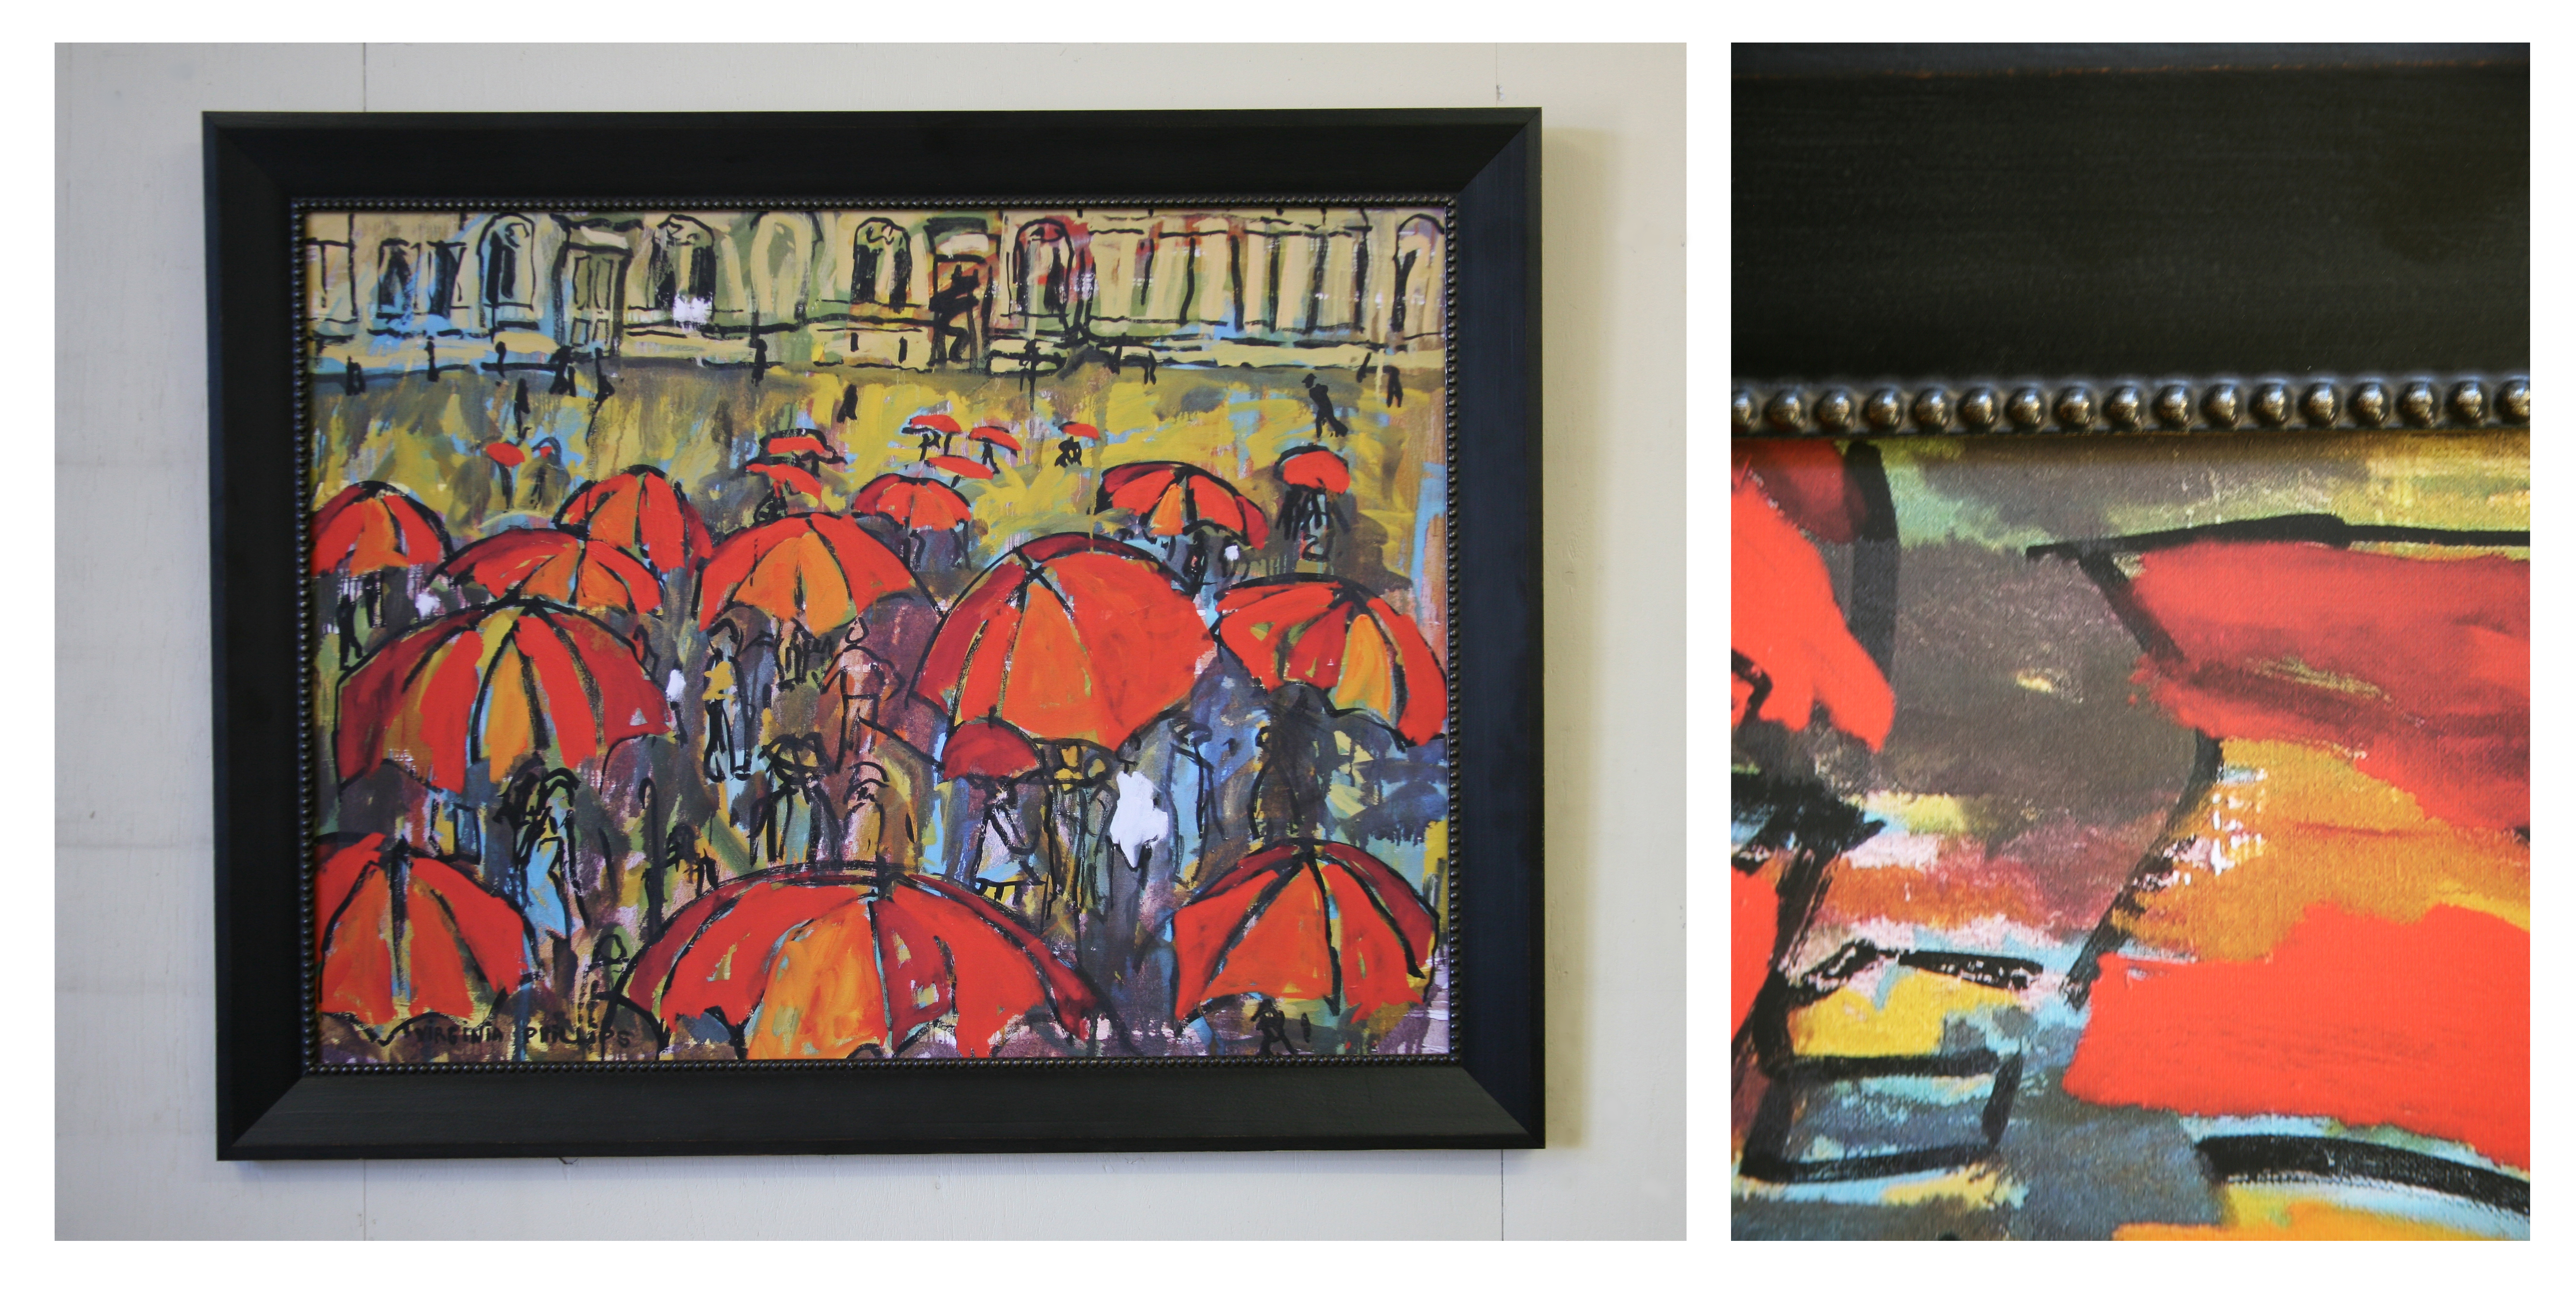
“This paper saves us a lot of time, cost and labor because it’s basically a two-step process: it comes off the printer, we mount it and it’s done. It gives a canvas look, texture and feel at a lower price point than canvas, and the image quality is great,” says Ryan Wanke, president of Sharpeye Framing Company in Michigan City, Ind.

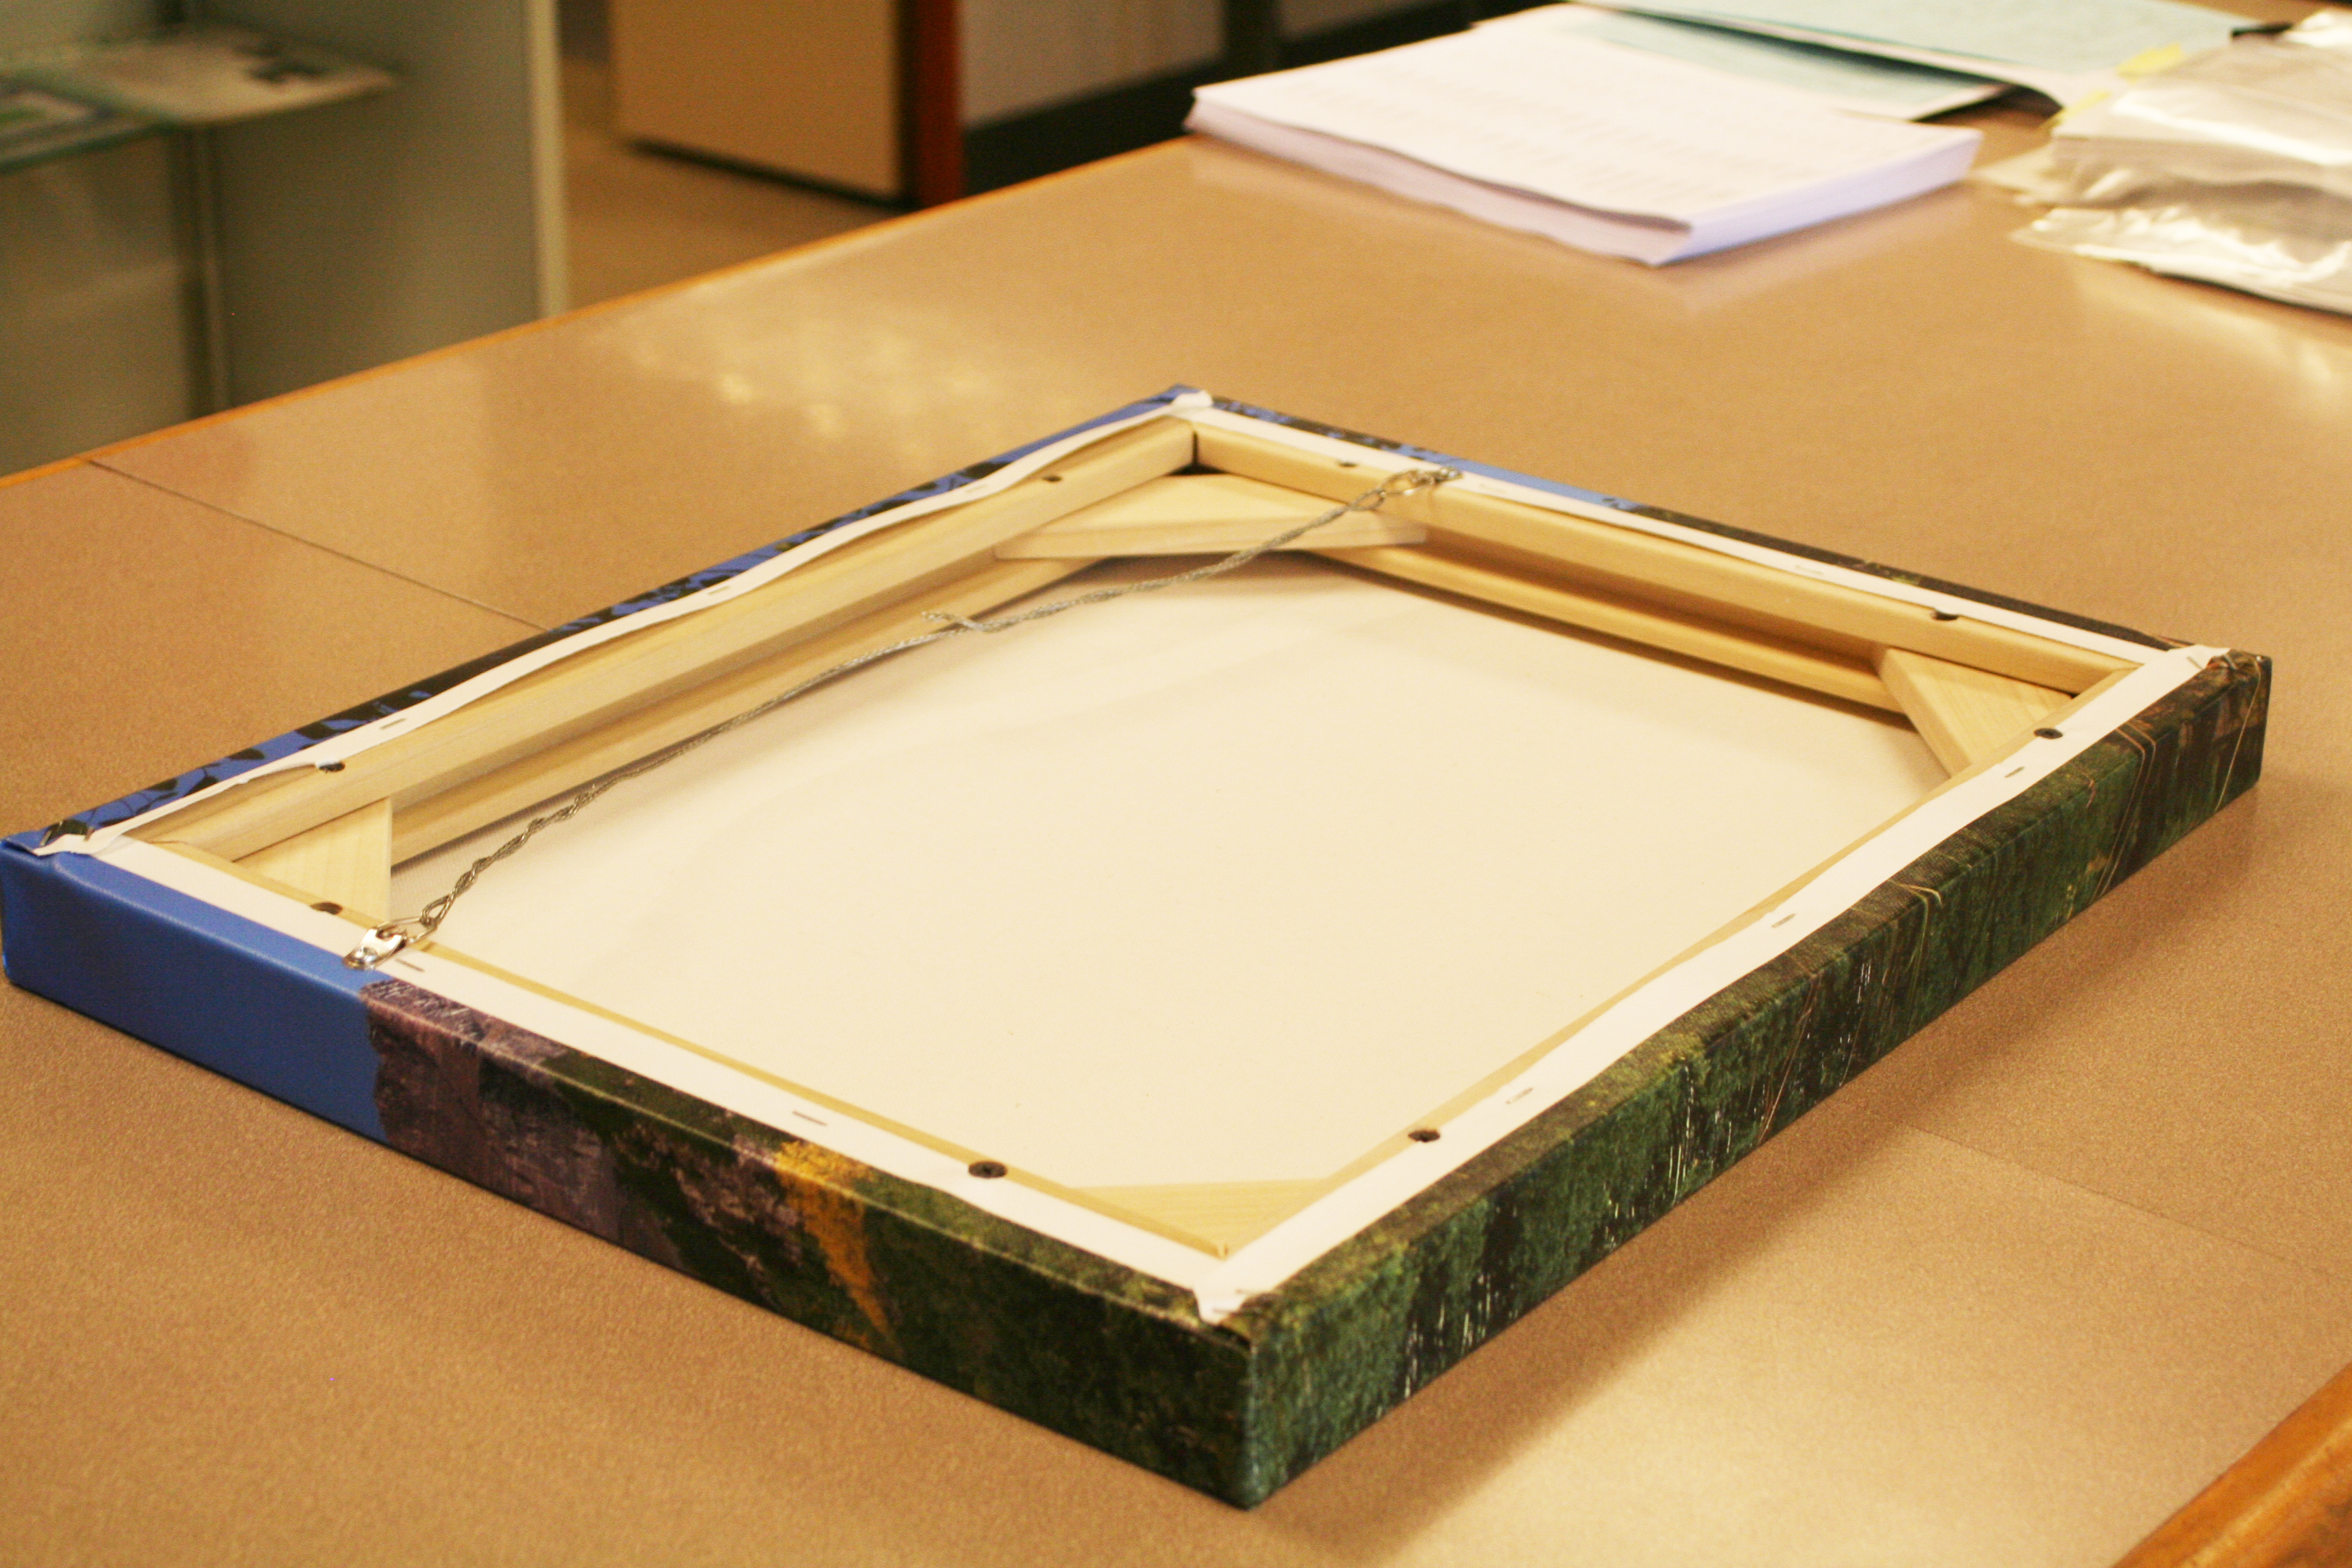
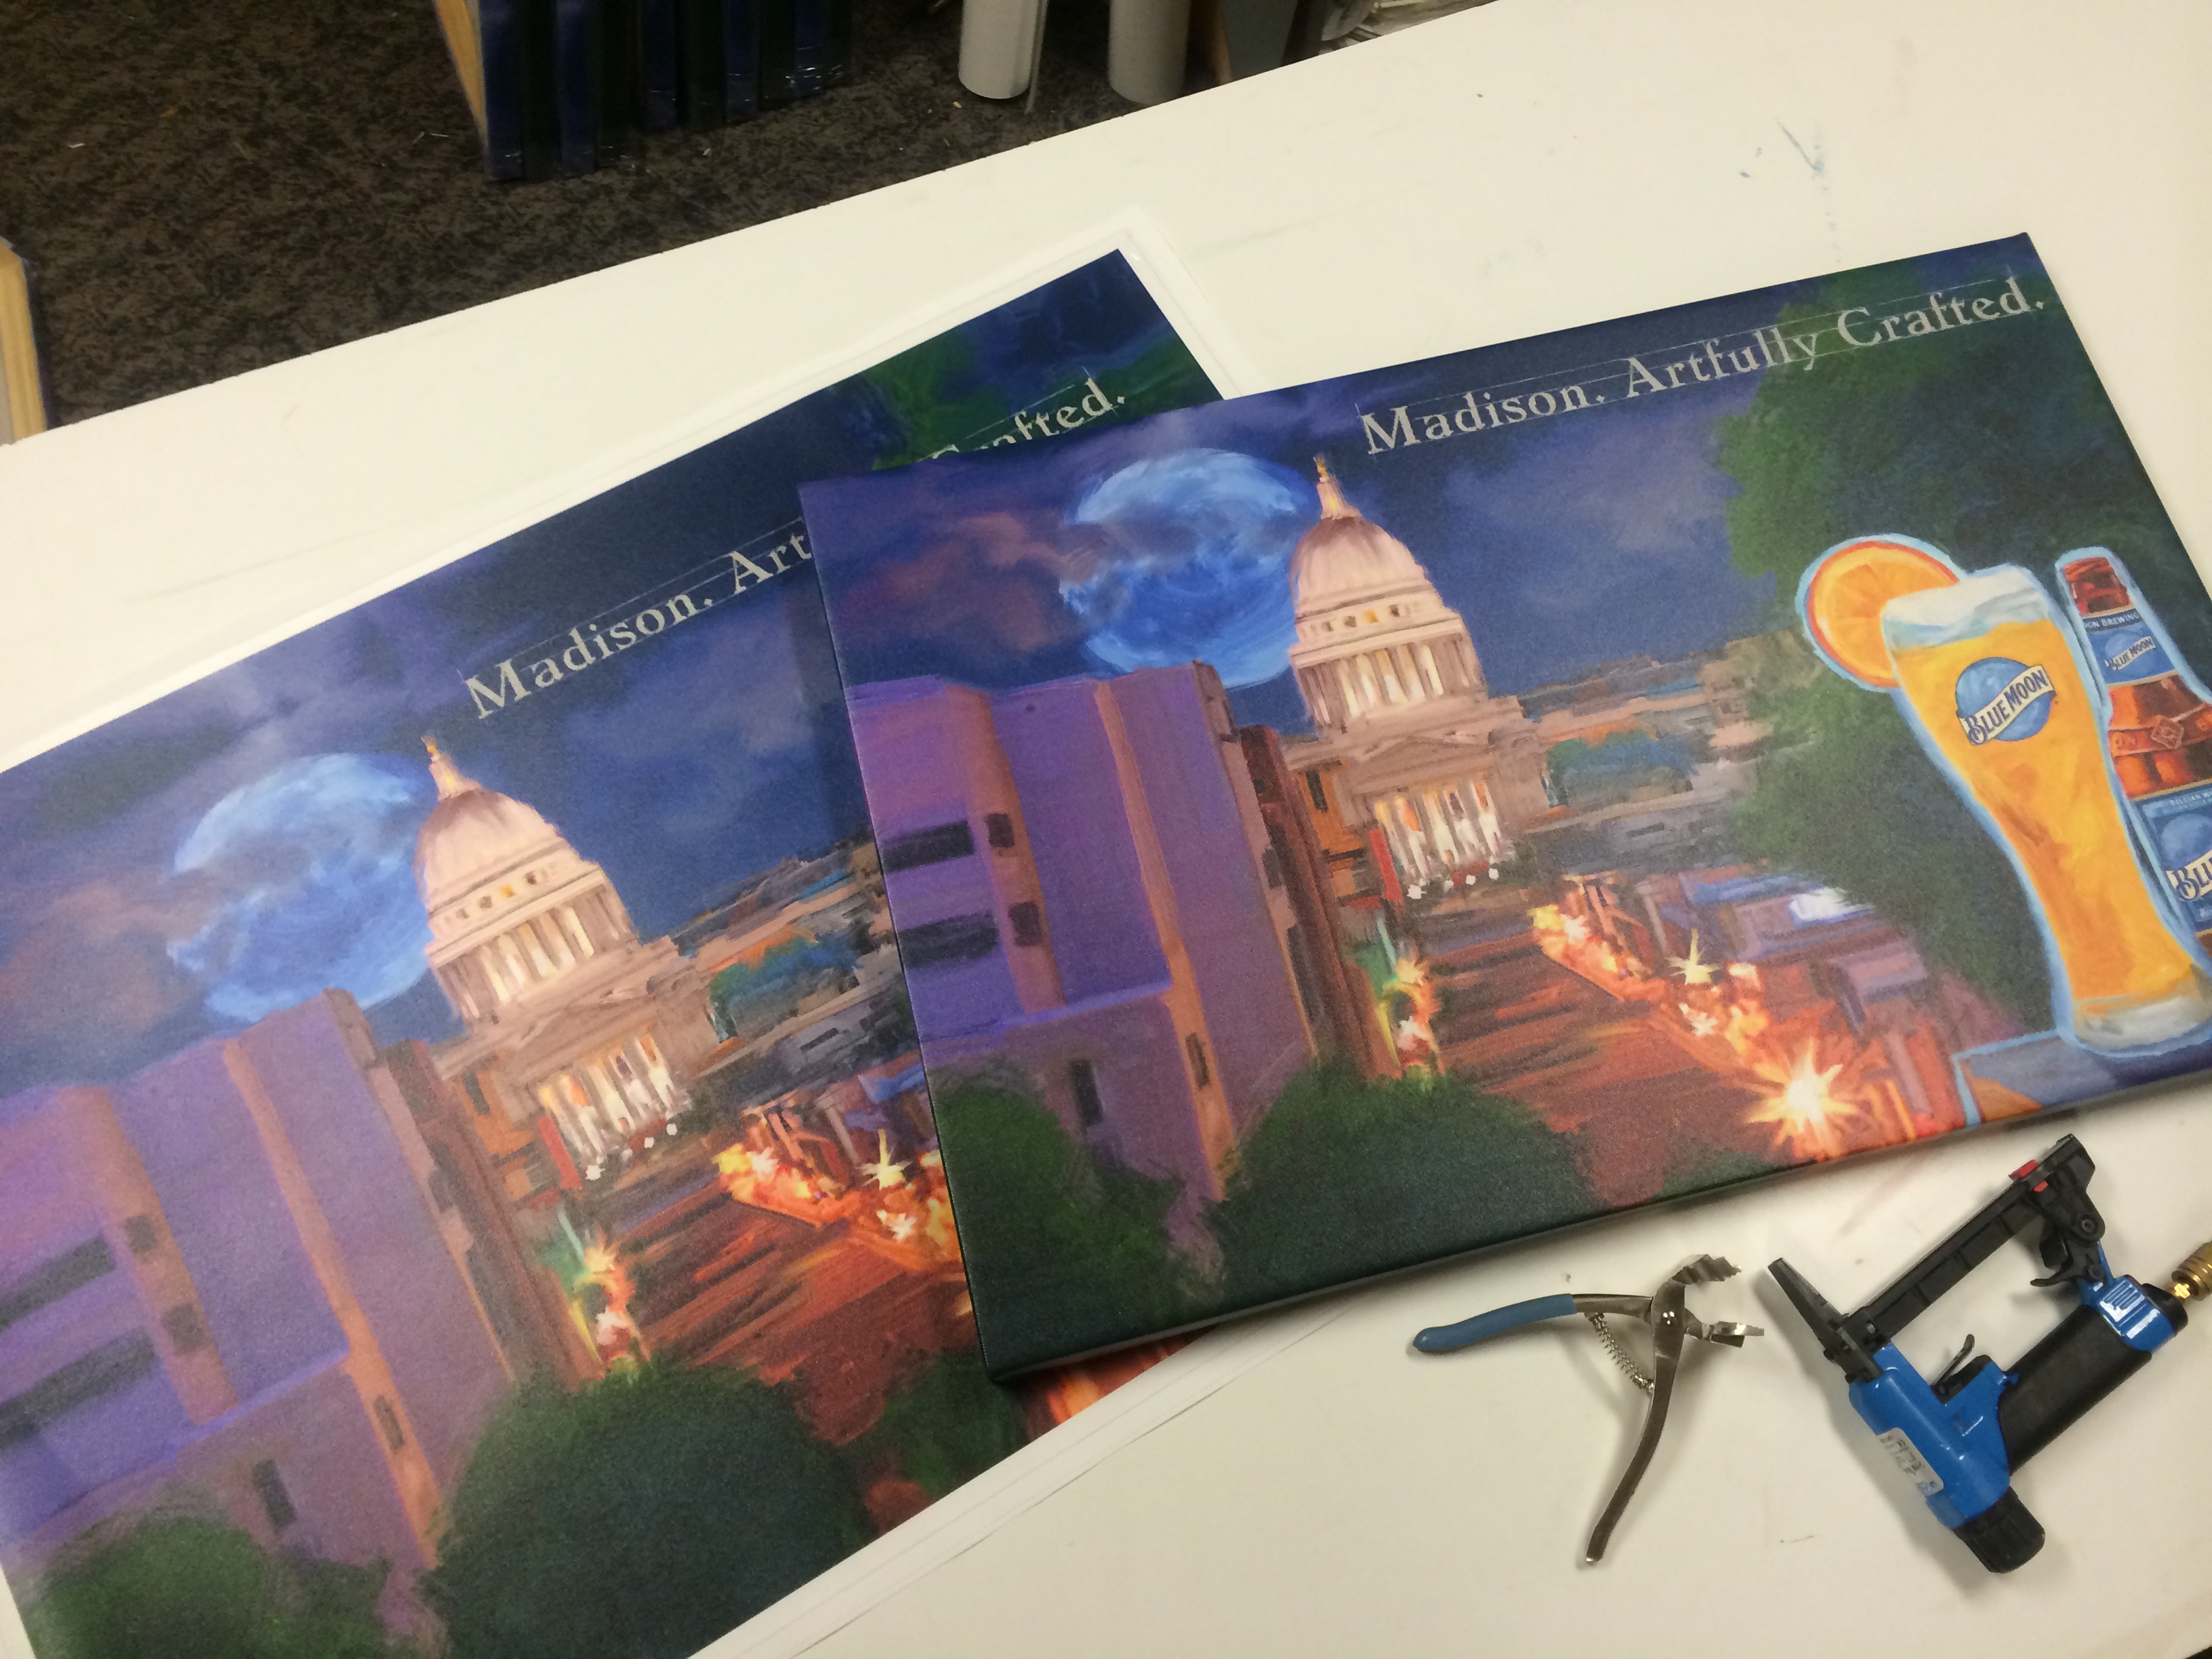
Sunset Photo Canvas Paper 230g is not an alternative for canvas gallery and museum wraps. Rather, it is an alternative for mounted and framed canvas prints since canvas can be difficult to mount to a board due to its weight and physical properties.

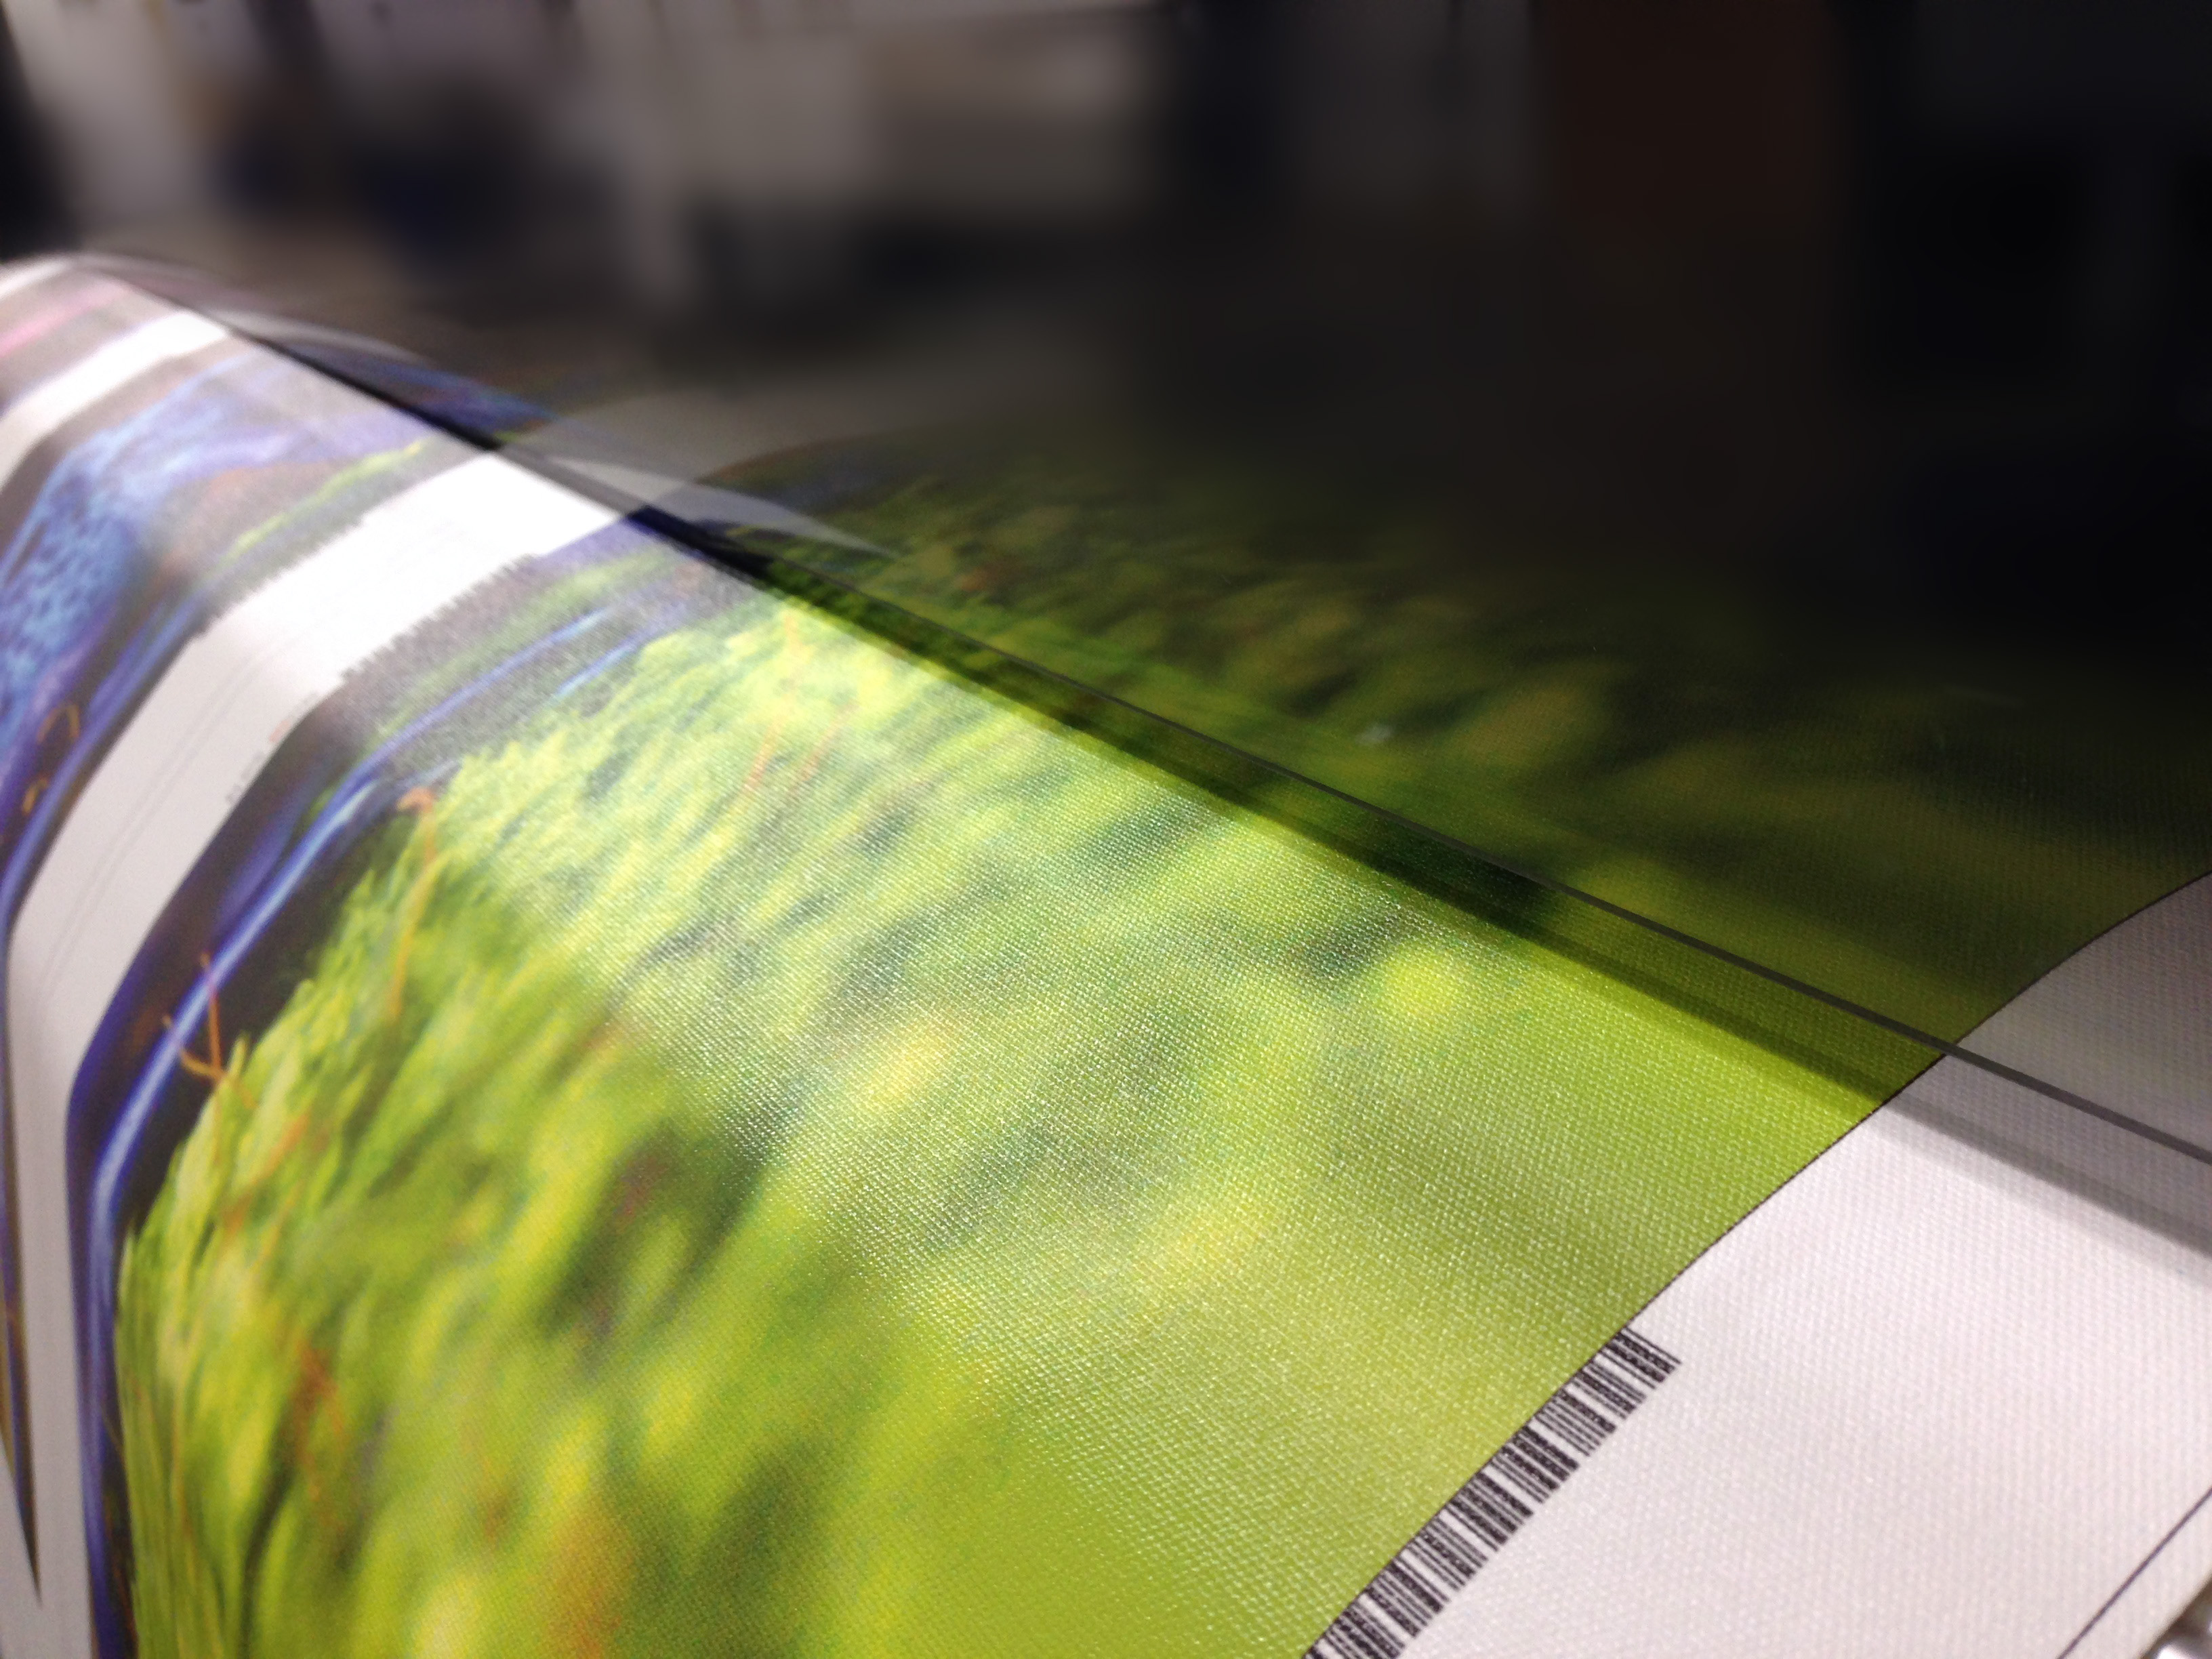
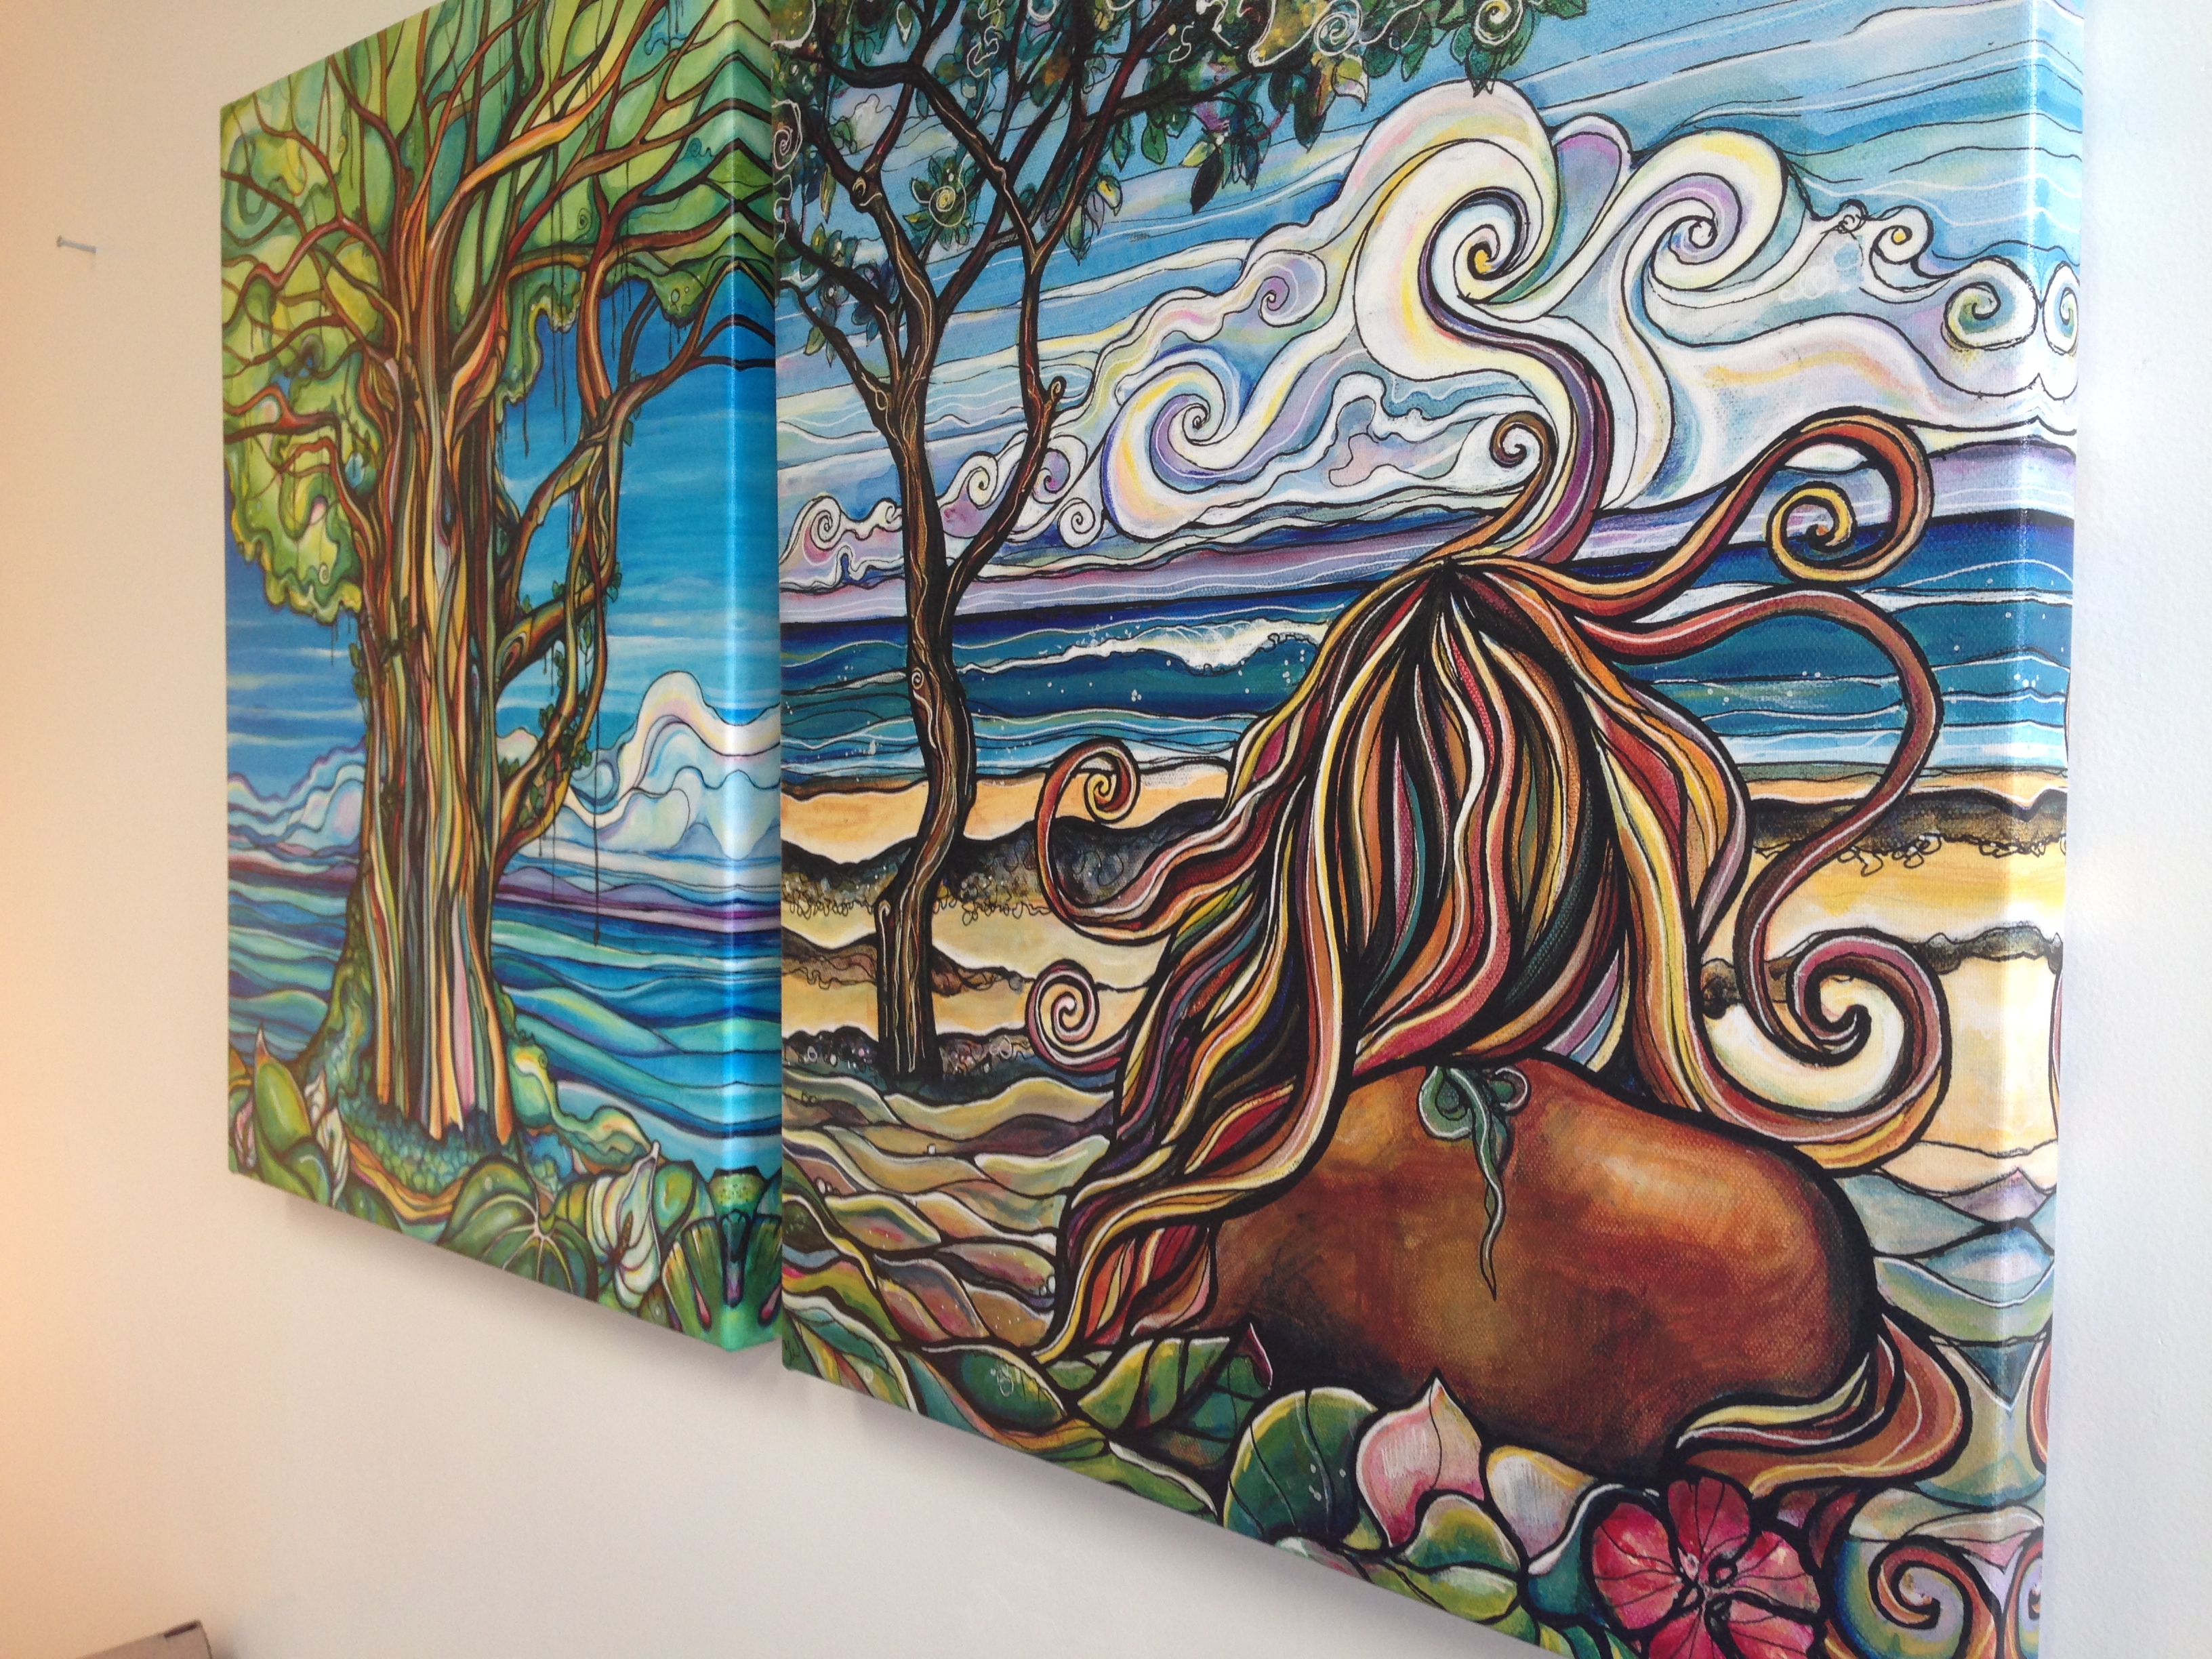
The embossed texture of Sunset Photo Canvas Paper 230g is similar to the 2-over-1 weave of LexJet’s award-winning Sunset Select Matte Canvas, providing a smoother and more consistent canvas texture on a matte finish.

“People love canvas, which is why canvas printing is such a growing market with a lot of opportunity for our customers,” says Jaimie Mask, LexJet’s product manager. “The biggest seller is and will likely always be canvas gallery wraps. However, there is a robust market for mounted and framed canvas prints, and Sunset Photo Canvas Paper makes it easier and more cost-effective to serve this niche.”

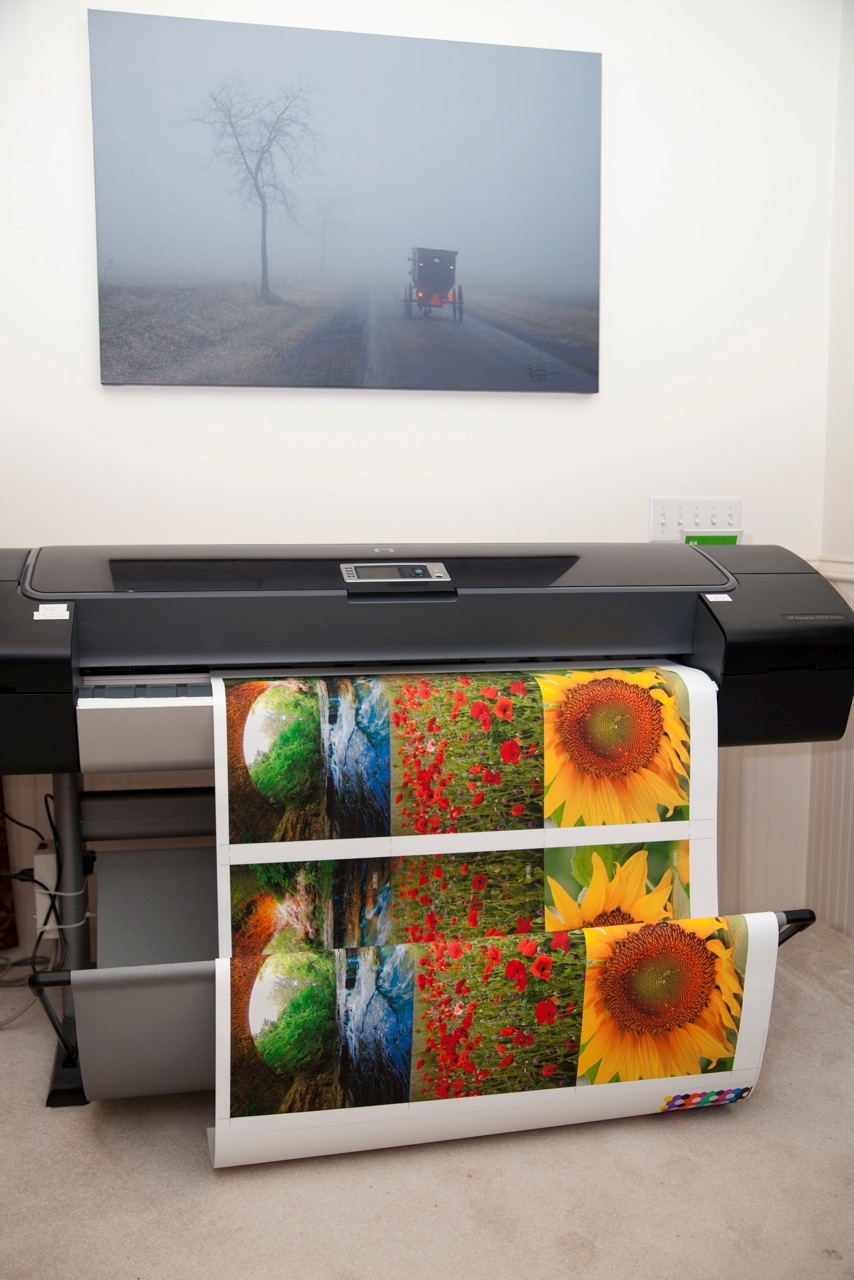
Sunset Photo Canvas Paper is now available in 17″, 24″, 36″, 44″ and 50″ widths and 100′ roll lengths from LexJet’s Nationwide Delivery Network. As with all LexJet-branded products, Sunset Photo Canvas Paper comes complete with a 30-Day Money-Back Guarantee and free and unlimited phone support from LexJet’s team of printing experts. To find out more, contact one of those experts at 800-453-9538.

How to Make Canvas Printing Work for You, Part 5: Canvas Wrap Options

Finishing and Stretching Canvas

Before we get into the physical stretching and wrapping of canvas, this seems a good spot to discuss ways in which you can prepare the file before printing so that it’s ready to be rendered as a gallery or museum wrap. A gallery wrap, by the way, is where the image continues to bleed onto and over the edges. A museum wrap substitutes a solid border along the edges.

The trick is getting this right before you print. Fortunately, there are quite a few options…

Photoshop actions: Typically, the Clone tool is the primary tool used to create a mirrored border. You can do this manually in Photoshop and then record your actions.

Canon Layout Plug-In: If you have a Canon iPF inkjet printer, the Layout Plug-in software features a tool that automates the process.

OnOne Software, Perfect Resize 8: Formerly known as Genuine Fractals, with Perfect Resize you can create selective, mirror, museum-wrap and other types of wrap borders.

Qimage Ultimate: This imaging software tool offers a number of ways to work with print borders. Click here to see how it’s done.

Alien Skin Software: Alien Skin’s Blow Up software comes with a free Photoshop Gallery Wrap Panel to make a solid border, reflected edges or reflected edges with a fade.

Stretching Inkjet CanvasTypically, there are three ways a canvas print can be stretched: by hand, with stretcher bars and strainers; using canvas stretching machines that provide a range of automation, like the Tensador II and the more automated Canvas Master machines by GAPP Engineering; or using a do-it-yourself stretcher bar system.

Stretching canvas by hand can be very involved and time-consuming, but the raw materials needed are less expensive. For detailed step-by-step instructions by master printer, photographer and craftsman Ralph Cooksey-Talbot on creating your own stretcher bars and canvas frames, including the tools and materials necessary, click here.

While much more efficient for production, acquiring equipment like the Tensador II or the Canvas Master requires an initial investment ranging from about $3,000 to $11,000. If your volume supports the equipment purchase, definitely investigate these machines.

Armando Garcia, director of operations for Soicher Marin, a high-volume fine art reproduction company is Sarasota, Fla., says, “We use the Tensador for just about everything up to 60 inches. When you compare it to doing it by hand, the machine always wins out. I can’t think of a situation where we wouldn’t use the machine, unless it was an original canvas.”

The Canvas Stretch Master from LexJet automates and speeds up the canvas wrap process for production printing and finishing.

Garcia adds that it usually takes one of their operators about a day and half to learn how to use the machine to its full potential and cuts the time needed to do a canvas wrap by anywhere from 30-50 percent.

The Canvas Stretch Master is more automated, thus it’s more expensive. However, it also produces about twice as many canvas wraps per hour than the Tensador II and the Canvas Studio Master, about 60 per hour on the high side, with less labor. To find out more about the setup and operation of the Studio Canvas Master and the Canvas Stretch Master, click to the videos below:

Studio Canvas Master Setup

Studio Canvas Master Demonstration

Canvas Stretch Master Setup

Canvas Stretch Master Demonstration

Corner Fold Options

Sunset Stretcher Bars for Canvas
DIY stretcher kits like Sunset Stretcher Bars are a quick and simple solution for canvas finishing.

The third option is the use of a pre-made DIY stretcher bar kit, which include kits by Hahnemuhle and LexJet Sunset. This is a happy medium between stretching by hand and automating the process. Tara Materials also offers easy-to-assemble tongue-and-groove stretcher bars so you don’t have to buy the raw materials and cut them down to size.

While overall material costs are a little more than if you made the frames by hand, each canvas wrap will be faster than doing it by hand, but will obviously take longer than using a machine. For videos of the process, click here.

And, for more videos about printing, coating and stretching canvas, click here.

For the rest of this series, click on the following links:

Part 1: Materials, Finishes and Textures

Part 2: Printer Technologies for Canvas

Part 3: Latex, Solvent and UV-Curable Printing

Part 4: Coating Canvas

How to Make Canvas Printing Work for You, Part 4: Coating Canvas

Dan Johnson Spray Booth
Dan Johnson’s DIY spray booth for canvas and fine-art prints.

As noted in the previous installments about printer selection for canvas printing, it’s recommended that you coat all aqueous-inkjet canvas output. Coating also helps ensure a crack-free, consistent stretch for gallery wrap applications, and it’s important to coat before stretching.

If it’s a short-term application – like a temporary decorative piece – or when using a solvent or latex printer, coating is not necessary unless the customer wants the look of a coated canvas.

Typically, coatings come in either gloss or satin (luster) finishes. Gloss coatings are often used to not only provide additional protection, but to bring out the density of blacks and the vibrancy of the colors in the print.

For a more subdued look and particularly to cut down the glare from high-powered lighting, a satin or luster coating may be preferred. Some will choose not to coat the canvas at all to retain the unique texture and characteristics of the material.

Coatings are available in both spray (aerosol or industrial sprayer) and liquid (can). Sprays from Hahnemuhle and Clearstar Corp., for instance, provide excellent results, though there are other brands available from other companies that specialize in fine-art and photo printing.

Stick with sprays and coatings that are specially formulated for this application, rather than those that are not tested specifically for inkjet prints (Krylon, for example), because the long-term effects of these off-the-shelf sprays on inkjet paper surfaces are unknown.

There are also liquid coating machines available in various widths from companies like Neschen and Marabu. While these machines automate the process and provide an excellent finished product, they require a controlled environment with consistent temperature and humidity, free from dust and dirt.

Coating Canvas
Click on the image to see a video on roller-coating canvas.

Liquid coatings that come in a can, such as Sunset Gloss and Sunset Satin Coatings, can be either rolled on or sprayed using an HVLP (high volume, low pressure) spray gun, which requires a well-ventilated dust-free area.

An HVLP spray gun wastes less coating in overspray than other types of sprayers. It also provides more control over the application process. Some print shops and studios simply don’t have space for spraying, or can’t justify buying specialized coating systems, which is why Sunset Coatings have been formulated to work equally well when applied with a spray gun, brush, or foam roller.

If you’re looking for way to spray on a budget and in limited space, click here to see how Dan Johnson built a space- and money-saving spray booth for his studio.

When rolling coatings on canvas, follow these basic steps:

1. Start with a high-density, white foam roller and a tray that is typically used for holding paints. You can buy these products in the paint department of any home-improvement store. The high-density foam will help reduce bubbles. Use a larger-width roller if you plan to coat larger canvases.

2. Pour the coating into the tray and dip the roller in the coating until it is thoroughly wet, but not too wet.

3. Lay your print on a clean, dust-free board that is bigger than your print. The extra space on the surface around the print can be used to roll off excess liquid if you happen to oversaturate the roller.

4. Consider using two or three thinner coats, instead of one thicker coat.

5. Don’t try to coat the whole print at once. Start with one or two passes at the edge of the print, and go over each pass enough times for the bubbles to dissipate, but not so many times that the coating becomes tacky or bumpy.

6. If large bubbles appear, try blowing on the coating.

7. Make overlapping passes so you can maintain a wet edge and avoid lines and streaks.

8. Find the rolling pattern that works best for you. Some users prefer rolling in one direction only. They go up the print in one pass, and down the print in the second pass (like mowing a lawn).

9. Don’t press down on the roller. Maintain a light, even pressure.

10. If you are applying a second coat, allow the first coat to dry before applying the second coat. A thin coat should take between 10 and 30 minutes to dry. But it will take longer if you’re working in an environment with high humidity.

11. Allow the coated print to dry thoroughly before you pack it for shipping. Don’t try to speed up the drying process with a fan; allow the print to dry on its own.

12. Clean the rollers immediately after each use. Run cool water of the rollers immediately after use, and squeeze them until they run clear. Allow 10 to 15 minutes.  If you keep the rollers clean, you can use them for about six months before you need to replace them.

A couple of important notes about coating canvas:

  • Make sure the ink is dry before applying any coatings. A good rule of thumb is 24 hours. To test whether a print is ready for coating, some printmakers suggest this technique: Lay each print on a flat surface, then cover the print with inexpensive butcher paper. The evaporating glycols will cause ripples to appear in the butcher paper. Periodically replace the wavy butcher paper with a fresh sheet of paper. If no waves appear in the fresh sheet of paper after a few hours, the print will be dry enough to coat.
  • Coat the print before stretching the canvas and wait at least six hours after applying the coating to stretch.
  • As more inks and media types are introduced, it is impossible to predict the compatibility of every combination of media, ink and clear coat. Therefore, it is strongly recommend that you test before use. A test will immediately show any incompatibilities, including water sensitivity, inkjet receptive layer mud cracks, and ink bleeds. Generally, let the tested material dry for at least 24 hours. Evaluate the adhesion, flexibility, and visual appearance. Be realistic in your expectations and simulate the conditions the material will be exposed to. Generally speaking, coatings formulated for wide format printing will work well with both aqueous and solvent prints.

Click here for a video demonstration of coating canvas with a roller.

For the rest of this series, click on the following links:

Part 1: Materials, Finishes and Textures

Part 2: Printer Technologies for Canvas

Part 3: Latex, Solvent and UV-Curable Printing

Part 5: Canvas Wrap Options

How to Make Canvas Printing Work for You, Part 3: Latex, Solvent, UV-Curable Printing

Canvas with the HP Latex Printer
Printing Sunset by Fredrix Gloss Canvas SUV on the new HP Latex 360 printer.

In the previous installment we detailed canvas printing using aqueous-ink printers. Here, we’ll discuss the pros and cons of latex, solvent and UV-curable printers for canvas…

Latex Layout
HP pioneered the use of latex inks in wide-format printing, and recently released its next generation of HP Latex 300-series printers. There are other latex printers out there, but HP’s Latex printers are the standard and best suited for canvas printing since you don’t need to coat the canvas after it’s been printed. Latex inks provide more durability and scratch resistance than aqueous inks and are touted as environmentally-friendly. For super-high production, the HP Latex 3000 provides all the benefits of latex printing, plus higher speeds at billboard-sized widths. Click here to find out what LexJet’s technical support director, Adam Hannig, found as he put the new HP Latex 360 through its paces.

Cost: The cost for the new 64-inch wide printer (the HP Latex 360) is priced around $20,000, which offers the most quality and flexibility within the HP 300 series. Ink and media costs are about the same as they are for aqueous and solvent printers since latex inks work with many of these media types.

Operation: It takes awhile for the heating element on older latex printers to get to the right temperature for printing, but this time has been cut down dramatically with the new HP Latex 300 Series. With latex, you can laminate right away since the ink is dry and outgassed once printed.

Durability: As mentioned with solvent printing, the additional durability of the latex inks allows you to skip the coating step for most applications, though the customer may like the look of a coated print and request it.

Quality: The HP Latex 300 Series also promises to boost quality, inching ever closer to aqueous-quality levels. The fact is that most wide-format inkjet printers will produce the quality you need for high-volume décor canvas printing. If you have a pickier clientele for more custom canvas work you should request samples from the manufacturer/distributor of the printer you’re interested in using files you supply them.

Maintenance: Latex requires less maintenance than a solvent or UV-curable printer, but more than an aqueous printer, though the HP Latex 300 Series includes new features like a maintenance cartridge, instead of a maintenance tank, making maintenance easier and faster.

Solvent Solutions
Solvent printing was a godsend to the sign industry when it first arrived on the scene. Commercial sign makers were continually carping about outdoor durability and the lack of it before solvent printers were introduced to the signmaking scene.

Sunset by Fredrix Satin Canvas SUV
Sunset by Fredrix Satin Canvas SUV printed on a low-solvent printer.

Printer manufacturers rushed to meet this demand and developed a solvent ink set designed to permeate and penetrate vinyl. Aqueous inks are anchored to the surface by an inkjet coating, so the ink sits on the surface, making it less permanent. One way to look at this relationship between ink and vinyl is that solvent ink is like a tattoo and aqueous ink is more like a sticker.

Most of those early solvent inks were hard solvents that were rather caustic and as such could bite into just about any material. Since then, the industry has moved to low/eco solvent inks, so the media designed for these inks requires some sort of treatment or coating to ensure ink adhesion.

As such, more high-volume fine art and décor reproduction companies are migrating to solvent since it eliminates the need for post-print coating; just pick the canvas finish – gloss, satin or matte – and go straight to stretching and finishing.

There is a great range of printer types, from entry-level units that are 54 in. to 72 in. wide and cost between $16,000 and $30,000 to giant 16-foot super-high production printers that can cost up to half a million bucks.

For the purposes of the following solvent printer discussion, we’ll use the Epson SureColor S70670 64-inch low-solvent printer as our benchmark as it sits in that entry- to mid-level range, provides near-aqueous quality printing, and is similar in cost and overall capabilities to those in the same range manufactured by Mimaki, Roland, and Mutoh…

Cost: As mentioned earlier, solvent printers have a higher average entry cost. For typical operation, ink and media costs are generally lower than they are with aqueous printers. But again, media represents only a small percentage of a print operation’s overall cost, so it’s not a significant factor.

Maintenance: The latest generation of solvent printers typically require only an hour or less of maintenance once a month.

Operation:  Outside of minor maintenance, solvent printers will run continuously and similar to an aqueous printer. However, there’s usually a recommended drying and outgassing time recommended before lamination based on the printer model.

Durability: Solvent prints are extremely durable, opening up a wider range of applications that don’t require lamination or coating, including canvas.

Quality: Solvent printers, particularly Epson’s, have made great strides in quality. Though you’re not likely to find the same quality as you will with aqueous printers, there are certain models that come very close to aqueous quality. It’s also important to keep in mind that quality is not only a function of the printer, but of the color management workflow and the media being printed to.

Printheads: Most solvent printers use piezo printheads, which are more durable and long-lasting than the thermal printheads typically found on aqueous printers (excepting Epson’s aqueous photo printers, which also use piezo heads).

Curing Time
For some, UV-curable printing represents the Holy Grail of sign printing because it’s the only wide-format technology that allows direct printing to board materials, such as Coroplast, Gator Board, Sintra, and even doors and tabletops. UV-curable inks are cured or set using UV lamps that are built into the printer so the inks adhere to more materials.

And, with the advent of hybrid UV-curable printers – those that can switch from flatbed to roll-to-roll, such as the CET Color X-Press – the printing potential becomes almost limitless. But with this seemingly limitless capability is an attendant complexity.

Moreover, UV-curable inks are generally not designed for the canvas printing process. The inks are simply not flexible enough for the stretching process, but should be fine for mounted or framed canvas prints.

Applications: A UV-curable printer eliminates the painful application step for board applications; simply print and go. Almost everything, excepting vehicle graphics and stretched canvas, is fair game for a UV-curable printer, allowing more opportunities to make a difference with specialty graphics.

Durability: The durability of UV-curable rivals solvent, and rarely needs lamination, unless you’re looking for a different texture or more rigidity for roll materials.

Quality: For canvas printing, UV-curable printers are really a last resort. If the bulk of your work is direct-to-board printing and you have an occasional canvas project you could certainly do it, particularly if you aren’t planning to stretch and frame the canvas. Some shops print directly to a pre-stretched blank canvas, but in that case you have to paint the edges as most people expect either a gallery wrap (where the image continues onto the edges of the frame, usually mirrored) or a museum wrap (a solid color on the edges).

Cost: Low-end UV-curable printers start at around $60,000 and range up to half a million dollars for a high-quality production printer. The hybrid CET Color X-Press and others like it were designed to strike a balance between economy, production and quality as the lower-end machines are not as sturdy and reliable, while the higher-end industrial printers represent an extraordinary capital investment. You can also use less-expensive uncoated materials and UV-curable inks are generally less expensive.

Maintenance: UV-curable printers require more detailed and time-consuming maintenance about once a month.

Operation: Because of the relative complexity of UV-curable printing, and the need to adjust the printhead height based on the material running through the printer, the variables in the process increase proportionately. Plus, you may need an additional operator, at least part time. High-performance, high-volume printers burn through material quickly, and the material used is often quite heavy. Where a roll of 36 in. wide material is easily loaded on an aqueous or solvent printer by one person, a 300 ft. roll of 60 in. material can weigh around 100 lbs., so someone else will need to be available to help load heavy materials or big boards onto the printer.

For the rest of this series, click on the following links:

Part 1: Materials, Finishes and Textures

Part 2: Printer Technologies for Canvas

Part 4: Coating Canvas

Part 5: Canvas Wrap Options

How to Make Canvas Printing Work for You, Part 2: Printer Technologies for Canvas

Sunset Reserve Bright Matte Canvas Print
Printing fine-art photography on Sunset Reserve Bright Matte Canvas with the HP Designjet aqueous printer at Art Warehouse, Chattanooga.

Beauty, as they say, is in the eye of the beholder. As noted in the previous installment, your clientele and market focus will ultimately dictate the choices you make regarding canvas materials and finishes. And so it goes with your choice in printer technology.

Though the volume you produce in canvas is an important element, it’s only one element of many that need to be considered to find the right printer. Those elements include:

  • Your current print production and application mix
  • What you want that print production and application mix to be in the future, and the clientele you aim to capture
  • The expectations of your clientele: do they require almost perfect fidelity to the original, are they more concerned about producing multiple prints at an economical price with short turn-arounds, or somewhere in between?
  • Your capital equipment budget, both initially and over the long haul of the printer’s life
  • How much post-print finishing you’re willing to do and how much finishing adds to your overall production time and costs

The choices in wide-format printing used to be fairly simple, but this simplicity also brought limitations. With the introduction of more affordable and reliable printers using solvent, latex and UV-curable ink sets, the potential applications became much more varied and print durability became less of an issue.

Canvas by AW Artworks
Point of sale gallery wraps by AW Artworks printed on Sunset Production Matte Canvas with a Canon iPF8300 aqueous inkjet printer.

Each wide-format printing technology – aqueous, solvent, latex and UV-curable – has certain characteristics that need to be taken into account based on each print shop’s goals, capital equipment budget and operating environment. While there may not be such a thing as the perfect printer, there is an ideal printer waiting to be used to its full potential.

Water Works: Aqueous-Based Printers
Aqueous-based printers, so called because the ink used is primarily water mixed with either dyes or pigments, are widely used for canvas printing and typically offer the best image quality. Most print shops have moved to pigmented inks because these inks provide a more durable print than dye inks; pigmented inks are now the standard.

Often referred to as UV inks for their ability to resist UV light, they should not be confused with UV-curable inks, which are discussed in the final section of this installment. The advent of pigmented inks for aqueous printers eliminated much of the laminating previously needed for prints using dye-based inks for short-term outdoor and long-term indoor applications.

However, it is still recommended that you coat aqueous inkjet canvas prints so they’re protected from environmental factors and to help ensure they won’t crack on the edges when they’re stretched.

Film laminates are rarely used for canvas prints, mainly due to aesthetic reasons. Liquid coatings enhance the canvas texture and provide a more “painted” or artistic look, and come in gloss, satin and matte to provide different finishes.

Film lamination is recommended for other print materials when you need extra rigidity, a different texture, protection from people picking or chipping away at the graphics, specialty applications (floor and vehicle graphics, for instance) or to gain about 20 percent added durability for longer-term outdoor signage (more than six months).

Along with the development of pigmented inks, there have been a plethora of printable media – from photo papers, polypropylenes and polycarbonates to fabrics– optimized for these inks that provide excellent color reproduction and greater longevity.

In other words, if you’re doing a variety of applications, including canvas prints, aqueous printers will fill the bill for most of those.

Following is a rundown of aqueous-based printing’s strengths and weaknesses, based on the latest printers from Canon, Epson and HP

Cost: Aqueous printers have a significantly lower cost of entry. You can get a 42-inch or 44-inch wide printer for $3,000-$8,000 or a 60-inch unit for $10,000-$13,000, as opposed to $16,000-$30,000 for an entry-level solvent printer, around $20,000 for a latex printer, and more than $60,000 for an entry-level UV-curable printer. The greatest cost will be on the finishing side. You don’t have to coat aqueous prints, but as noted above it’s recommended that you do. From print to ship, expect to add at least 48 hours to production since you should wait 24 hours before coating and 24 hours before stretching. The coating step obviously adds labor and the cost of the coating to the equation as well. There are a lot of companies that run multiple aqueous printers to keep up with demand, but have usually added automation in the finishing department, such as coating machines and canvas stretching machines, which will be discussed in subsequent installments. Even with automation, the lag time between printing and shipping is an important consideration. The most important element in the cost-to-print equation is finishing since time and labor are the largest cost factors in the print process. Some studies of the cost-to-print put ink and media as less than 10 percent of the total operation costs.

Maintenance: Aqueous printers require little maintenance, other than keeping the production area as clean as possible.

Operation: They are virtually plug-and-play, so there is very little time lost tweaking the printers for different materials. Because of their relatively simple operation, they are the most reliable printers over the long haul. Moreover, with the more complicated latex, solvent and UV-curable printers the addition of a RIP (Raster Image Processor) software is necessary, requiring additional training and knowledge.

Quality: You typically get a nicer-looking print with a wider color gamut at production speeds than you do with other printing technologies. The wider the color gamut, however, the slower the print speed. When you’re researching printers ask about speeds in the highest-quality mode.

Applications: Though aqueous is versatile enough for almost any application, including canvas, specialty applications like vehicle wraps are more difficult and time-consuming to accomplish than they are with solvent and latex printers (UV-curable printers are not ideal for vehicle graphics, or stretched canvas, since the ink tends to crack when stretched around corners or rivets and over stretcher bars in the case of canvas).

Speed: This is actually somewhat of a wash when compared to entry-level solvent printers, particularly with the latest technology, which prints about twice as fast as the previous generations. Basically, upgrading to any new printer – be it aqueous, solvent, latex or UV-curable – will increase production speed significantly.

Printheads: HP and Canon use thermal printheads, which don’t last as long as the piezo heads used in Epson’s printers and in most solvent printers. Fortunately, the cost of each thermal printhead is relatively low, and significantly lower than the cost to replace a piezo printhead.

For the rest of this series, click on the following links:

Part 1: Materials, Finishes and Textures

Part 3: Latex, Solvent and UV-Curable Printing

Part 4: Coating Canvas

Part 5: Canvas Wrap Options


How to Make Canvas Printing Work for You, Part 1: Materials, Finishes and Textures

Mountain Dreamworks Fine Art Canvas Banners
The most typical canvas application is a gallery or museum wrap over a frame. However, some print shops use canvas for framed art or banner-type applications like this one by Mountain Dreamworks, Ketchum, Idaho, printed on Sunset Select Matte Canvas.

Is canvas printing a fad? It’s certainly a growing and profitable segment of the print market, and if it’s a fad, it’s one that should continue for years to come, which means it’s probably not just a fad.

According to InfoTrends, a printing industry research firm, printed canvas is expected to grow from about 500 million square feet in 2013 to 860 million square feet in 2018 for a five-year CAGR (compound annual growth rate) of 11.6%.

InfoTrends also reports that canvas represents about 12 percent of the total online photo printing market in the U.S., and that social media sites, like Instagram, have actually helped fuel growth in this market. After all, while it’s nice to share photos with your friends on a computer screen, many consumers still desire something distinctive outside of cyberspace they can hang up on the wall.

That’s healthy growth and represents a lot of opportunity in various market segments, including: limited-edition art reproductions, consumer photography, home and corporate décor, hospitality, hospitals, restaurants and bars, and just about anyone or any organization looking to spice up their spaces with the unique canvas look.

Canvas by Chromaco
Perfect reproduction of Colleen Wilcox’s art by Honolulu-based Chromaco on Sunset Reserve Matte Canvas.

For print shops, sign companies, commercial printers, photo labs, photographers and fine art reproduction companies the big questions are about utilizing the best production methods, choosing the right materials and finding the best ways to finish canvas based on their market, both as it stands now and where they want to be in a year, two years and beyond.

Materials and Textures
There are quite a few characteristics to take into consideration regarding inkjet canvas currently available on the market: base material, weave, weight finish and optical brighteners (OBAs). All of these characteristics, both by themselves and combined, factor into which canvas is chosen for a given project.

Choosing the “right” canvas is mostly subjective since different people like different looks. Some may like a more textured surface, while others will prefer a smoother surface, for instance. It may also depend on the lighting situation where the canvas is being displayed.

When you’re discussing a canvas print project with a client, make sure you understand their expectations and be cognizant of the environment in which the canvas will be displayed. All of these factors, including budget, will help determine the right canvas for the project. First, let’s look at the base materials, starting with the most common, polyester/cotton blends.

Poly/Cotton Blends: Traditionally, artist canvases were made of linen or cotton. Poly/cotton blends seek to split the difference between the aesthetic qualities of cotton with the consistency polyester provides. Most of these blends are 60/40 in favor of polyester since the polyester helps ensure that the canvas is consistent in the manufacturing process, and thus prints consistently from roll to roll and lot to lot. No one likes surprises, and a poly/cotton blend ensures that first print will look the same as the 50th print.

Polyester: Typically used for higher-volume projects because it’s less expensive, polyester canvas is smoother than poly/cotton blends or 100% cotton canvas. It’s often used for décor applications, decorative signage and even banners and wallcoverings. Some like the smoother surface for photography reproductions where texture may detract from the image, while artists prefer the texture of a more traditional-looking canvas. While the tactile and aesthetic qualities of canvas – base material, texture and finish – are mostly based on what a given client likes, the economics of production may dictate its use.

Cotton: 100% cotton canvases tend to have the most texture and personality, which is what most people think of when they envision art canvas. But because they are made up of 100% natural fibers, there are more likely to be variations in whiteness, weave and texture from lot to lot. To some printmakers, this variability in the color and look of their prints is an advantage because it gives each print a very original look. That’s great for a custom, one-of-a-kind print, but may not be so great for projects that require consistency from print to print, even shorter-run limited edition prints.

Richard Herschberger Sunset Production Matte Canvas
Sunset Production Matte Canvas is 100% polyester, and as the name implies is geared toward higher-volume production work that still requires quality reproduction.

In addition to the base material, the texture of canvas is determined by the diameter of the threads used to create the canvas and how tightly the threads are woven. The tighter the weave, the less texture you’ll see in the finished canvas.

The ratio of threads on the loom running in the X and Y directions also affects the texture. A canvas with a 2-over-1 weave has more texture than a 1-over-1 weave since there are more loops per square centimeter.

A highly textured base canvas may lose some of its textured look if coatings are applied to change the finish or make it more water- and UV-resistant. Just be aware of this as you apply coatings; the more you apply will fill in the peaks and valleys of the material, altering the texture to a smoother finish.

Inkjet canvases typically range in weight from 16 oz. to 22 oz., though there are lighter and heavier canvases on the market. A heavier canvas will obviously be more durable during stretching and finishing and when it’s handled, but a thinner canvas will usually be more economical. Again, the client may prefer the aesthetics of a heavier-weight canvas or may not care either way.

Finishes: Matte, Satin and Gloss
The finish of a canvas – whether it’s matte, satin (luster) or gloss – is once again almost wholly dependent on what the client prefers, though the lighting environment will be a factor. However, there are certain qualities of each finish to keep in mind…

Matte: This finish is usually preferred for fine art and lighting situations where glare could be an issue. The “problem” with a matte finish is that it has a smaller color gamut. If there are a lot of bright colors that require greater accuracy, a satin or gloss finish may be best. However, adding a gloss coating to a matte canvas can help mitigate this restrained color gamut, and make the images pop more than if they weren’t coated. Still, many matte canvases have a good color gamut that will work well in most applications.

Satin: As the name implies, you’ll get a nice satiny sheen with this finish that is not as susceptible to glare, but expands the color gamut. You’ll typically choose this finish simply because the client likes the look of it.

Gloss: This is a great option for canvases designed for solvent or latex printers because you can print and skip the coating step, saving time and money in the process. For aqueous printers you have to be extra careful when you stretch as a gloss inkjet coating is more likely to crack. For artists who prefer a matte finish but are especially picky about hitting their colors as closely as possible, you can print to a gloss canvas and apply a matte coating.

Sunset by Fredrix Matte Canvas
Sunset by Fredrix Matte Canvas is OBA-free, but with a brighter white point than most OBA-free canvases on the market.

OBAs and Archivability
Optical brighteners, or OBAs, have been used in traditional photo papers since the 1950s and photographers have had a love-hate relationship with this additive ever since. While increasing the whiteness and thus the color pop of printed images, many are concerned that this decreases the archival qualities of the print.

Archival specifications are defined by various international institutions such as ISO, DIN, and the Library of Congress. Within the specifications, there are allowances for chemical additives to brighten and stabilize papers.

Many of the most popular fine art papers and canvas on the market today utilize optical brighteners to create consistent color base materials. These papers have been tested by various organizations, such as Rochester Institute of Technology, Wilhelm Imaging Research, and others, obtaining 100+ year ratings.

For a more thorough discussion of this topic, click here to read an article by Dr. Ray Work, To Brighten or Not to Brighten.

For the rest of this series, click on the following links:

Part 2: Printer Technologies for Canvas

Part 3: Latex, Solvent and UV-Curable Printing

Part 4: Coating Canvas

Part 5: Canvas Wrap Options