How to Print from the New Photoshop CS6 to Epson Printers

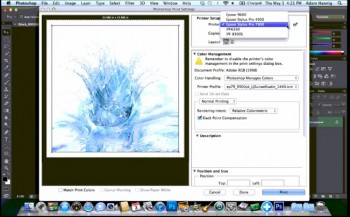
Printing through Photoshop CS6As noted yesterday here at the LexJet Blog, Adobe officially released its latest Creative Suite, CS6. Photoshop CS6 has a bevy of new features designed to improve and supplement the photo editing workflow.

New features include: Content-Aware Patch, Mercury Graphics Engine, new Blur Gallery, new Crop Tool, preset migration and sharing, Adaptive Wide Angle, Background Save, Auto Recovery, Adobe Camera RAW 7, Content-Aware Move, Scripted Patterns, and a whole lot more. Click here to see all the new features and what they do.

And, as with all new software releases, the new version will change your print workflow slightly. So, our technical guru and video producer, Sean McGettigan, has put together a series of videos to show you the new print process in Photoshop CS6.

Yesterday, Sean went through the printing process from Photoshop CS6 to Canon iPF inkjet printers. Today, he shows us the process with Epson printers for Mac and PC, in that order, in the videos embedded below. As always, if you have any questions about printing through Photoshop CS6 or anything else in the print workflow, contact a LexJet account specialist at 800-453-9538. We’re here to help…

How to Print from the New Photoshop CS6 to Canon iPF Printers

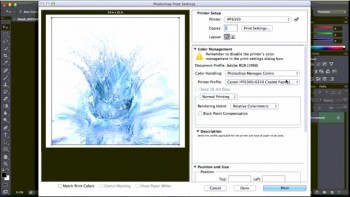
Printing from Photoshop CS6 to Canon printersToday, Adobe released its latest version of Photoshop, CS6. While there are many great new features that I am sure will be discussed all over the Web, the main things I wanted to make you aware of are some minor changes to the printing workflow.

While all of the selections that are made in CS6 are the same as version CS3 through CS5, the print window has had a cosmetic upgrade and things were moved around a bit.

Embedded below in the order shown are two videos: Learn how to print to a Canon iPF printer with Adobe Photoshop CS6 using a Mac and a PC. Keep an eye out tomorrow for the same videos for use with Epson Stylus Pro printers.

How To Video: Streamlining Workflow with Onyx Software Plug In

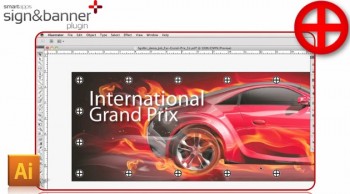
Software for sign and banner production workflowIf you’re looking for a tool to help eliminate production bottlenecks, SmartApps Sign & Banner Pro from Onyx is a plug-in for Adobe Illustrator that helps users streamline the sign and banner workflow. With Sign and Banner Pro you can:

  • Set up grommet/eyelet and fold marks for fast banner finishing
  • Set up bleeds beyond Adobe Illustrator’s limitations
  • Create banners with all finishing marks to scale

In the videos embedded below you can learn more about the benefits of Sign and Banner plug-in and how to use it…

Warning! Look Before Leaping with Lion

Compatibility issues with Mac Lion OS 10.7The warnings are rolling in from various graphics software developers about incompatibilities with the new Mac operating system, Lion 10.7. As with any new OS release there are legions of detractors and supporters. Either way, it really doesn’t matter, because it’s the new OS and eventually the din of software punditry will die down as Mac users migrate to Lion 10.7.

However, if you’re making the leap you’ll need to check in with your software vendors to find out what the compatibility issues are at this point. For instance, ColorByte, developers of the ImagePrint RIP used primarily for photographic and fine art printing, released a statement that Versions 8 and older of the software are not compatible. A new version, 9 to be exact, is expected to be released next month and will be compatible with Lion. If you purchased Version 8 after April 15 the upgrade to the Lion-compatible version will be free.

Software compatibility issues with Mac Lion OS 10.7Large-format production RIPS – like ONYX and Wasatch – are immune since they only run on a PC. However, if you have a large-format production RIP on a Mac, expect issues and even complete incompatibility. Once again, check with your software vendor for specifics.

If you’re printing through the printer driver, make sure to touch base with the manufacturer of your printer. Canon for instance, has a list of updated driver releases for its line of large-format printers, which you can find here. For Epson, click here, and for HP, click here.

Adobe has issued a list of compatibility issues for its suite of products, including Acrobat, Illustrator, Lightroom and Photoshop. Click here for the full list of issues.

If you run into any problems, contact a LexJet customer specialist at 800-453-9538, and they’ll run down the issue and find an answer for you as quickly as possible.

How to Print from a PDF with an Epson Stylus Pro Printer

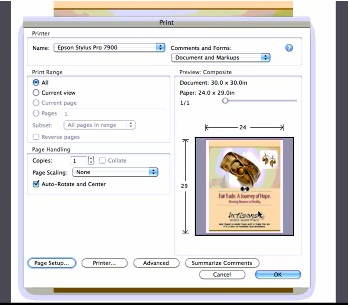
The workflow for printing a PDF from Adobe Reader with an Epson Stylus Pro printer is a little bit different than the typical workflow used in Adobe Photoshop or Adobe Illustrator. Unlike printing from either Photoshop or Illustrator, printing directly from a PDF does not allow you to use an ICC profile with an Epson printer.

How to print from a PDF to an Epson printerWithin the Epson driver you can only select a media type, so you have to select one that’s closest to the media you’re printing to. For example, if you’re printing to Sunset Photo eSatin Paper you would want to select Epson Premium Luster Photo Paper (260) in the driver. If you’re at all confused about which media type to select, you can always consult with your LexJet customer specialist (800-453-9538).

In the videos below you will learn the workflow for printing directly from a PDF to an Epson Stylus Pro Printer using a Mac or a PC, in that order:

Inkjet Printing Workflow: Tiling Images for a Large Display

There are two methods for tiling images to create a large display. First, you can use software like Adobe InDesign, Illustrator or Photoshop to crop the image down into individual sections for print. However, the easiest and most efficient way I have found to do this for printing is in a RIP software.

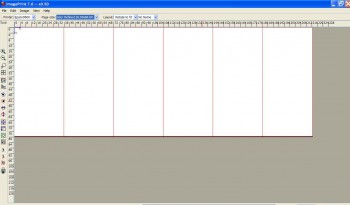
Here, I want to cover an 18-ft. wide x 80-in. tall wall. I'm printing on a 36-in. wide roll of media, so I need six tiles of 36 in. x 80 in. to complete the graphic.

Tiling is a pretty common task for the signage industry, so RIPs for that industry seem to handle tiling best. If you’re running Onyx, for example, you have a lot of control over how you tile large images.

ImagePrint, which is more geared toward photographic and fine-art printing, has a more simplistic version of tiling that will also allow you to perform this task. Think of the sign industry RIPs as more industrial for large production runs, and ImagePrint as more custom, for shorter runs in a photographic/fine-art workflow.

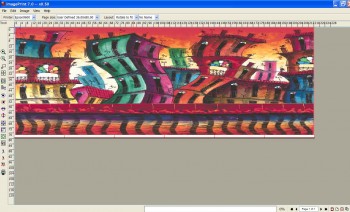
In ImagePrint, you simply fill the tiles with the image you plan on breaking up into panels, and hit print. It's that easy!

Either way, a RIP will make all the difference in the world for the quality of your images, and the efficiency and profitability of your workflow, including tiling large images together.