 As I examine the pricing that photographers charge, I find a serious lack of consistency across the board. That is why I have decided to do a quick two-part series on pricing. The next part will appear tomorrow morning here at the LexJet Blog.
Many photographers and fine-art producers base their pricing on the square foot cost of the material and ink. It is an easily measureable cost, so I understand why this is the trend. But there are many other factors that should be considered when setting up your pricing structure.
For example, labor should also be considered, as I will illustrate in the first part of this two-part series. The next installment will provide two other methods of tweaking the pricing structure in order to make more money.
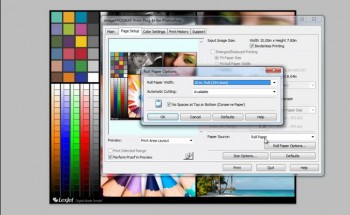
Epson and Canon large format professional printers have the ability to print borderless left to right, and cut top to bottom to bleed. To find out more about how to print borderless, go to the following posts at the LexJet Blog:
Borderless Printing through Photoshop and the Epson Driver
Borderless Printing through Photoshop and the Canon Driver
Borderless Printing through the Canon Plug-In
Check your Tech Data Sheet to see which sizes your printer can print borderless, and purchase rolls in these widths. For example, if you are printing on a 10-in. roll on an Epson Stylus Pro 7900, the printer can drop perfectly trimmed 8x10s in the basket for you. There is no trimming labor involved with frame sizes that have one dimension the same length as a roll you have loaded, like in the previous example.
Also, it is very simple to make one cut in between to frame sizes that are half the width of the roll. For example, if you print two 5x7s on a 10-in. roll with double cut on, then you will only need to make one cut in between the two for perfect 5x7s. Therefore these sizes should be promoted to your market.
The frame sizes that don’t fit these parameters should be priced significantly higher for two reasons: 1) To cover the additional cost of labor involved with trimming, and 2) To discourage the customer from ordering these sizes. Here is a quick example of how a pricing structure should look to encourage customers to use the sizes that are most profitable for you:
2 – 4x6s = $10.50 ($31.50 per sq. ft.)
2 – 5x7s = $10.00 ($20.57 per sq. ft.)
1 – 8×10 = $11.31 ($20.57 per sq. ft.)
By making the 4×6 more expensive than the larger 5×7 and barely cheaper than the 8×10, the customer is sure to pick the 5x7s or the 8×10. If they really need the 4×6 size, it is still offered, but at a price that covers the additional labor involved.
Your customer may ask why the pricing seems out of line. I would respond to them with honesty, but in a manner that does not reveal your exact methods. A good example of a response would be, “Unfortunately, a 4×6 is an odd size in my photographic process, so it costs more to produce that particular size.” This is a simple response with which your customer can relate.
By adjusting your pricing slightly you can encourage your customers to purchase the products that are the easiest for you to produce. This should decrease your labor costs and increase your profit per print, which will have an immediate impact on your bottom line!
