
Guest blog by Billy Elkins
Large-format photography is a five-part process. In the last blog, I talked about communication being key. We will cover the five-part process and then walk through a real-world scenario that will show just how important that is.
1. Communication with the client. Ask the client how and where the photos will be used. Try to visit the location, if possible. What is their vision? Are there any restrictions to size or are there any obstacles in the way? It is our job as the photographer to gather this information.
2. Communication with the printer. Ask the printer to go over the specifications that they need from the images. Will they be building the final file? What size and type of files do they prefer? Will they be providing proofs to client before printing?
3. Create the image. You need to satisfy the clients needs, but within the specifications of the printer. Any time that all three — you, client and printer — can be together to discuss the details of the project the better.
4. Printing. My background is in large-format printing and I have seen and worked with many types of output devices and media. It has helped to give me more insight into what my photo will ultimately turn into. Having an understanding of the printing devices helps in not only image capture but preparation of the final files may differ depending on the type of output device. This part is just as important as understanding the camera, lens, and software used to create the image. Often this part is overlooked by many photographers.
5. Installation. You may wonder why that part is important to the photographer? It does several things that are beneficial. If you have never seen an installation go up, it is pretty amazing to watch. This is where all the technical parts come together. To see an image that is merged from many images on a computer screen to see being installed at full size (over 40 feet) is incredible. Seeing how the installers work and put the image together helps me envision the final product as I work on the various steps along the way.
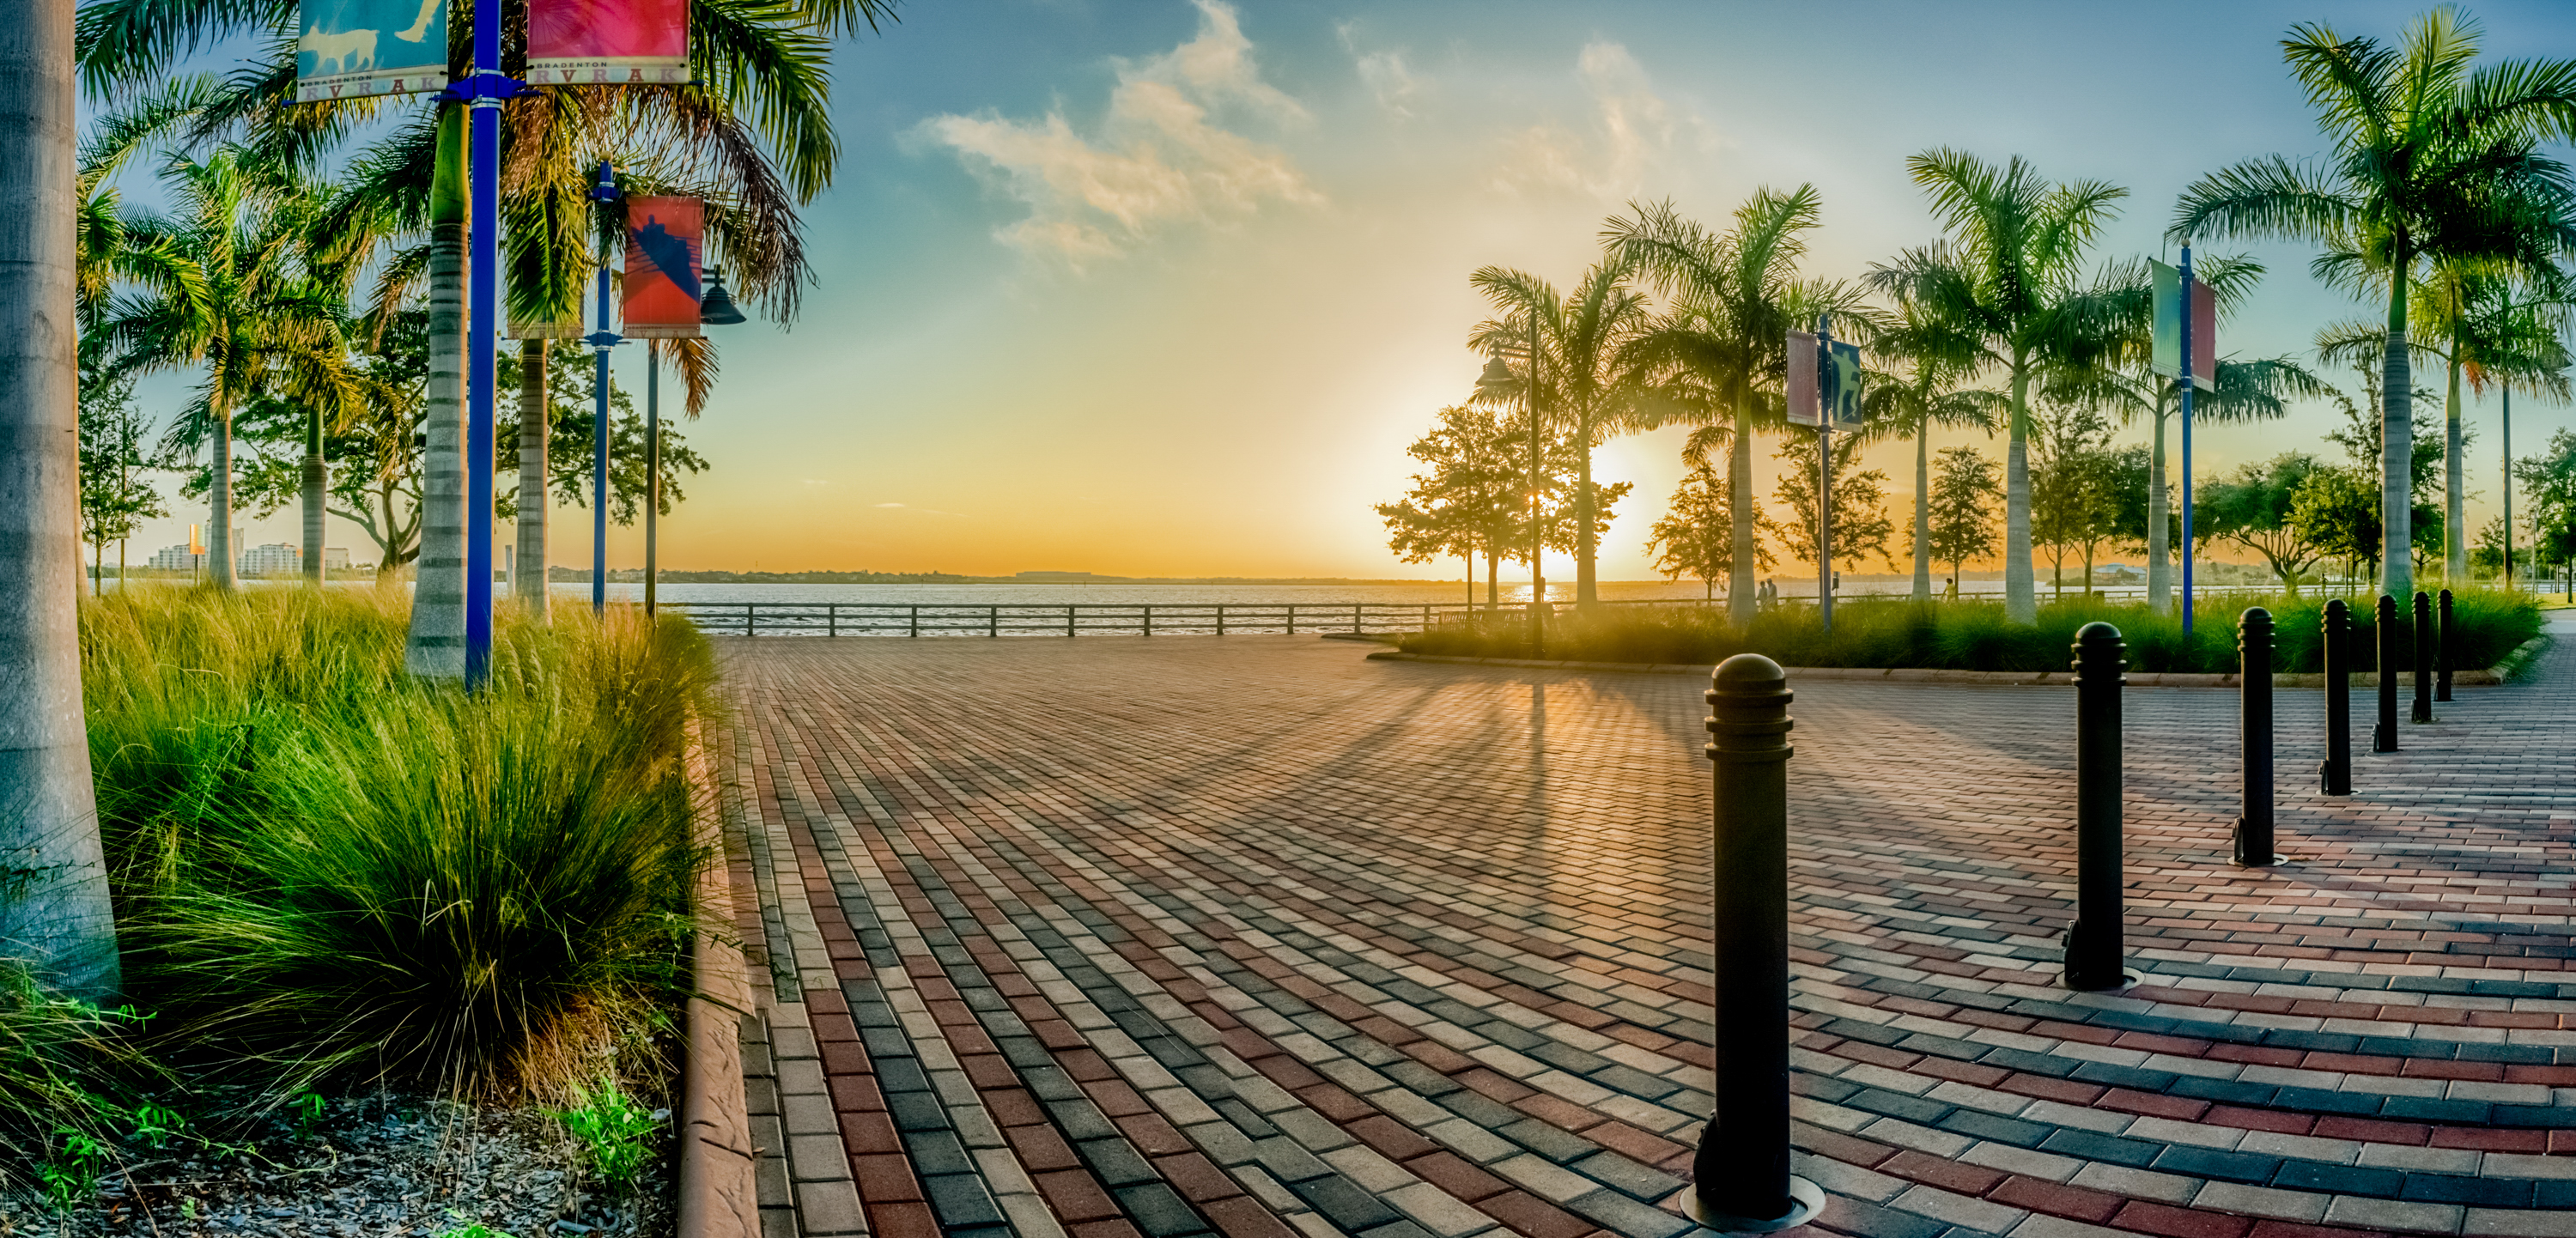
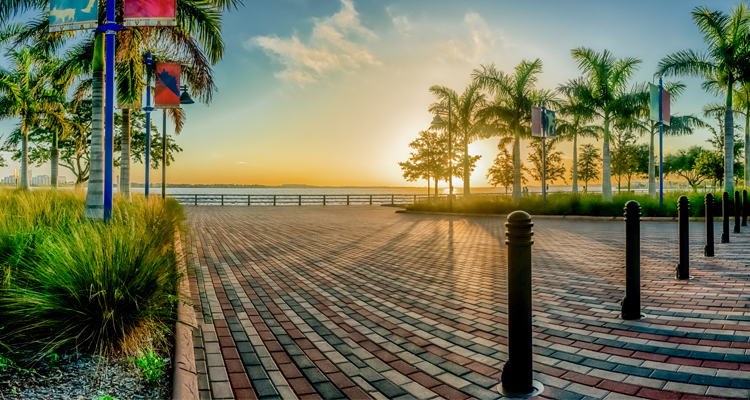
The example below was for a large format installation at the Sarasota International Airport. The client was advertising on the back wall directly behind the baggage claim area. The final installation included wall graphics and 3-dimensional cutouts, as well as 360-degree image wraps around columns. The full wall area was 971” x 103.5”, and the image I needed to create was 415”x 103.5”.
The scope of the job was not very difficult, but I was brought in after the original photographer was not able to provide large enough files. In this case, I was contacted by the printer to see if I could create the image at the size they needed. We went over all of the details and I was given the exact location of what needed to be photographed.
Technical details:
- Camera – Nikon D800
- Lens – Nikkor 24-70mm f/2.8
- Focal Length – 24mm
- F-Stop – f/11
- Shutter – 1/160
- ISO – 200
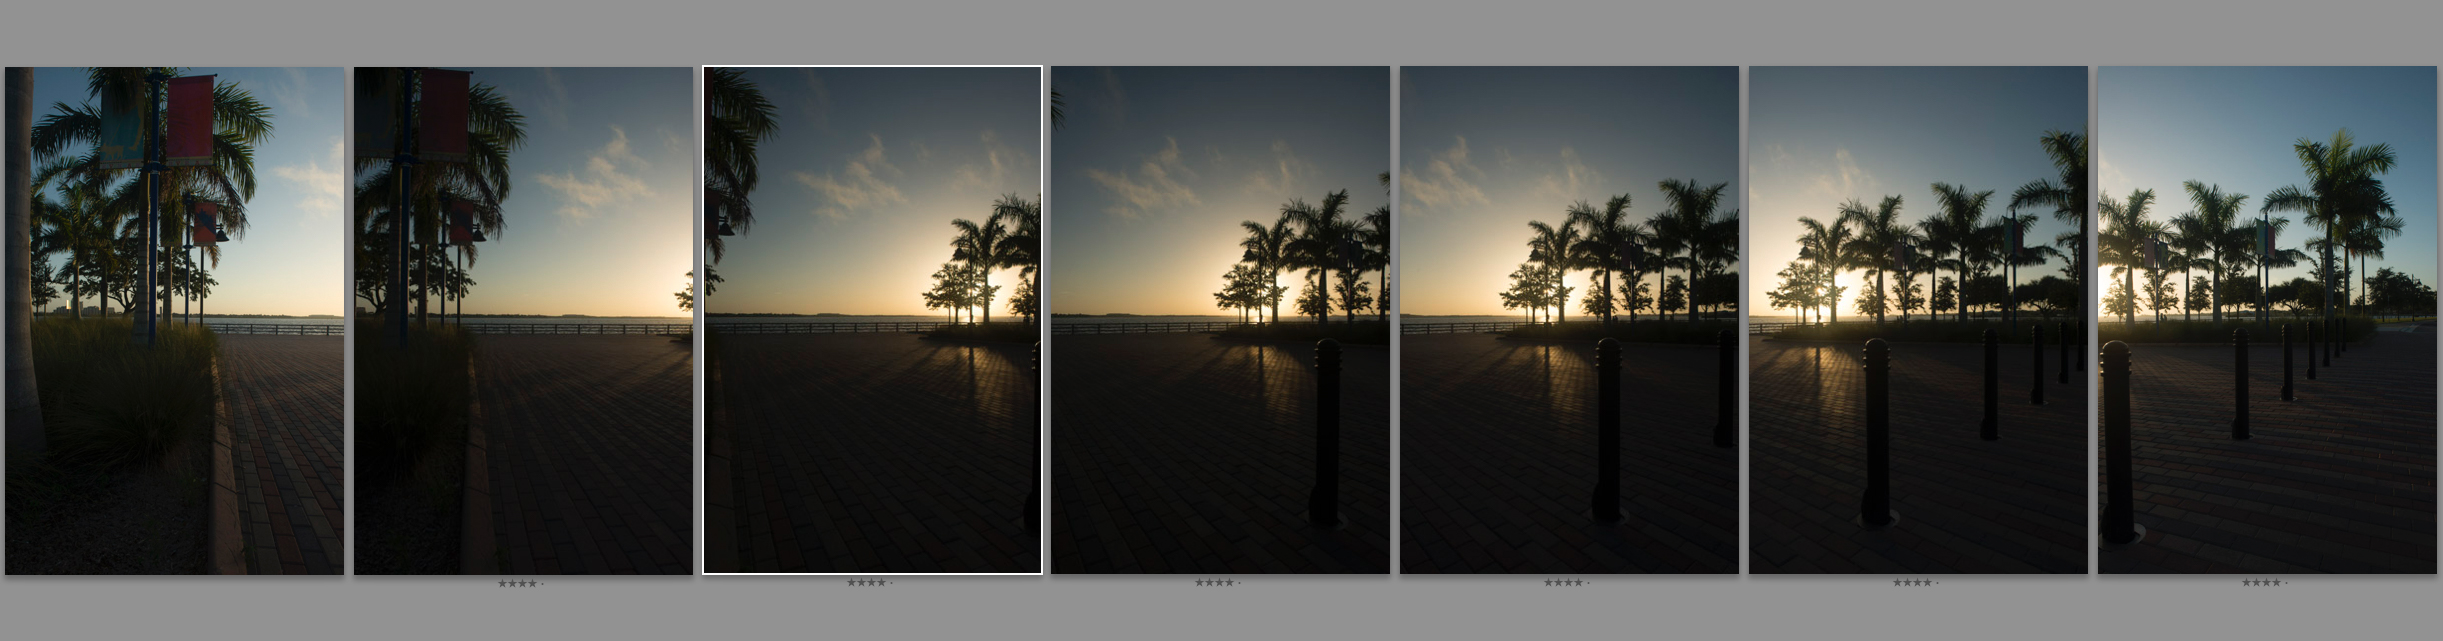
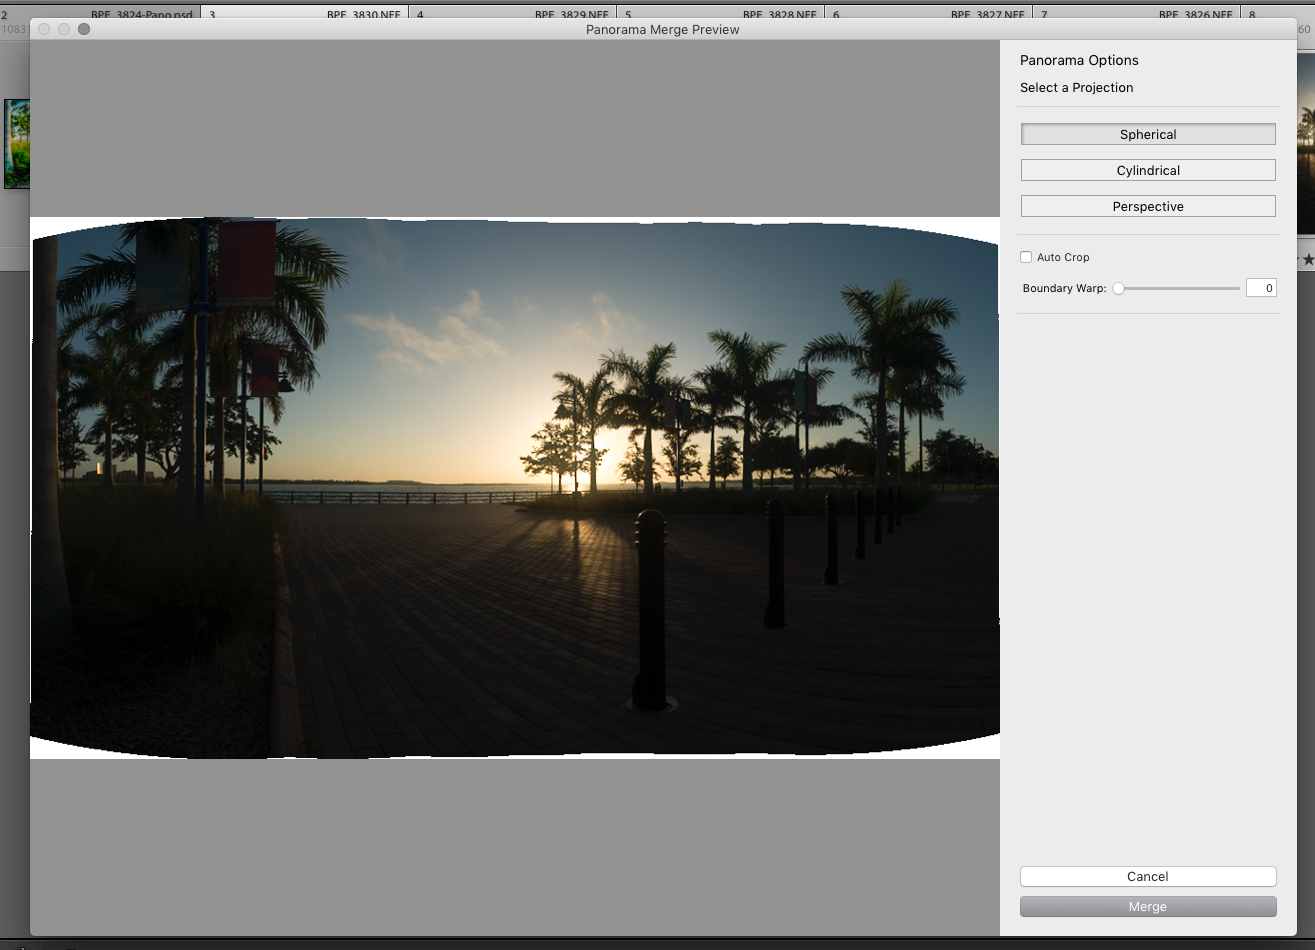
- Frames – 7 overlapping NEF files
- Final image size – 10830ppi x 5200ppi
The image was merged using Adobe Lightroom CC Photo Merge and then brought into Adobe Photoshop to add some minor effects that the client requested.
I provided a final layered PSD file to the printer so they could make any further adjustments, if needed, for printing. The final print resolution was 32dpi. Yep, 32dpi! Click on the photos below to see how the project came together.