NEW: Exclusive Knowledge Center for LexJet.com Users

We know it’s not always convenient to jump on a call to troubleshoot a technical issue, that’s why we compiled more than 100 answers to common problems on our all new Knowledge Center.

If you’ve got an issue with a print or a printer, you can easily find a solution on the new Knowledge Center by reviewing the content under your equipment brand, including Canon, Epson, HP and more.

This exclusive content is available to registered online LexJet.com users. Don’t have an account? No sweat. It only takes a minute to register. Just head over to LexJet.com and click on Log In and you’ll get an option to register.

Once you’re logged in, find the Knowledge Center under the user menu drop down. Watch the video above to learn how it all works.

Of course, we’re here to answer any technical questions you may have, so give us a call at 800-453-9538.

The LexJet Difference: Wayne Thursby, IT Specialist

Employees that make a difference for customers and other employeesEach month, LexJet’s employees pick a co-worker who embodies The LexJet Difference, which ultimately means enhancing the customer and employee experience. This past month Wayne Thursby, LexJet’s IT specialist, was selected.

Wayne is instrumental in making sure that LexJet customers get the service and support they need from their customer specialists. He’s a firefighter of sorts, stomping out the blazes that inevitably erupt with complex computer and phone systems.

As one fellow LexJet employee put it: “My laptop was completely shut down. I shipped it off to Wayne and he diagnosed the issues and even spent hours of his personal time in the evening to get the computer fixed. Wayne did not just fix the laptop issues, he also made sure that I was able to get up and running, remotely, from another computer. He took the time to help me install all the programs I needed to be able to function and not fall behind. He showed true dedication to LexJet, his fellow employees and made a lasting impression on me. This is a great example of an employee that defines our culture.”

With his usual humorous humility, Wayne says, “They hide me in the basement and I keep things running.” In reality, Wayne is everywhere in the office or on the phone with remote workers, helping ensure that LexJet’s systems run like a well-oiled machine for the ultimate benefit of LexJet’s customers.

“I have the same attitude as the customer specialists do when they’re on the phone with a customer. I’ve worked in IT departments where the users are looked at as a problem to be managed, or cats to be herded, but it’s different here,” Wayne says. “You feel weird if you wake up on the wrong side of the bed and don’t have a positive attitude, because the atmosphere at LexJet is so positive. The challenging part of this job for me isn’t the desktop support and the computers. I know all that stuff; it’s everything else we do at LexJet because I see that everyone around here does more than their job title. I see it as an opportunity to learn all the different roles, how the company works as a whole and what makes a great company great.”

Thanks for your excellent service, Wayne, and your dedication to exemplifying what The LexJet Difference is all about. Find out more about Wayne, what he does and his approach at LexJet in the video embedded below…

HP Latex Printers and Onyx X10: Troubleshooting Ink Smudge Issues

Troubleshooting HP latex printersWhen printing to the HP L25500, L26500 and L28500, the heat settings play a crucial role in producing a quality print. While profiles are made to work for all users, different environmental factors can impact how a profile performs. For example, a profile that is made in an environment where there is high humidity may not work the same in a place where there is very low humidity.

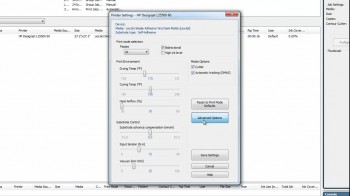
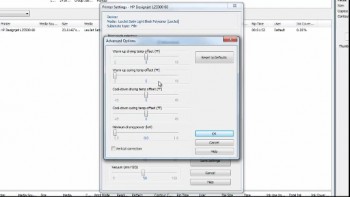
If you are experiencing ink smudges on your latex prints, you may need to adjust specific heat settings. The location of the smudging on the print will determine what settings need to be adjusted in the Onyx Media Profile.

In the videos embedded below, learn how to fix the following ink smudging issues by adjusting the Media Profile in Onyx X10:

HP L25500 Latex Printer and Onyx X10: Troubleshooting Ink Smudges

How to troubleshoot HP latex printerThe HP L25500 dry and cure heat settings are two key components in the printing process of this latex printer. A heat setting that is too high might cause thermal marks to appear on the substrate as vertical bands in some colors or it may wrinkle the material, also causing vertical banding or defects like bubbles to appear. Using the correct ICC profile with the proper heat settings is extremely important in getting a quality print and avoiding reprints and wasted material.

One of the more common troubleshooting issues that we have seen with the L25500 has to do with the smudging of ink and is typically caused by a curing temperature that was set too low. If after printing you are able to smudge the ink on the entire print, you will need to increase the curing temperature in five-degree increments. If you are only able to smudge ink on the first eight inches of a print, only the warm-up curing temperature will need to be adjusted.

In the videos embedded below, learn how to adjust the curing temperature and warm-up curing and drying temperature offset in Onyx X10 to fix ink smudging issues.

Troubleshooting Common Problems with Pressure Sensitive Laminates

How to laminate graphics with PSA laminatesThe four most common problems that laminator operators run into when using pressure sensitive laminating films are print curl, infeed waves, silvering and tunneling. In the video embedded below you can learn about the main causes of these four problems and the steps that can be taken to avoid or eliminate these issues.

As always, if you have any questions, please feel free to contact a LexJet Customer Specialist at 800-453-9538.

How to Perform a Head Cleaning on a Canon Inkjet Printer

A couple of days ago we posted a video that shows how to do a nozzle check on a Canon large format inkjet printer, which is the same process for the Canon iPF5100, iPF6100, iPF8000S, iPF9000S and iPF9100 printers.

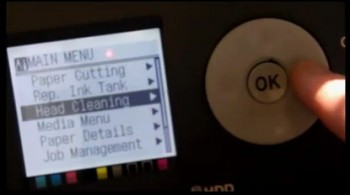
As mentioned in the previous post, we promised a follow-up video showing how to perform a head cleaning on the Canon printers, which is the next step if you identify a problem with the nozzle check. It’s important to note that you should only perform a head cleaning if you find an issue through the nozzle check; a head cleaning should always be preceded by a nozzle check.

After you perform a head cleaning, always follow up with a nozzle check to make sure it worked. If it didn’t, repeat the process. If you go through the nozzle check/head cleaning process about five or six times there’s likely something else wrong. However, this is very unusual and the printer will almost always let you know if the printheads need to be replaced (click here to see the video on how to replace printheads).

Most of the processes detailed in the videos, including the nozzle check and head cleaning, are not quite the same for the latest generation of Canon printers – the iPF6300, iPF6350 and the iPF8300. They use the same menu options, but the path to get there is slightly different. We’re working on these and will let you know when they’re available.

If you have any questions or need help troubleshooting anything, give us a call.