Video Tip: Create 3D Floor Graphics with Photoshop

You can give your floor graphics the appearance of coming right out of the ground with this step-by-step video that walks you through manipulating your graphic using Photoshop.

shark attack!To create anamorphic art with a 3D illusion, you’ll need to download the LexJet Anamorphic PSD Template. You’ll use this along with your original graphic file to make the magic happen.

The video above shows you how to:

  • Size your graphic
  • Work with your graphic in the template file
  • Maintain image resolution
  • Morph the image to the proper perspective
  • Create a path for contour cutting
  • Save your ready-to-print file

Use a one-step, self-adhesive product like panoRama Walk & Wall for an easy-to-install, slip-resistant floor graphic that will really stop people in their tracks.

Video Tip: Install Floor Graphics Using the Hinge Method

Floor graphics are becoming more popular in retail spaces, with new products that make installation as easy as 1, 2, 3: print, peel and stick.

In the video above, we demonstrate an easy hinge method to keep the graphic in place while you apply it to the floor. All you’ll need is your printed graphic, painters tape, a squeegee and a pair of scissors.

To install the graphic, simply:

  • place the graphic where you want it
  • create a hinge in the center of the graphic
  • peel the liner away from the top hinge and trim it off
  • squeegee the exposed adhesive from the center out
  • remove hinge and repeat those steps on the bottom half of the graphic

LexJet offers a variety of products that work with this quick and easy method. They include:

LexJet Print-N-Stick Fabric: Photographic image quality with high ink saturation

LexJet Solvent Print-N-Stick Fabric: Smoother weave with satin sheen for photographic detail

panoRama Walk & Wall: Slip-resistant certified without a laminate

LexJet Simple Indoor FloorAd: Durable solution that can withstand heavy floor traffic

LexJet Extreme AquaVinyl w/PSA: Long-lasting, waterproof with permanent adhesive

Photo Tex PSA Fabric – Aqueous: Won’t rip, wrinkle or shrink

Photo Tex PSA Fabric – Solvent: Great for windows and walls, too

How To Video: Canvas Corner Folding Options

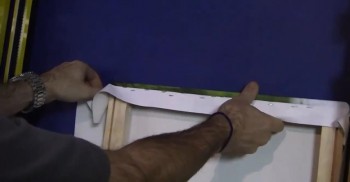
Canvas Corner Folding OptionsWhen using the Canvas Stretch Master or Studio Canvas Master, there are a number of different options for folding canvas corners. Three of them are:

Gift-wrap fold: the easiest and fastest of the three folds.

Straight-edge fold: Tends to be neater but takes a little bit longer than the gift-wrap fold.

Alternate straight-edge fold: Takes the longest amount of time due to trimming off excess canvas in the corners before stretching but tends to be the neatest of the three folds.

In the video embedded below, learn how to make three different canvas corner folds.

To learn more about the Canvas Stretch Master and Studio Canvas Master, you can check out these videos:

Canvas Stretch Master Demonstration

Studio Canvas Master Demonstration