Dan Berg Offers Hands-On Instruction in Finishing Canvas Prints

If you want to learn how to convert images printed on canvas into ready-to-hang prints, contact Dan Berg to schedule a full-day of one-on-one, hands-on instruction. Whether you simply want to convert a few of your own images into wall art or create high-quality canvas prints for sale to others, Dan can show you how to:

  • Process the image specifically for printing on canvas;
  • Select the right canvas for the specific image you want to print;
  • Choose the correct print settings on a 24-in. Epson Stylus Pro7900 and 44-in Epson Stylus Pro 9900 inkjet printer;
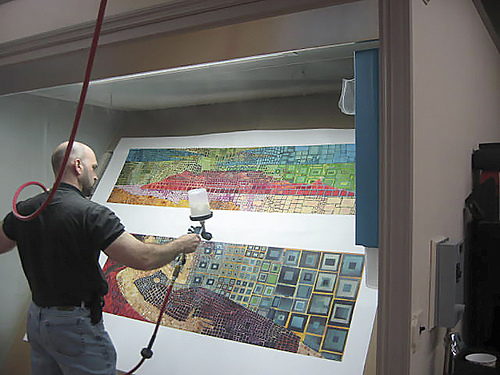
  • Use a roller or spray gun to evenly apply a coating that protects the canvas from UV light and moisture;
  • Cut and assemble stretcher frames for panoramic or custom-size prints;
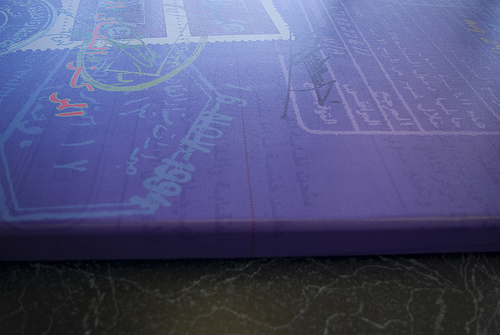
  • Gallery wrap canvas by hand or machine;
  • Mount canvas to Gatorboard; and
  • Make the print look more like a painting or achieve special artistic effects by brushing on clear acrylics.

Photo Book and Exhibit on Ferrari Testarossa

Photographic artist Duane Conliffe, who was profiled in Vol. 3, No. 5 of LexJet’s In Focus newsletter, is proud to report he is  one of the featured artists at The Art of Living Black Exhibition at The Richmond Art Center in Richmond, CA from Jan. 26-March 13.

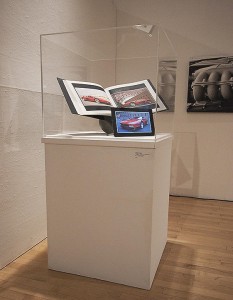
The first major public exposure of the exhibition will take place Saturday, Feb. 20 during an artist’s reception.  Conliffe’s portion of the exhibition is built around Redhead—The Ferrari Testarossa Art Photography Book that he produced earlier this year.

“The Redhead project began when a San Francisco car collector asked me to create a very special, high-quality book about one of his prized vehicles, the 1988 Ferrari Testarossa,” explains Conliffe. “He was looking for something unique to express his appreciation for the extreme levels of craftsmanship throughout this car as well as the superb quality of the driving experience.”

 Conliffe believes he was approached to create the one-of-a-kind book, because of his combination of experience photographing motorsports, auto and motorcycle events and expertise in bookmaking. He was honored to accept the project.

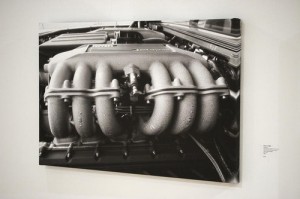
 “The Ferrari Testarossa was named after the Testa Rossa sports racing car series from the late 1950s,” says Conliffe.”And in fact, Testarossa means Redhead in Italian. This ‘redhead’ in the sports car refers to the red painted camshaft covers on the 12 cylinder engine.”

 Conliffe photographed the Testarossa in four sessions over a nine-month time span. He shot the exotic sports car at various locations in San Francisco and Alameda, CA, with the intention of telling the story of the car through purely visual means.

 “The handcrafted details of the Testarossa are great subjects for any photographer,” notes Conliffe,“but I also wanted to portray the driving experience through my photography because that is what an extreme sports car like this is made for.”

 After all the images had been captured, Conliffe spent several weeks in editing, post processing and book design. He paid a lot of attention to the sequence of images on the pages in order to create the right visual flow for the viewer.

  He also wanted full control over how the final images looked, so he printed all 75 color plates for the book himself, using his Epson Stylus Pro 9800 with Epson UltraChrome K3 inkset.

 “In my opinion, the ultimate expression of the photographer is the fine art photographic print. So one of the goals of this project was to use my digital-printing skills to create unique high-end artwork,” says Conliffe. The book pages were printed on Moab Entrada 190 gsm, 100% cotton, double-sided, bright paper. The finished pages were mounted into the Moab Chinle Digital Book black leather cover.“This makes a first-class presentation when finished off with the black slip-case that is provided with the book cover.” notes Conliffe.

 Judging from the reactions he got from his colleagues in photography and art, he realized that the book project was really something special.

 “So, I decided to expand the scope of this project,” said Conliffe. “I decided to present the book as part of an annual fine-art exhibition that I have participated in for the last seven years.”

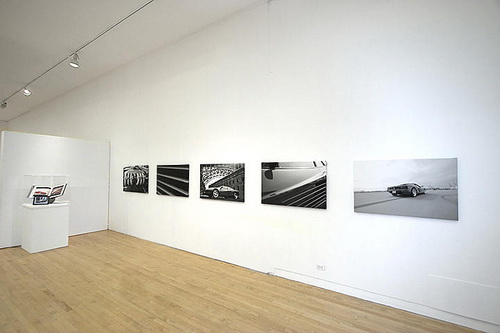
 Visitors to the exhibit at The Richmond Art Center will see the one-of-a-kind book on display, but they won’t be able to thumb through its pages. Instead, Conliffe has set up an HP Dreamscreen 100 digital display to run a continuous slideshow of all 75 images featured in the Redhead book. In addition, he converted five of the best images from the book into 26 x 40 in. black-and-white prints. He output the prints on LexJet Sunset Select Matte Canvas, then coated and stretched them himself.

In keeping with the Art Center gallery hours, the HP Dreamscreen 100 is programmed to turn itself on at 11 am each day and shut itself off at 5 pm.

 “It tends to draw viewers in because it is a dynamic display with a very sleek design,” says Conliffe. “It readily complements the quality of the “Redhead” photography and the ultra-stylish nature of the subject matter.”

 Conliffe reports that the black-and white canvas prints have also drawn serious interest: “Black-and-white imaging has universal appeal,” he says. “Photographers, artists and the general public all seem to have a great affinity for this work. I noticed the same phenomenon last year when I presented a large-format black-and-white portrait photographic exhibition on LexJet Water-Resistant Satin Cloth.”

The canvases are protected with Golden Archival Varnish with UVLS (Gloss). “I sprayed the varnish in two cross-directional coats, let the coats dry for 20 minutes, and then sprayed with two more cross directional coats,” explains Conliffe. “Then, I let the coated canvas dry overnight. After the canvases were dry, I stretched and mounted them to heavyweight stretcher bars and installed hanging hardware. This presentation is very clean and has a lot of impact.”

 On Saturday, Feb. 20, Conliffe is participating in the Artist Talks from 1 to 2:30 pm before the Artist Reception is held from 3:00 to 5:00 pm. More information can be found at The Richmond Art Center website.

 Conliffe is also participating in a satellite exhibition that features 13 of the 53 artists showcased at The Art of Living Black exhibition. This show will be held at Mills College in Oakland on Feb. 27 and 28.

He wouldn’t mind at all if this exposure resulted in other art-book commissions from other car collectors. He can reached through his website: www.DuaneConliffe.com

Using a Foam Roller to Apply Sunset Coatings to Inkjet Prints on Canvas

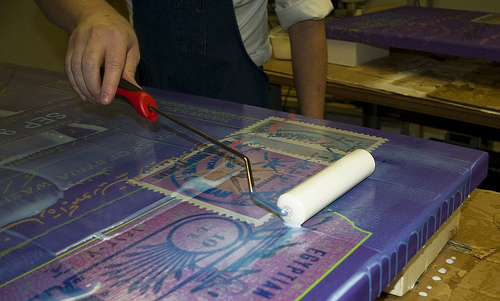
A previous post on this blog talked about Clearcoating Inkjet Photo and Art Prints and LexJet’s Sunset Gloss and Sunset Satin Coatings.  It was noted that LexJet Sunset Coatings can be applied with either a spray gun or foam roller. Below are a few tips for using a foam roller to apply a smooth, even coating. 

Photo: BWO Print Studio and Photo Lab, Oklahoma City

Note that the effectiveness of these techniques may vary depending on the humidity and temperature of your working environment.  It may take a little practice and experimentation to find the touch and technique that works best for your studio.

1. Start with a high-density, white foam roller and a tray that is typically used for holding paints. You can buy these products in the paint department of any home-improvement store. The high-density foam will help reduce bubbles.  Use a larger-width roller if you plan to coat larger canvases. 

2. Pour the coating into the tray and dip the roller in the coating until it is thoroughly wet, but not too wet.

3. Lay your print on a clean, dust-free board that is bigger than your print.  The extra space on the surface around the print can be used to roll off excess liquid if you happen to oversaturate the roller.

4. Consider using two or three thinner coats, instead of one thicker coat.

5. Don’t try to coat the whole print at once. Start with one or two passes at the edge of the print, and go over each pass enough times for the bubbles to dissipate, but not so many times that the coating becomes tacky or bumpy.

6. If large bubbles appear, try blowing on the coating.

7. Make overlapping passes so you can maintain a wet edge and avoid lines and streaks.

8. Find the rolling pattern that works best for you.  Some users prefer rolling in one direction only.  They go up the print in one pass, and down the print in the second pass (like mowing a lawn).  Others will apply enough coating at once to roll it out in a few different directions until the excess rolls of the side. They then roll smooth passes, alternating horizontal and vertical passes.  While the coating is still wet, they use the side of the roller or a brush to smooth the coating on the edges of the stretched canvas print.

9. Don’t press down on the roller. Maintain a light, even pressure.

10. If you are applying a second coat, allow the first coat to dry before applying the second coat. A thin coat should take about five minutes to dry. But it will take longer if you’re working in an environment with high humidity.

11. Allow the coated print to dry thoroughly before you pack it for shipping. Don’t try to speed up the drying process with a fan; allow the print to dry on its own.

12. Clean the rollers immediately after each use. Run cool water of the rollers immediately after use, and squeeze them until they run clear. Allow 10 to 15 minutes.  If you keep the rollers clean, you can use them for about six months before you need to replace them.

If you have any questions about how to apply Sunset Coatings, please contact a LexJet account specialist at 800-453-9538.

Tips for Applying Hahnemuhle Protective Spray to Inkjet Prints

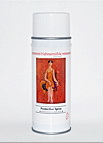
HahnemuhleProtectiveSprayHahnemuhle Protective Spray is a non-toxic, spray-on coating that is particularly well-suited for photographers and artists who need to protect small quantities of prints produced on desktop photo printers. The spray seals the print surface and protects it from dirt, fingerprints, moisture, and other environmental hazards. While the spray makes prints more resistant to water, scratches, and the damaging effects of UV light, it is completely transparent and doesn’t influence the colors on the paper.

Product literature that Hahnemuhle distributed at their booth at the PhotoPlus Expo show in October included some practical advice for using the spray:

•         Spray the coating directly onto the image and allow it to air dry.

•         To ensure that the print is fully protected, apply three light coats: one vertical, one horizontal, and one corner to corner.

•         To provide maximum protection to prints that won’t be mounted or framed, apply the coating to both the front and back of the paper.

•         Use the spray to protect both glossy and matte prints. The finish of the spray mimics the base media, meaning that a gloss or luster paper will remain glossy or lustrous even after it has been sprayed. A matte paper or fine-art media will absorb the spray into the surface, retaining the non-reflective finish of the surface.

According to Hahnemuhle, each 400-ml aerosol can will provide two to three protective coats on up to twenty 8.5 x 11-in. images.

At LexJet, we encourage customers to apply the coatng in a well-ventilated area. We also recommend spraying a light coat on some small test prints first to get a feel for how much you should apply and how much time it takes each coat to dry.  

You can order Hahnemuhle Protective Spray from LexJet or through the accessories section in the online store on the www.hahnemuhledirect.com website.

If you need to protect a higher volume of larger prints, including prints on canvas, ask a LexJet account specialist to tell you more about liquid clearcoats such as Sunset Gloss and Sunset Satin coatings. These coatings can either be brushed on, rolled on with a high-density foam roller, or applied with a spray gun. Because the coatings are self-leveling, the applied coatings have a uniform thickness and appearance, without visible strokes from the roller or brushes.

Call 800-453-9538 and we’ll be happy to answer any specific questions you may have about Hahnemuhle Protective Spray or the Sunset Coatings.

Read more about Sunset Coatings in the post entitled Clearcoating Inkjet Photo and Art Prints

Clearcoating Inkjet Photo and Art Prints

CleacoatPrintFor more than 15 years, LexJet has been helping creators of inkjet prints choose the most cost-effective way to protect valuable prints from damage due to scratching and exposure to UV light, humidity, and airborne pollutants.  Photographic and art prints can be protected with traditional framing systems, laminating films, clearcoats, or protective sprays.

Protective sprays may be fine if you occasionally make a few smaller prints, but liquid clearcoats are the most popular option for studios that use wide-format pro-model inkjet printers to produce multiple, large photographic and art prints.

LexJet recently introduced Sunset Gloss and Sunset Satin liquid coatings that provide great protection, while taking some of the hassle out of the application process. The coatings are ready to apply straight from the can, without any dilution or mixing. This is important, because every time you add water to a liquid coating, you’re adding an uncontrolled variable that can diminish the level of protection the coating was engineered to provide.  The finish of Sunset Gloss and Sunset Satin Coating is tough and flexible, contains UV inhibitors for maximum protection from the elements, and is non-yellowing. The coatings were designed for use with LexJet’s Sunset canvases, but also work well with other canvas products as well as  certain photo and fine-art papers.

If you have any questions about using a clearcoat, please contact a LexJet Account Specialist at 888-873-7553 or submit your questions in the comments section of this blog. Below are answers to a few questions we’ve received:

Why do you recommend a liquid coating instead of an aerosol spray?

Aerosol sprays and liquid coatings essentially serve the same purpose—to protect the image.  But with aerosol coatings, it’s very difficult to get the correct amount of solids to produce a good protective film.  It typically requires more coats to accomplish the same desired result.  Liquids are more cost effective, and can either by applied with high-density foam rollers or sprayed on through systems that can be purchased at home-improvement stores.  While LexJet sells protective sprays from Hahnemuhle and Clearstar, we currently don’t offer Sunset Gloss or Satin Coatings in spray form.

What’s the best way to apply a  liquid coating?

ClearcoatSprayBoothIf I were building a printmaking studio from the ground up, I would include an enclosed, well-ventilated dust-free area in which I could use an industrial HVLP (high-volume, low pressure) spray-gun.  An HVLP spray gun wastes less coating in overspray than other types of sprayers. It also provides control over the application process. But since most photographers don’t have room in their studios for spraying (and can’t justify buying specialized coating systems), Sunset liquid coating has been formulated to work equally well when applied either with a spray gun, brush, or foam roller.

Developing the right technique with a roller can take some practice, and a lot will depend on the temperature and humidity of your work environment. In LexJet’s In Focus newsletter, you can read some helpful tips about rolling on a clearcoat.

ClearcoatRollingTopWhat are the most common causes of errors?

The three most common errors are using incompatible materials, coating the print before it is fully dry, and applying the coating unevenly.

Incompatible materials: LexJet Sunset Coating is a water-based coating. If you apply a water-based clearcoat to inks and papers that aren’t water-resistant, you can easily ruin the print. LexJet sells a wide selection of photo papers, art papers, and canvases that can be protected with LexJet Sunset Coating.  A LexJet account specialist can tell you if the combination of ink and materials to use for your prints will work with the LexJet Sunset Coating.

Not waiting long enough for the print to dry before coating it: Different inks dry at different rates, especially if you’re working in an area of the country that experiences wide variations in temperature and humidity. Even when your print feels dry to the touch, it may not be ready to clearcoat. You need to make sure your print has properly “outgassed” before you apply a liquid coating.

Outgassing is the process in which the glycols used as wetting agents in the inks are evaporated. If the glycols haven’t completely outgassed before you apply the coating, your finished print could look cloudy.

To test whether a print has outgassed, some fine-printmakers suggest this technique: Lay each print on a flat surface, then cover the print with inexpensive butcher paper. The evaporating glycols will cause ripples to appear in the butcher paper. Periodically replace the wavy butcher paper with a fresh sheet of paper.  If no waves appear in the fresh sheet of paper after a few hours, the print has probably finished outgassing and will be dry enough to clearcoat.

Applying the coating unevenly: If some areas of the print have a different sheen than others, you most likely applied the coating unevenly.

What are the advantages of clearcoating?

A properly formulated clearcoat can add years to the life your fine photo print or art canvas by protecting it from everyday hazards, such as fingerprints and scratches or exposure to sunlight, humidity, and airborne pollutants.

A glossy clearcoat can enhance the density of the blacks and the vibrancy of the colors in your print. But if you don’t want your finished print to look glossy, try applying a layer of Sunset Gloss, finished with a layer of Sunset Satin. The sheen of the finished print is determined by the sheen of the final coat.

The key to getting the best results is to experiment in your own environment. The self-leveling properties in LexJet Sunset Coating can help you achieve optimal results, but the best techniques for applying Sunset coatings will depend on the specific conditions within your work environment.

If you have any questions or coating techniques you’d like to share, we would welcome your comments!