Create Easy Contour Cut Lines for Stickers, Decals & More

To create attractive, customized shapes for decals, stickers and signage of all types, you can easily adjust your graphic file in Adobe Illustrator to create cut lines in the shape of your choice that will be perfectly set up for when you’re ready to send the job to your printer and cutter.

Follow along as we walk through, step-by-step, in this short educational video to ensure your cut lines are set up correctly to print and cut accurately with your graphic.

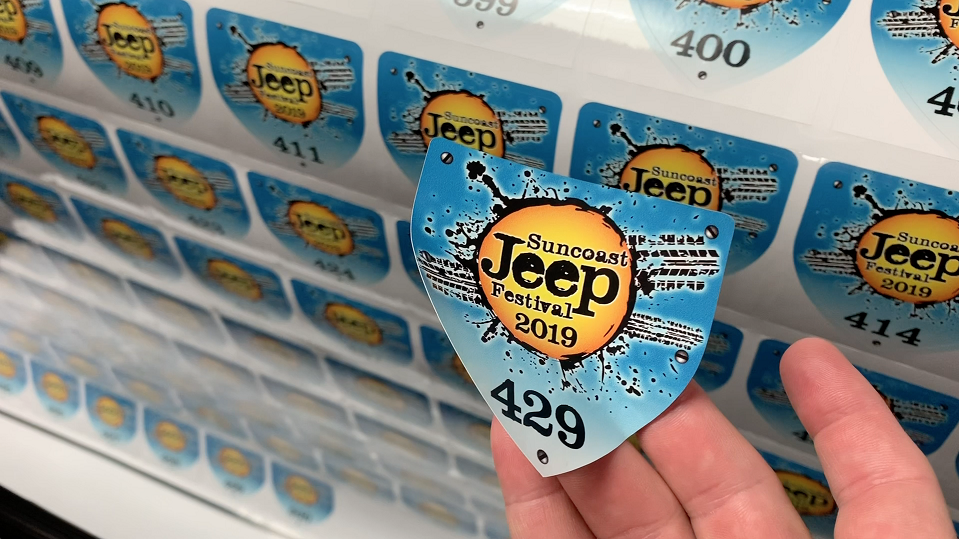
This technique is often used for customized sticker shapes, but can also be utilized to create functional cutouts, like the graphics we created for the mini-Jeeps pictured below, in which the graphic is trimmed perfectly to fit around the hood hinges and clamps. For this project, we used HP Adhesive Vinyl. This technique would work well with other products, such as LexJet Print-N-Stick Fabric and LexJet Simple Grip or other self-adhesive products with a release liner.

In the video above, we also show you how to convert JPEG and PNG files for optimal results. Rastor and vector files are covered, as well.

Once you follow this set-up procedure, you’ll be ready to send the file to your RIP software, which will prepare the file for printing.

YOU MAY ALSO BE INTERESTED IN:

How to Print through Adobe Illustrator and the Canon Driver

How to print through Illustrator and the Canon driverAs with the post this morning about how to print through Adobe Illustrator through the Epson printer driver, the same holds true with the Canon printer driver. That is, once you’re ready to print a file, you need to know how to make the correct color management and print settings in Illustrator and the Canon printer driver. A sound workflow will help you achieve consistent results.

In the two videos below, you will learn the workflow for printing through Illustrator and the Canon printer driver using a Mac or a PC, in that order…

How to Print through Adobe Illustrator and the Epson Driver

How to print throug Illustrator and the Epson printer driverA common file type in the print workflow is Adobe Illustrator. If you don’t have a RIP (Raster Image Processor) and you’re printing through the printer driver, you need to know how to make the correct color management and print settings in Illustrator. A sound workflow will help you to achieve consistent results.

In the two videos below, you will learn how to print through Illustrator and the Epson printer driver using a Mac or a PC, in that order. We’ll follow up with a post on how to print through Illustrator and the Canon printer driver for both Mac and PC, so keep an eye on the LexJet Blog for those instructions…

How-To Videos: Printing, Trimming Banner Stand Graphics Simplified with Templates

How to trim a graphic for a banner standWhen printing a graphic for use in an Expand Banner Stand, the templates provided for Adobe Illustrator and Adobe Photoshop simplify the printing and trimming process.

Using one of these templates will allow you to print out your graphic with crop marks and cut guidelines. For retractable stands, the non-visible area that goes into the cassette is also delineated. The importance of using the templates is illustrated in the trimming process.

When trimming the graphic, all you need is a straight edge and a blade. Simply line up the straight edge on the cut guideline and trim the graphic. The result is a perfectly trimmed graphic that is ready to be installed into the stand.

The videos embedded below in the order shown include:

  • Using Expand Banner Stand Templates in Adobe Photoshop
  • Using Expand Banner Stand Templates in Adobe Illustrator
  • Expand Banner Stands – Trimming a Graphic